Create a Third-Party Token in Kaseya VSA X for the Neo Agent integration
To enable Neo Agent to interact with your VSA X tenant, create a Third-Party Token (a Token ID + Token Secret pair) with the appropriate permissions.
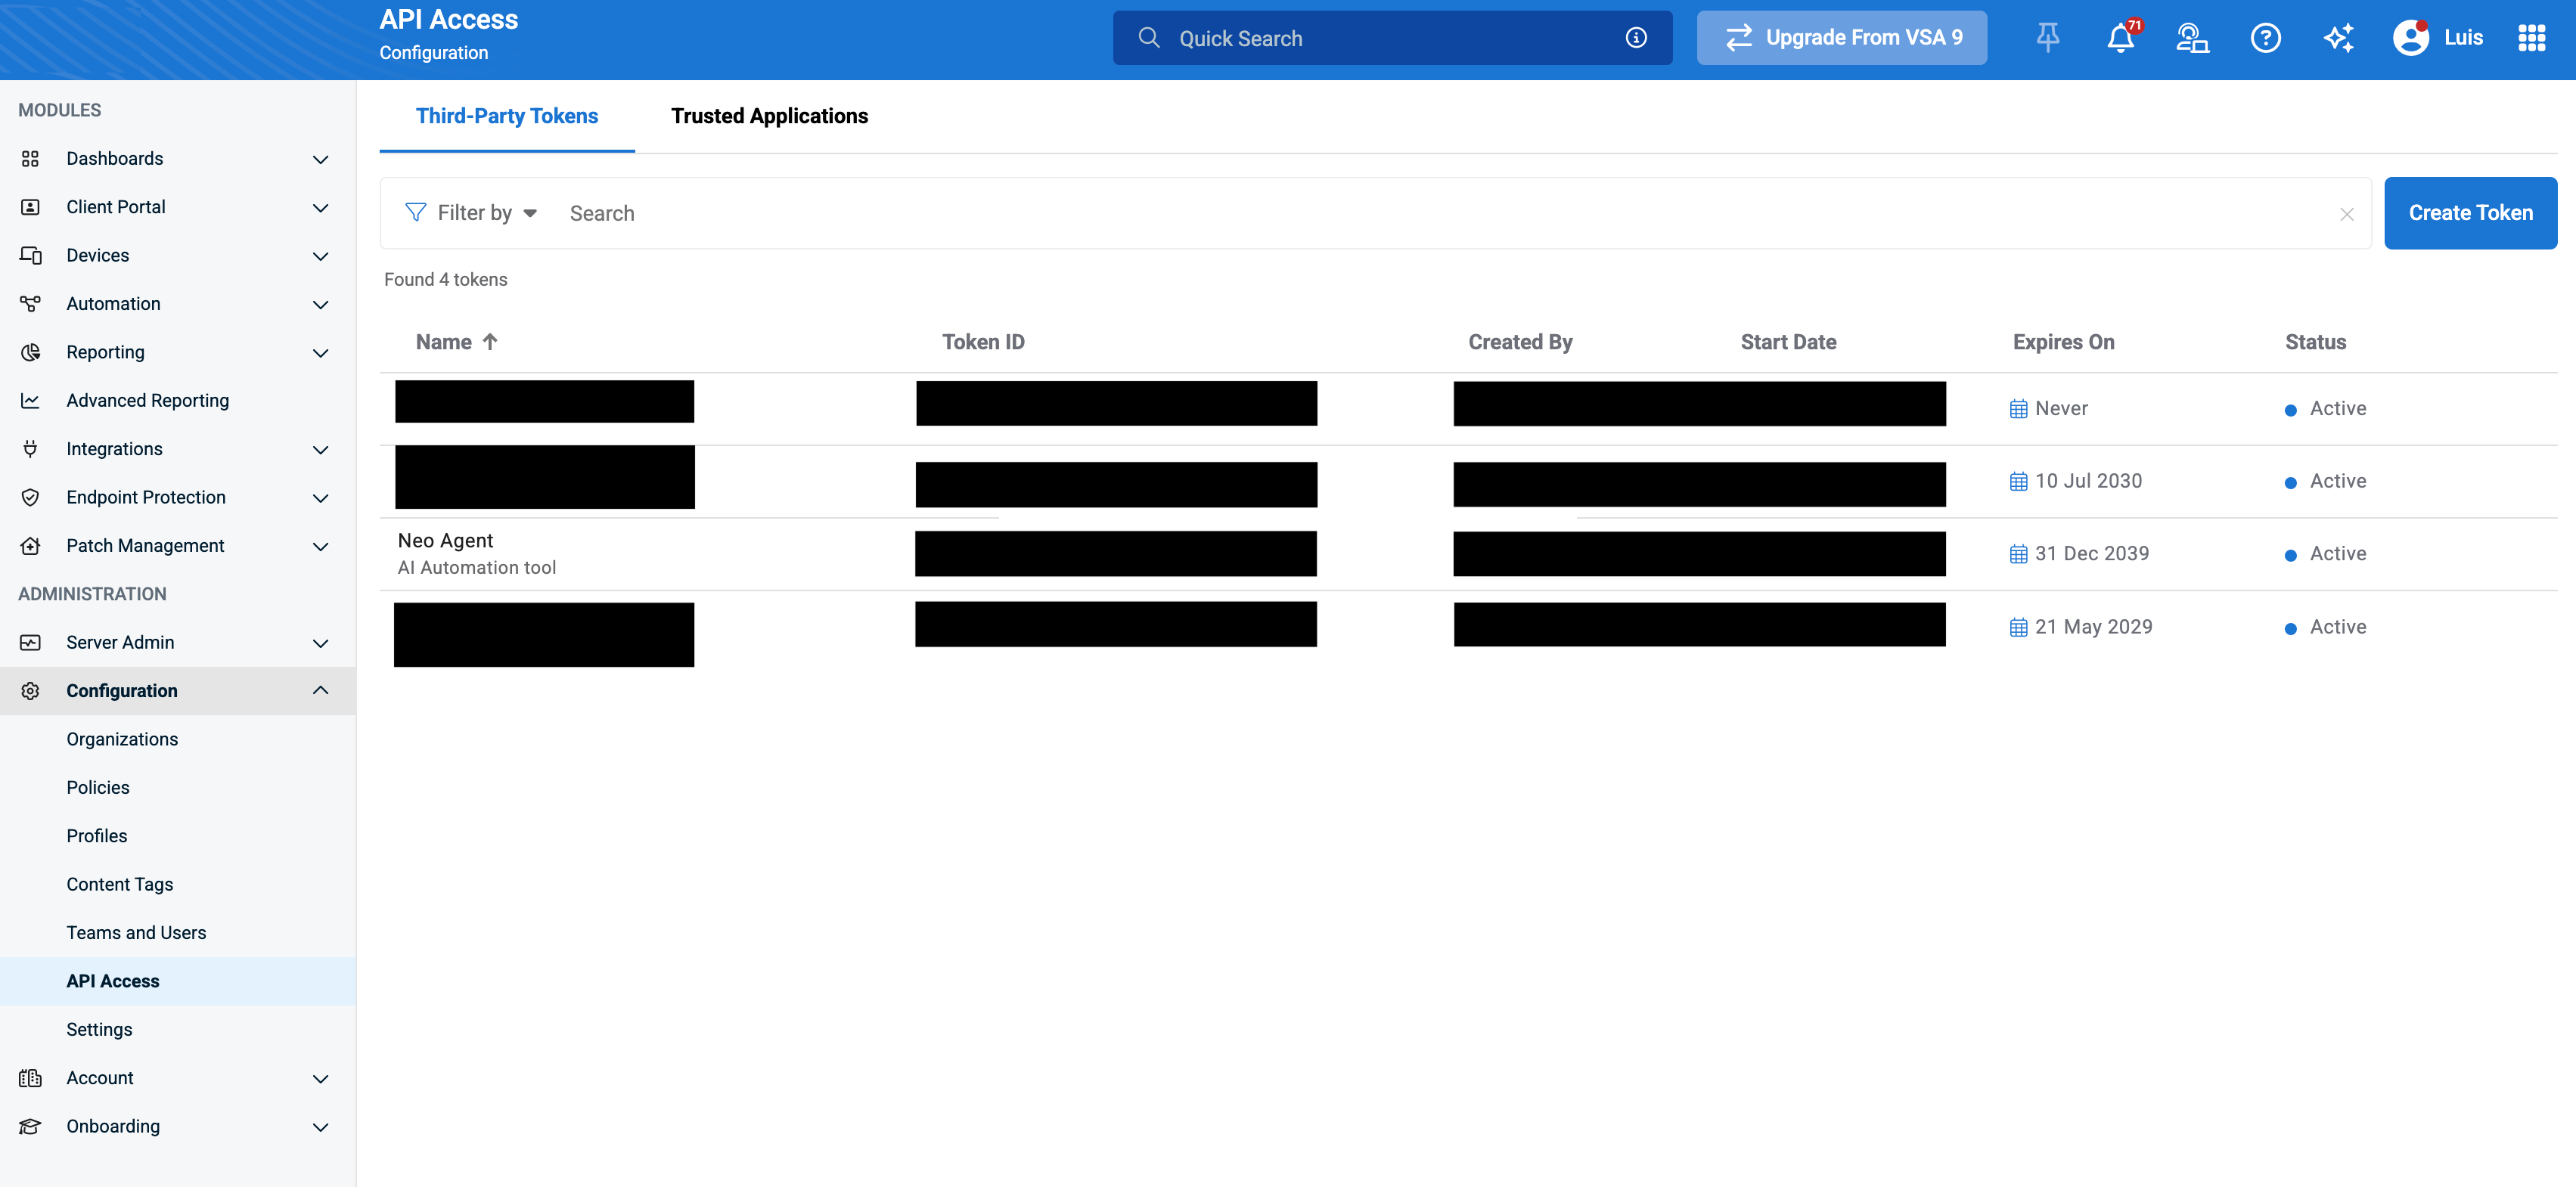
Token management lives under Configuration → API Access → Third-Party Tokens. If you don’t see API Access under Configuration, your account’s role lacks the API Access permission — ask a Super Admin to grant it or to create the token for you.
In your VSA X portal, go to Configuration → API Access → Third-Party Tokens, then click Create Token in the upper-right corner.
2
Configure the token details
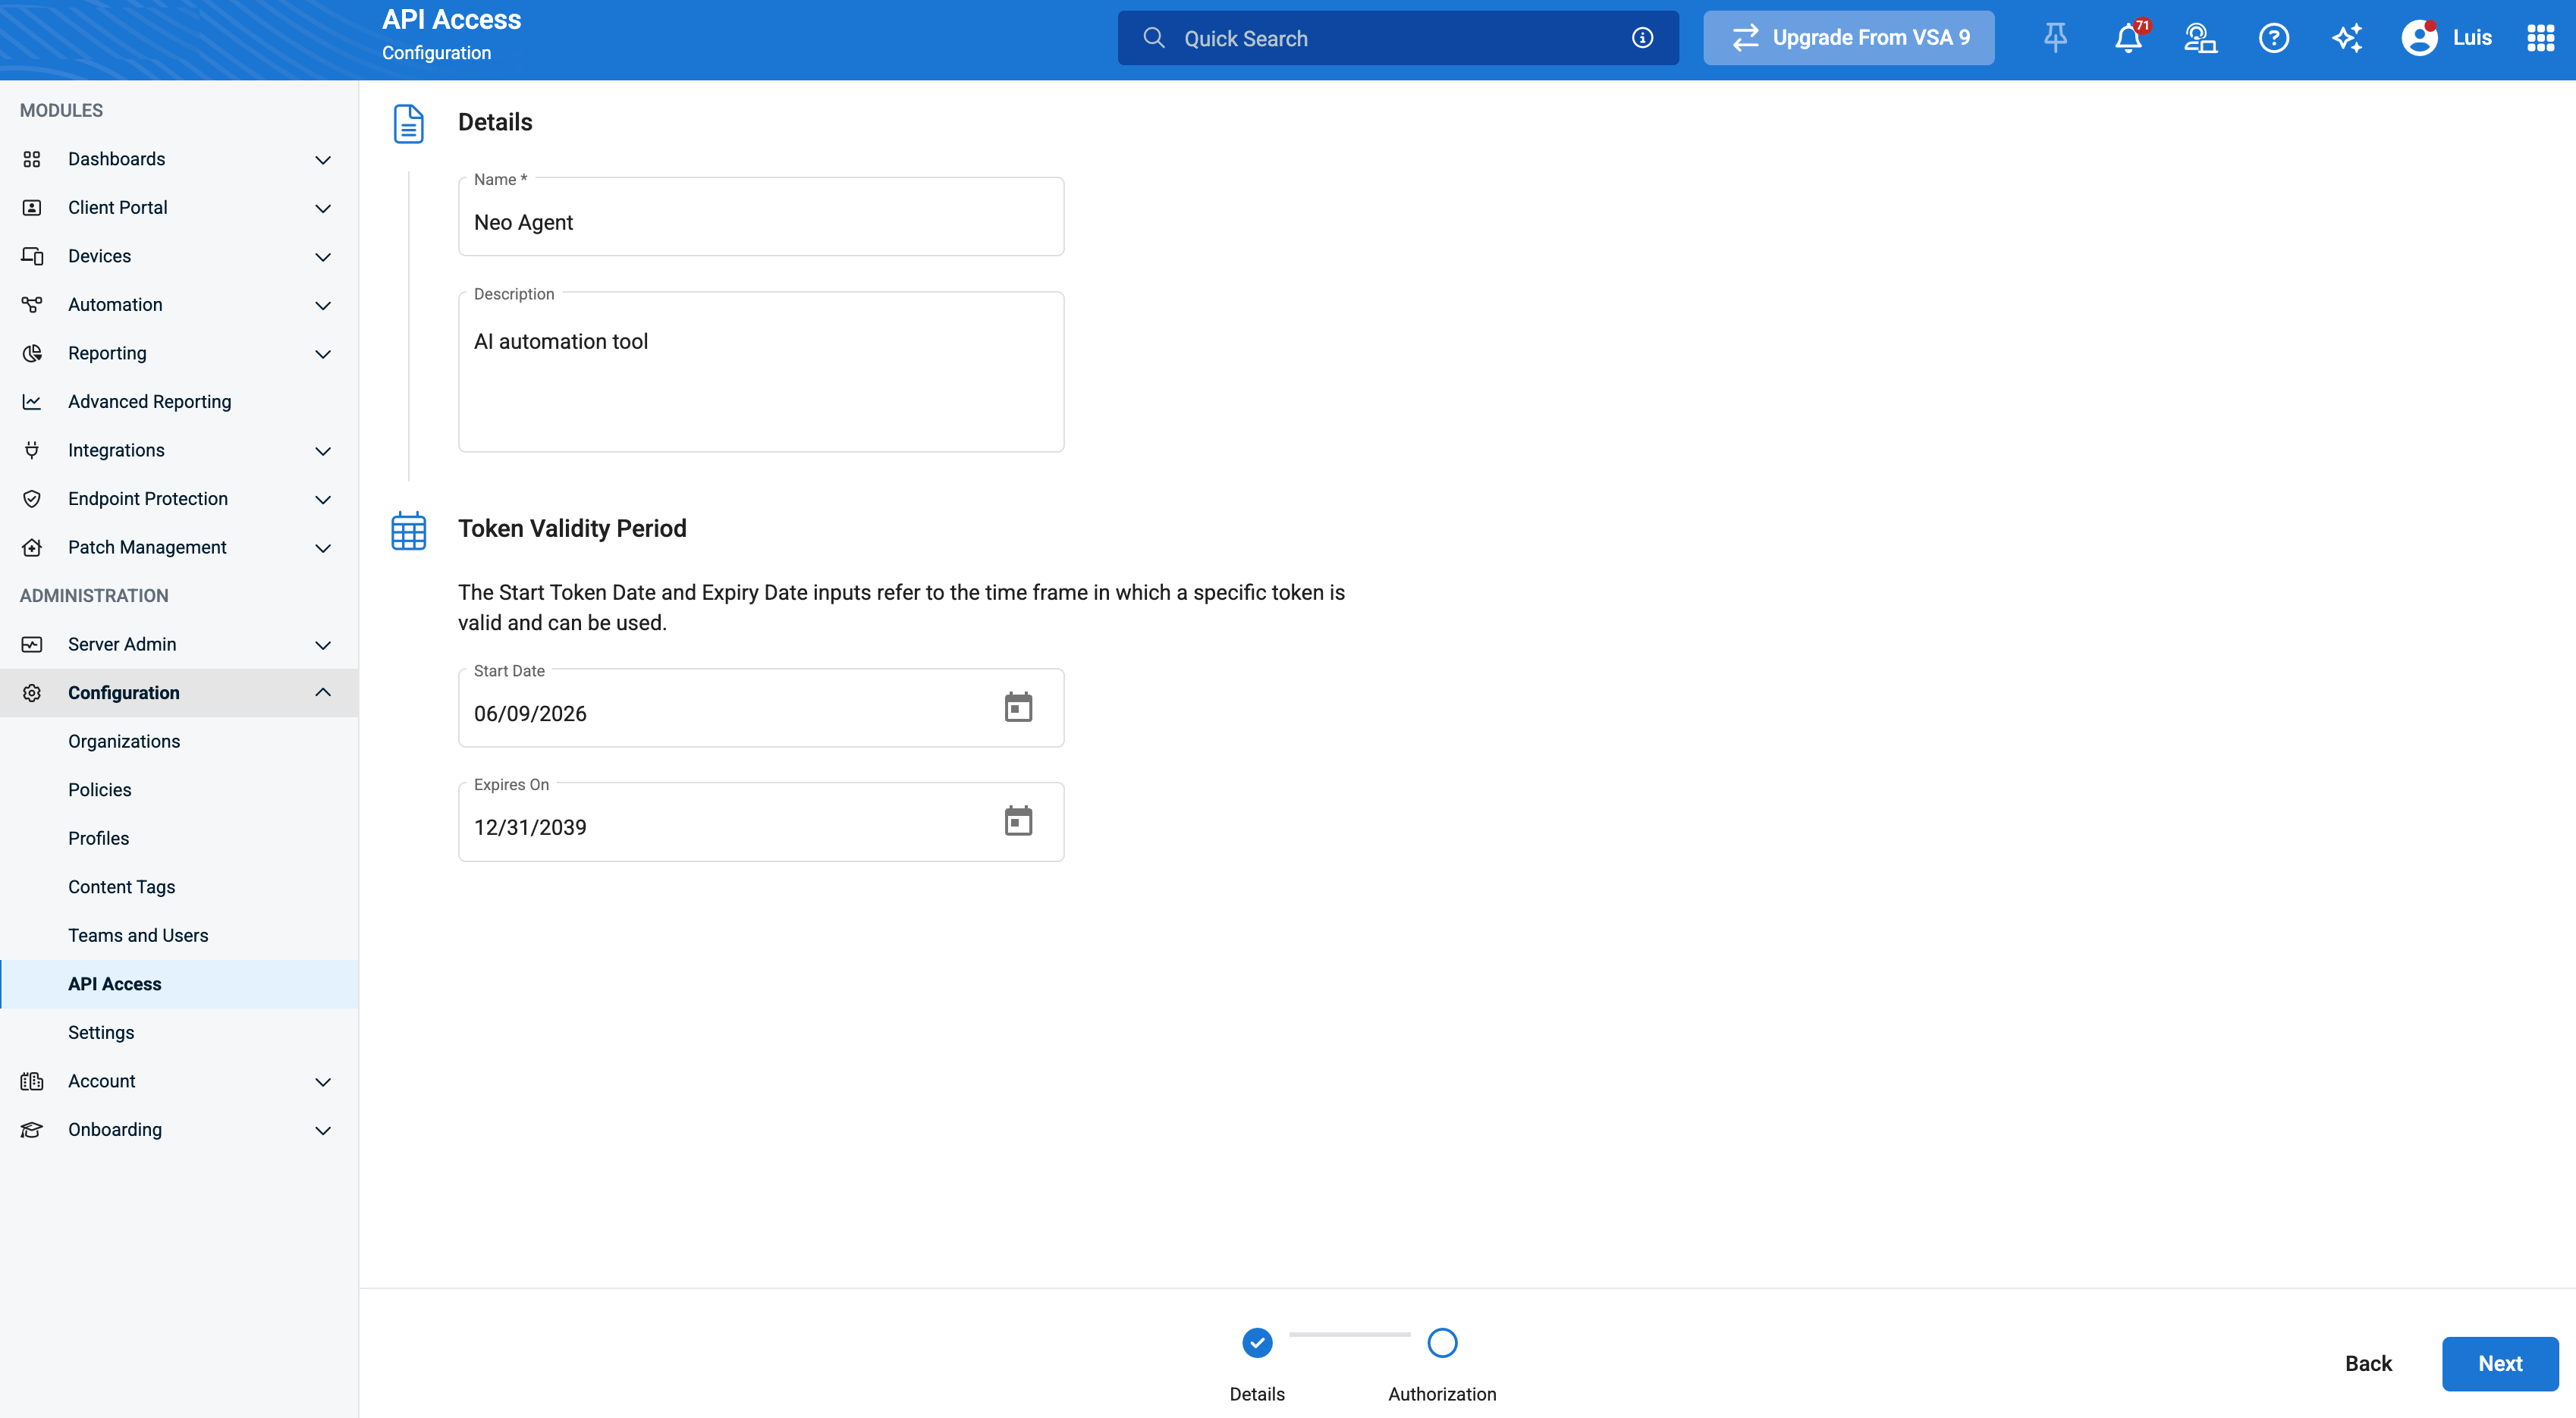
On the Details tab, give the token a recognizable name (e.g. Neo Agent) and an optional description. You can optionally set start/expiration dates and restrict the token to specific IP addresses.
Token details — name, optional expiry, optional IP allowlist
3
Set the token authorization (scopes)
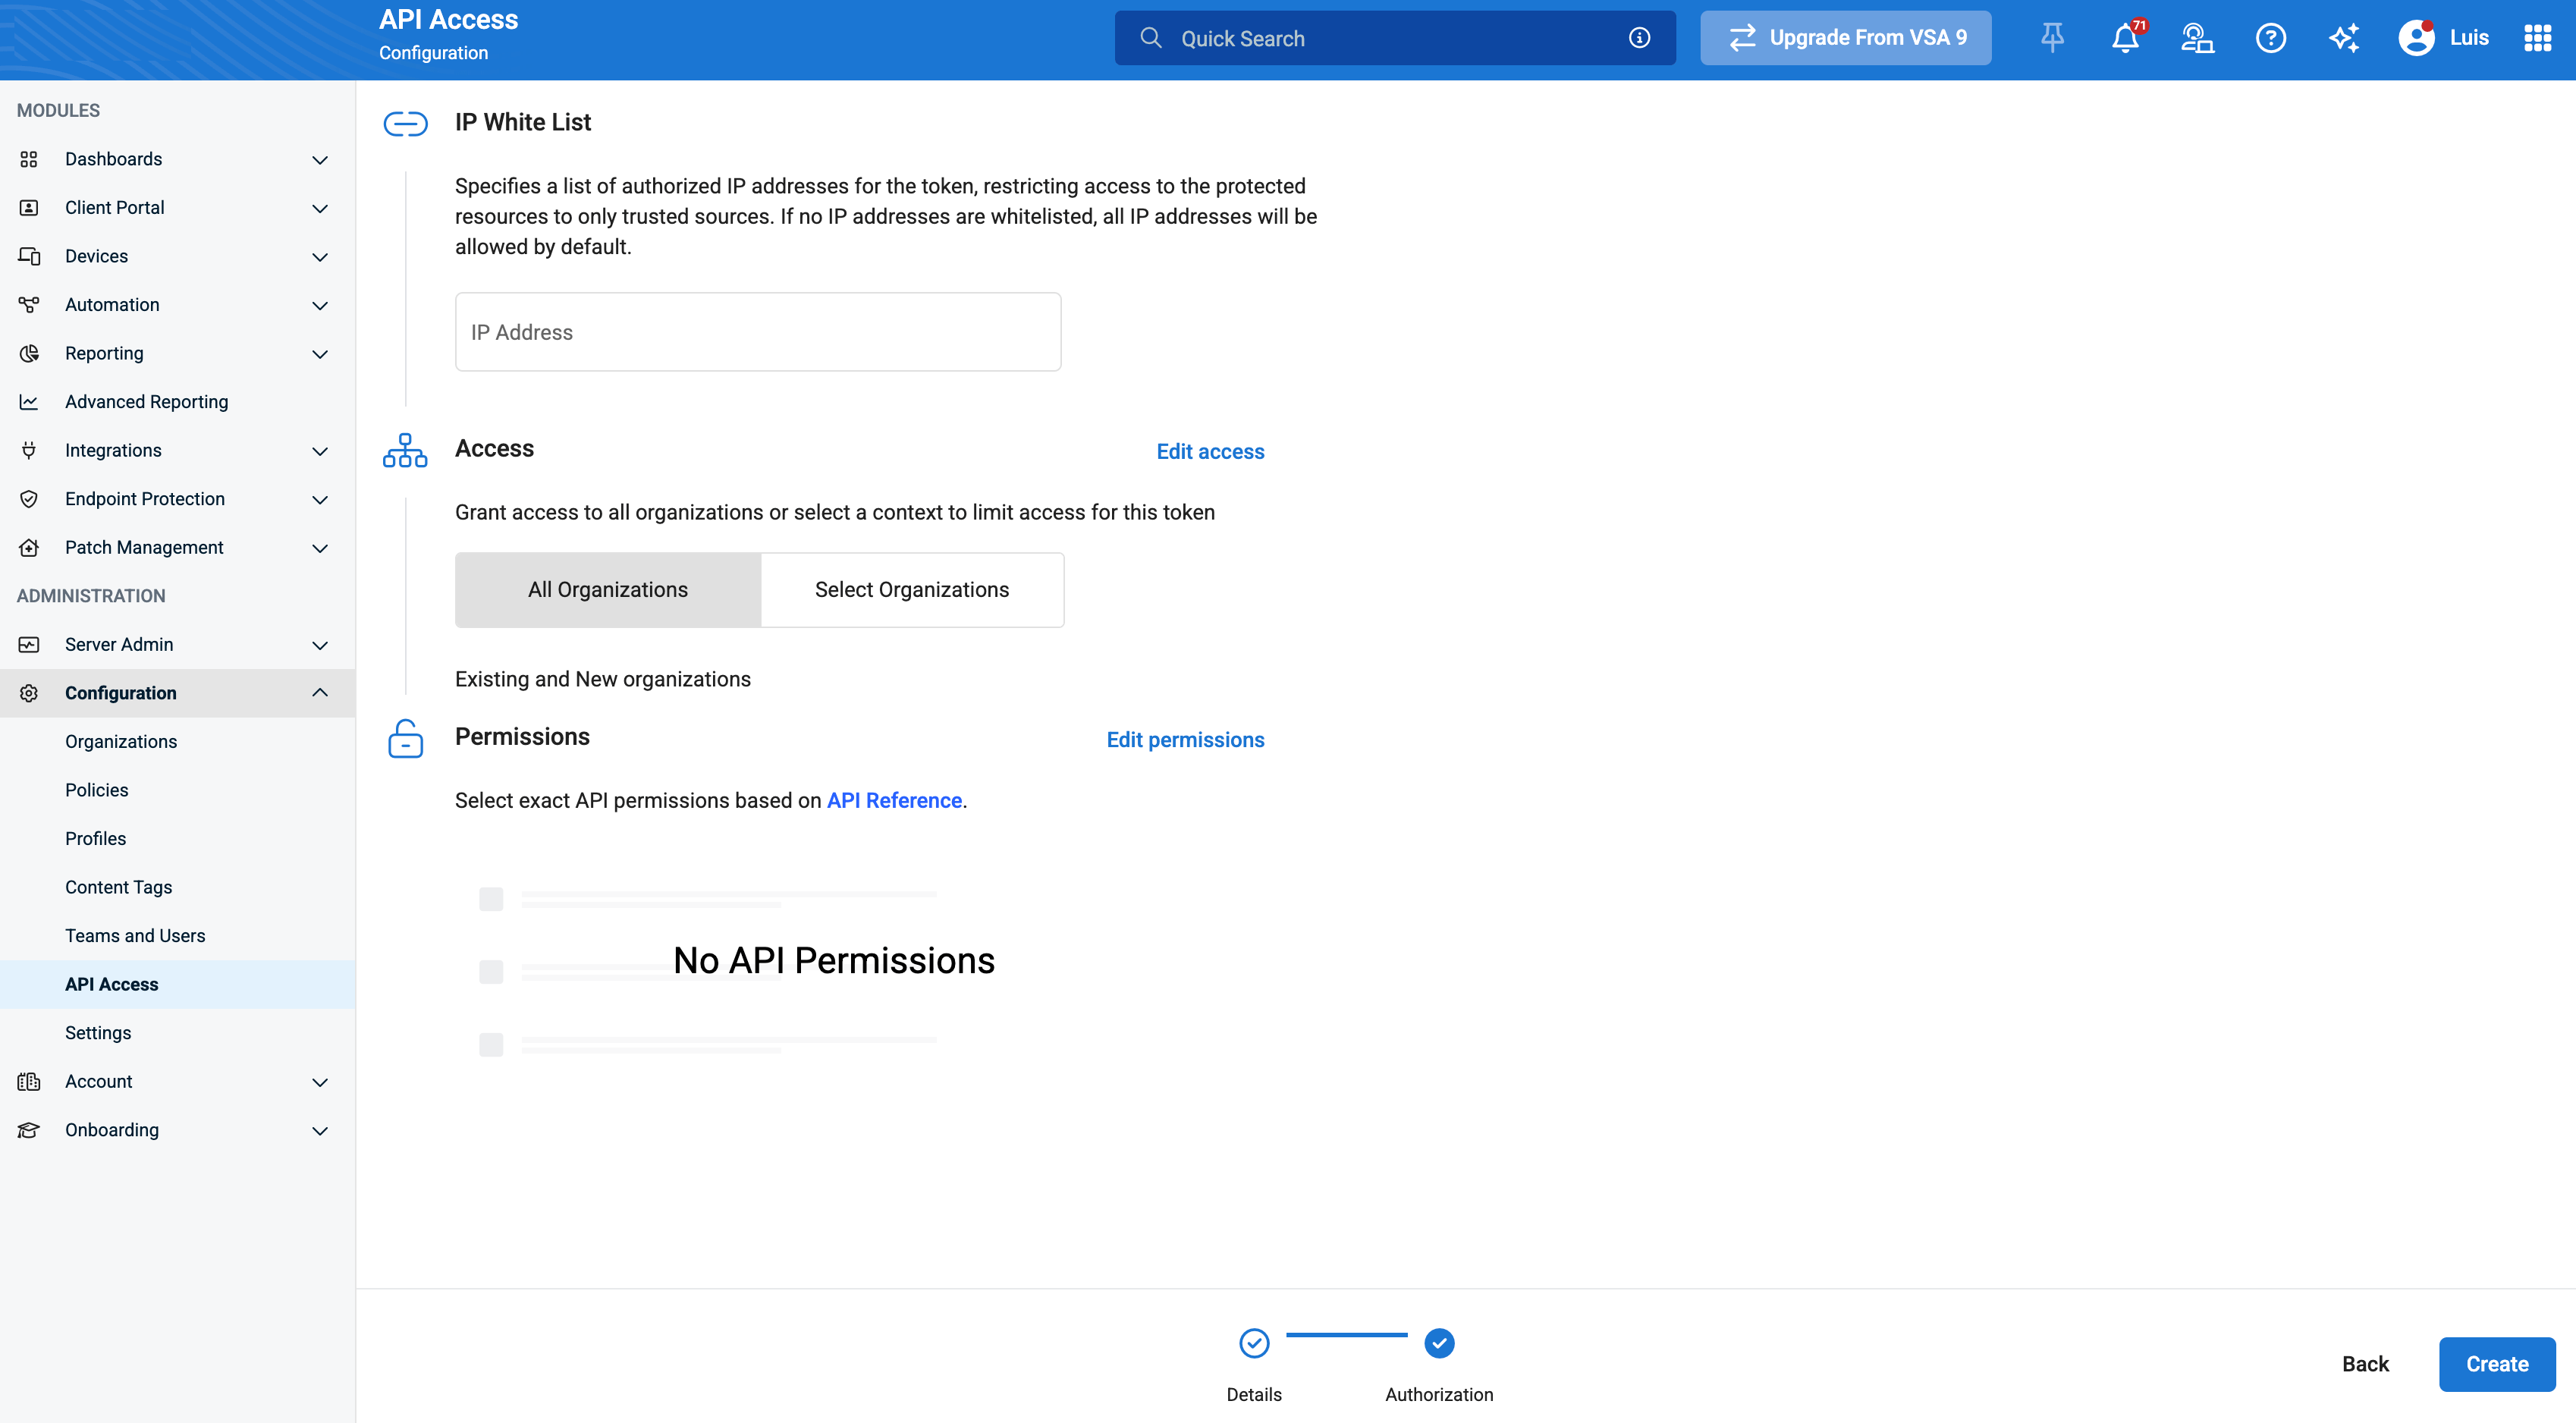
On the Authorization tab, scope the token to the organizations Neo should manage, then grant the API endpoint permissions. Enable the exact set listed under Permissions to grant below — read access across every group, plus the Automation run permissions so Neo can execute scripts.
Missing permissions cause Neo to fail with 403 Forbidden on the affected endpoints. At minimum, grant the Device, Asset, and Organization read permissions so device sync and PSA company mapping work.
4
Create and save the token
Click Create. VSA X displays the Token ID and Token Secret once.
Generated Token ID and Token Secret — copy these immediately
Important: Copy both the Token ID and Token Secret immediately and store them securely. The Token Secret is not recoverable after you navigate away — you would have to regenerate it.
Before closing, make sure you’ve saved:
The Token ID
The Token Secret
Your tenant URL (e.g. https://yourtenant.vsax.net)
Enable the permissions below on the token’s Authorization tab. The pattern is read access across every group plus the Automation run permissions so Neo can execute scripts — the create / update / delete write permissions are not needed.
Group
Enable these permissions
Device
Get a Specific Device · Get All Devices · Get Device Notifications · Get Antivirus Status · Get Device Custom Fields · Get Device Applied Policies
Asset
Get Asset Information for a Specific Device · Get All Devices and Asset Information
Automation
Run Task · Get a Specific Task · Get All Tasks · Get Task Execution · Get Task Execution Devices · Get Task Execution Scripts · Get Task Execution Script Output · Run Script · Get a Specific Script · Get All Scripts · Get Script Executions by Device · Get Script Execution Details · Run Workflow · Get a Specific Workflow · Get All Workflows · Get Workflow Executions · Get Workflow Execution Details · Cancel Workflow Executions
Custom Field
Get a Specific Custom Field · Get All Custom Fields · Get Custom Field Usage
Organization
Get a Specific Organization · Get All Organizations
Site
Get a Specific Site · Get All Sites · Get Site Custom Fields
Group
Get a Specific Group · Get All Groups · Get Group Custom Fields
Environment Information
Get Environment Information
Leave the create / update / delete permissions — and Publish a Device — unchecked. The token needs only these read scopes to connect, plus the Automation run permissions (Run Task / Run Script / Run Workflow) used to execute scripts on devices, including the on-prem AD/Exchange PowerShell flow. What Neo may write back to VSA X is controlled per permission group in the Neo dashboard, where you can grant Read & Write per area. If you only want read-only device and asset visibility, you can omit the Automation run permissions too.
A revoked token has a 30-day grace period during which you can regenerate its secret before it’s permanently deleted.