You’ll need your tenant URL, Token ID, and Token Secret from VSA X to complete this setup.
Required Information
string
required
Your VSA X tenant URL, e.g.
https://yourtenant.vsax.net. The /api/v3 path is appended automatically — enter just the host.string
required
Your VSA X Token ID.
string
required
Your VSA X Token Secret.
VSA X calls these the Token ID and Token Secret; the Neo form labels them Client Id and Client Secret (the shared credential fields used across RMMs). They’re the same values.
Configuring the Integration
1
Access the Neo Agent Dashboard
Navigate to the Neo Agent Dashboard and log in.
2
Navigate to RMM Integrations
From the dashboard: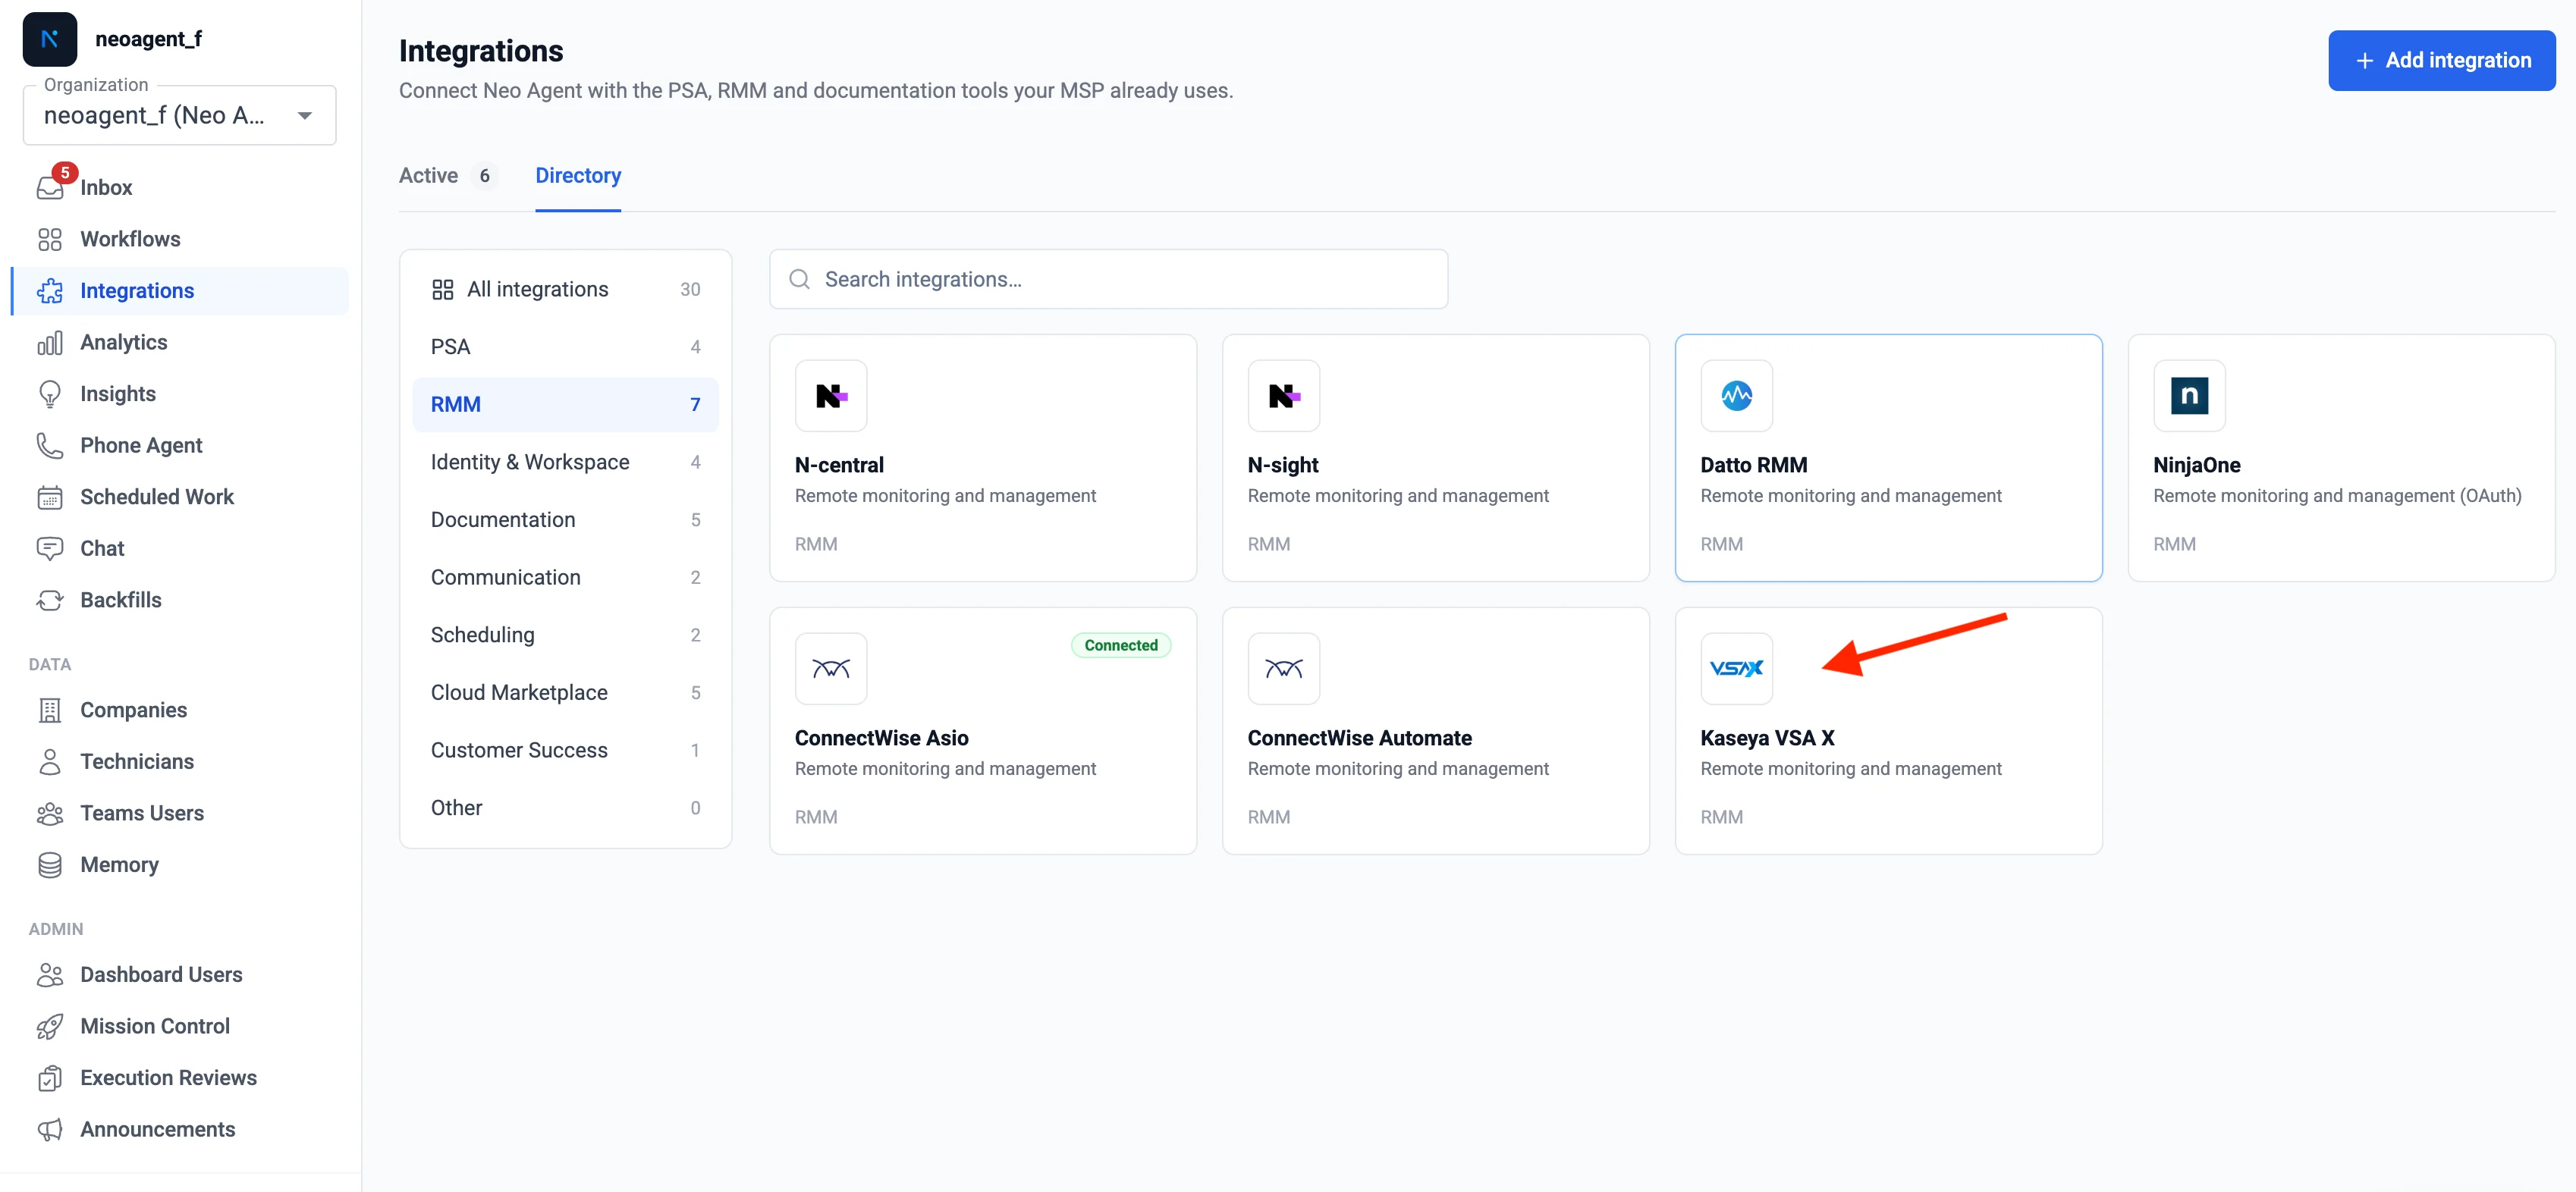
- Click Integrations in the left sidebar
- Select the RMM tab
- Find and select Kaseya VSA X from the list of available RMM integrations
Neo Agent integrations page showing the Kaseya VSA X option
3
Enter Your Credentials
Complete the Kaseya VSA X integration setup form: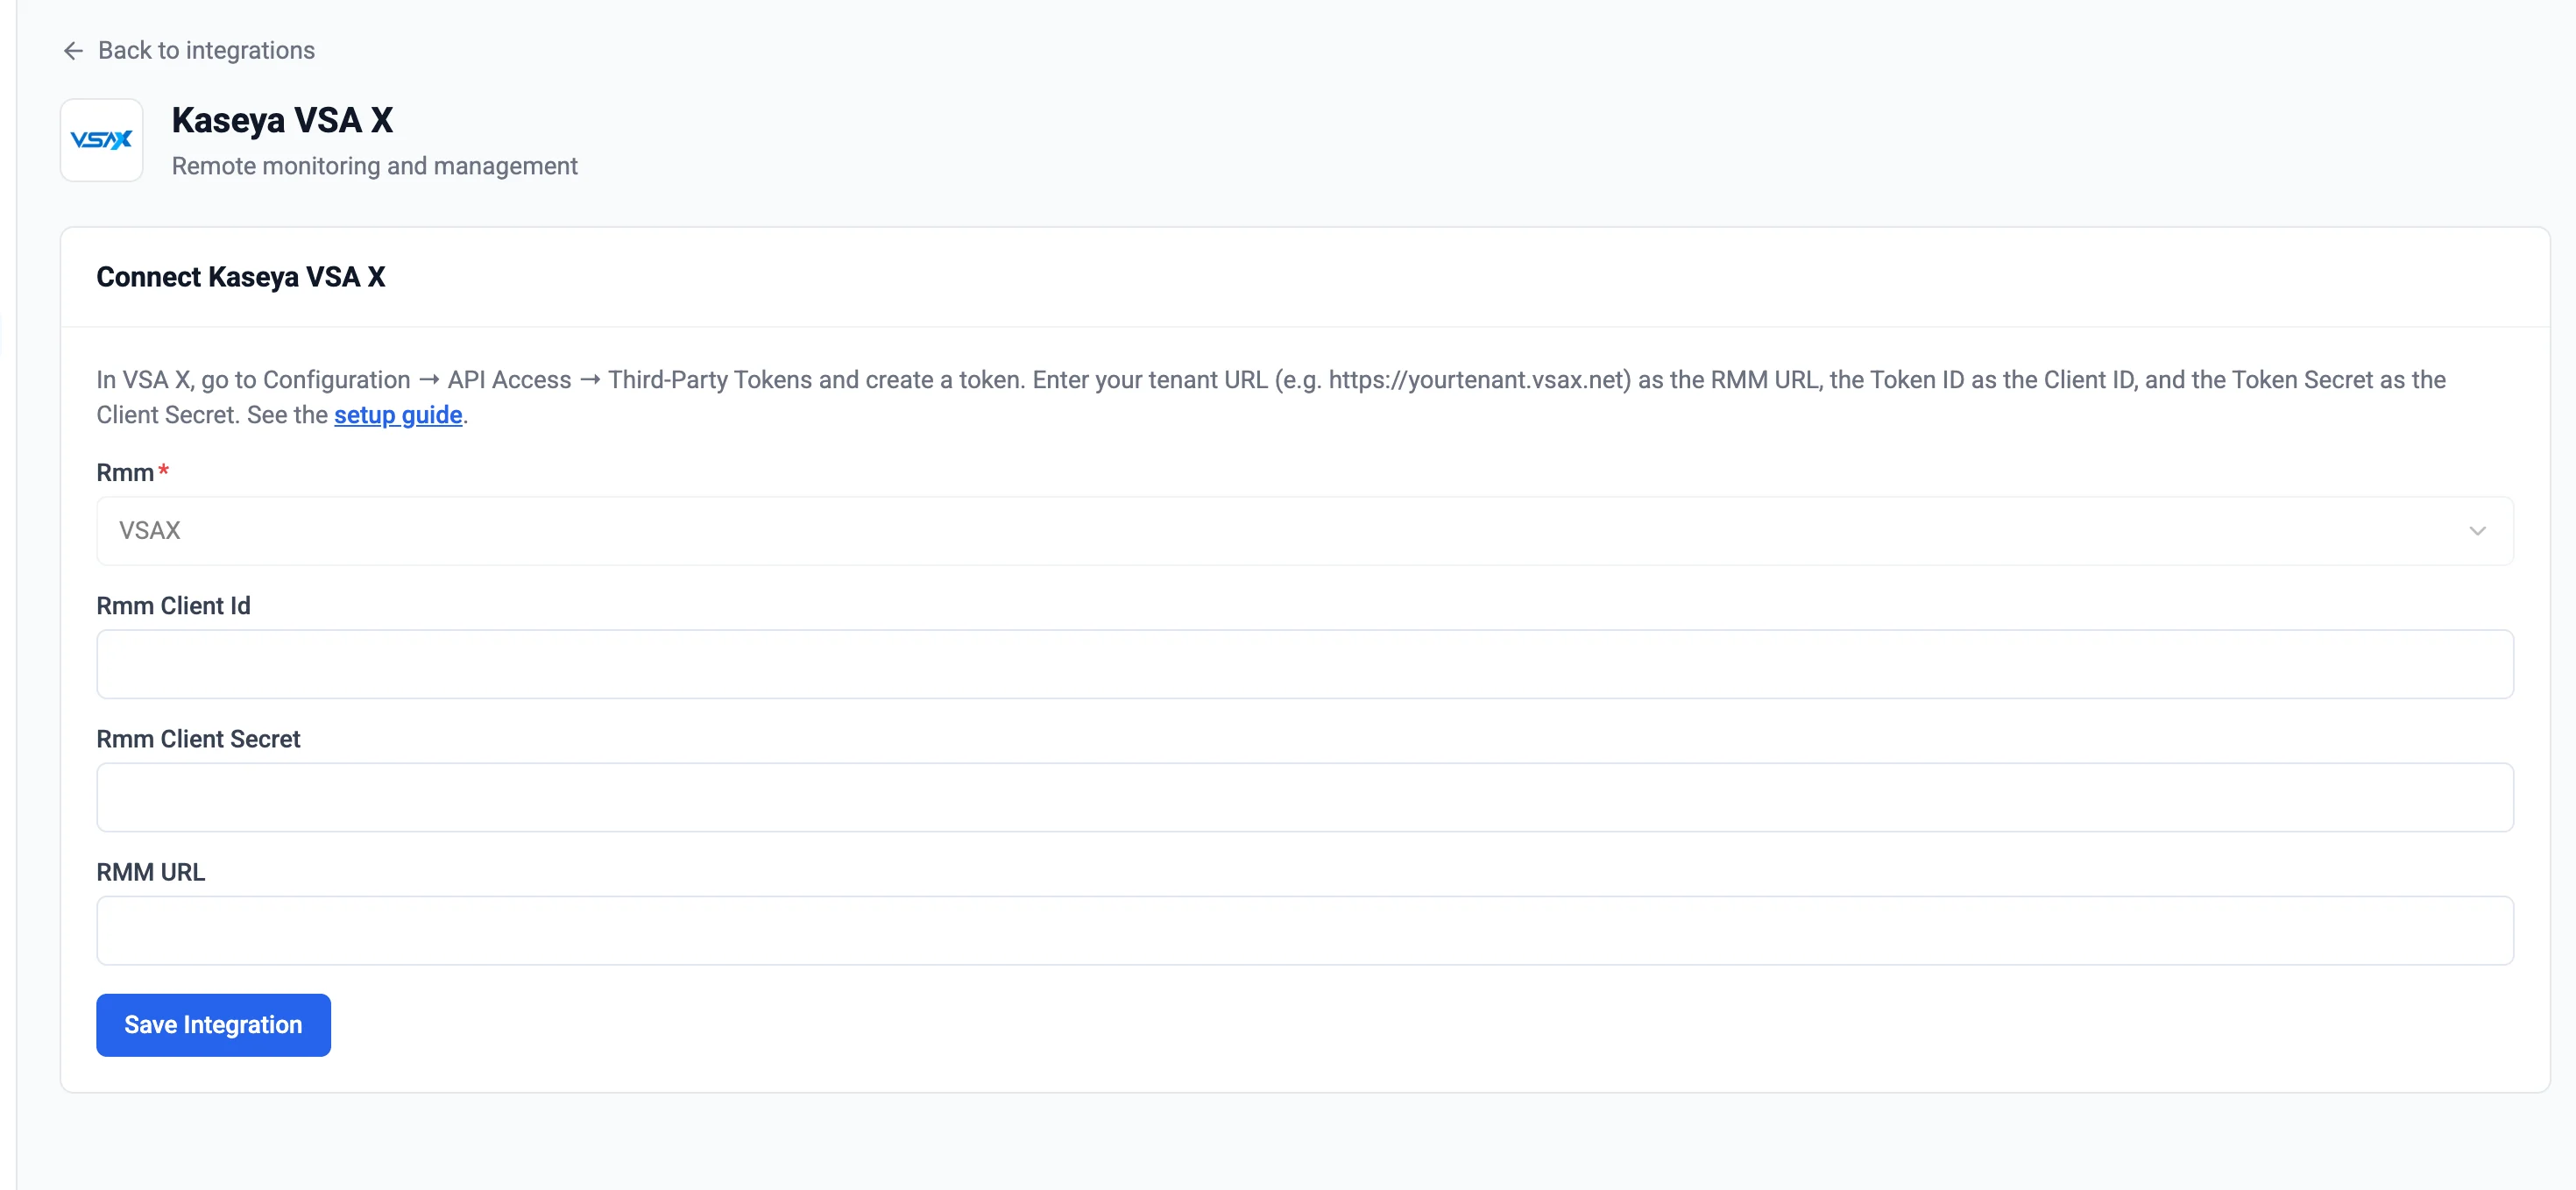
- RMM URL: Enter your tenant URL (e.g.
https://yourtenant.vsax.net) - RMM Client Id: Enter your VSA X Token ID
- RMM Client Secret: Enter your VSA X Token Secret
Kaseya VSA X integration configuration form
4
Submit Configuration
Click Submit. Neo Agent validates the token against your tenant and establishes the connection.
A successful connection confirms Neo Agent can reach your VSA X tenant with the provided token.
Finding Your Tenant URL
Your tenant URL is the address you use to log in to VSA X —https://<yourtenant>.vsax.net. You can confirm it under Configuration → Account / Server details.
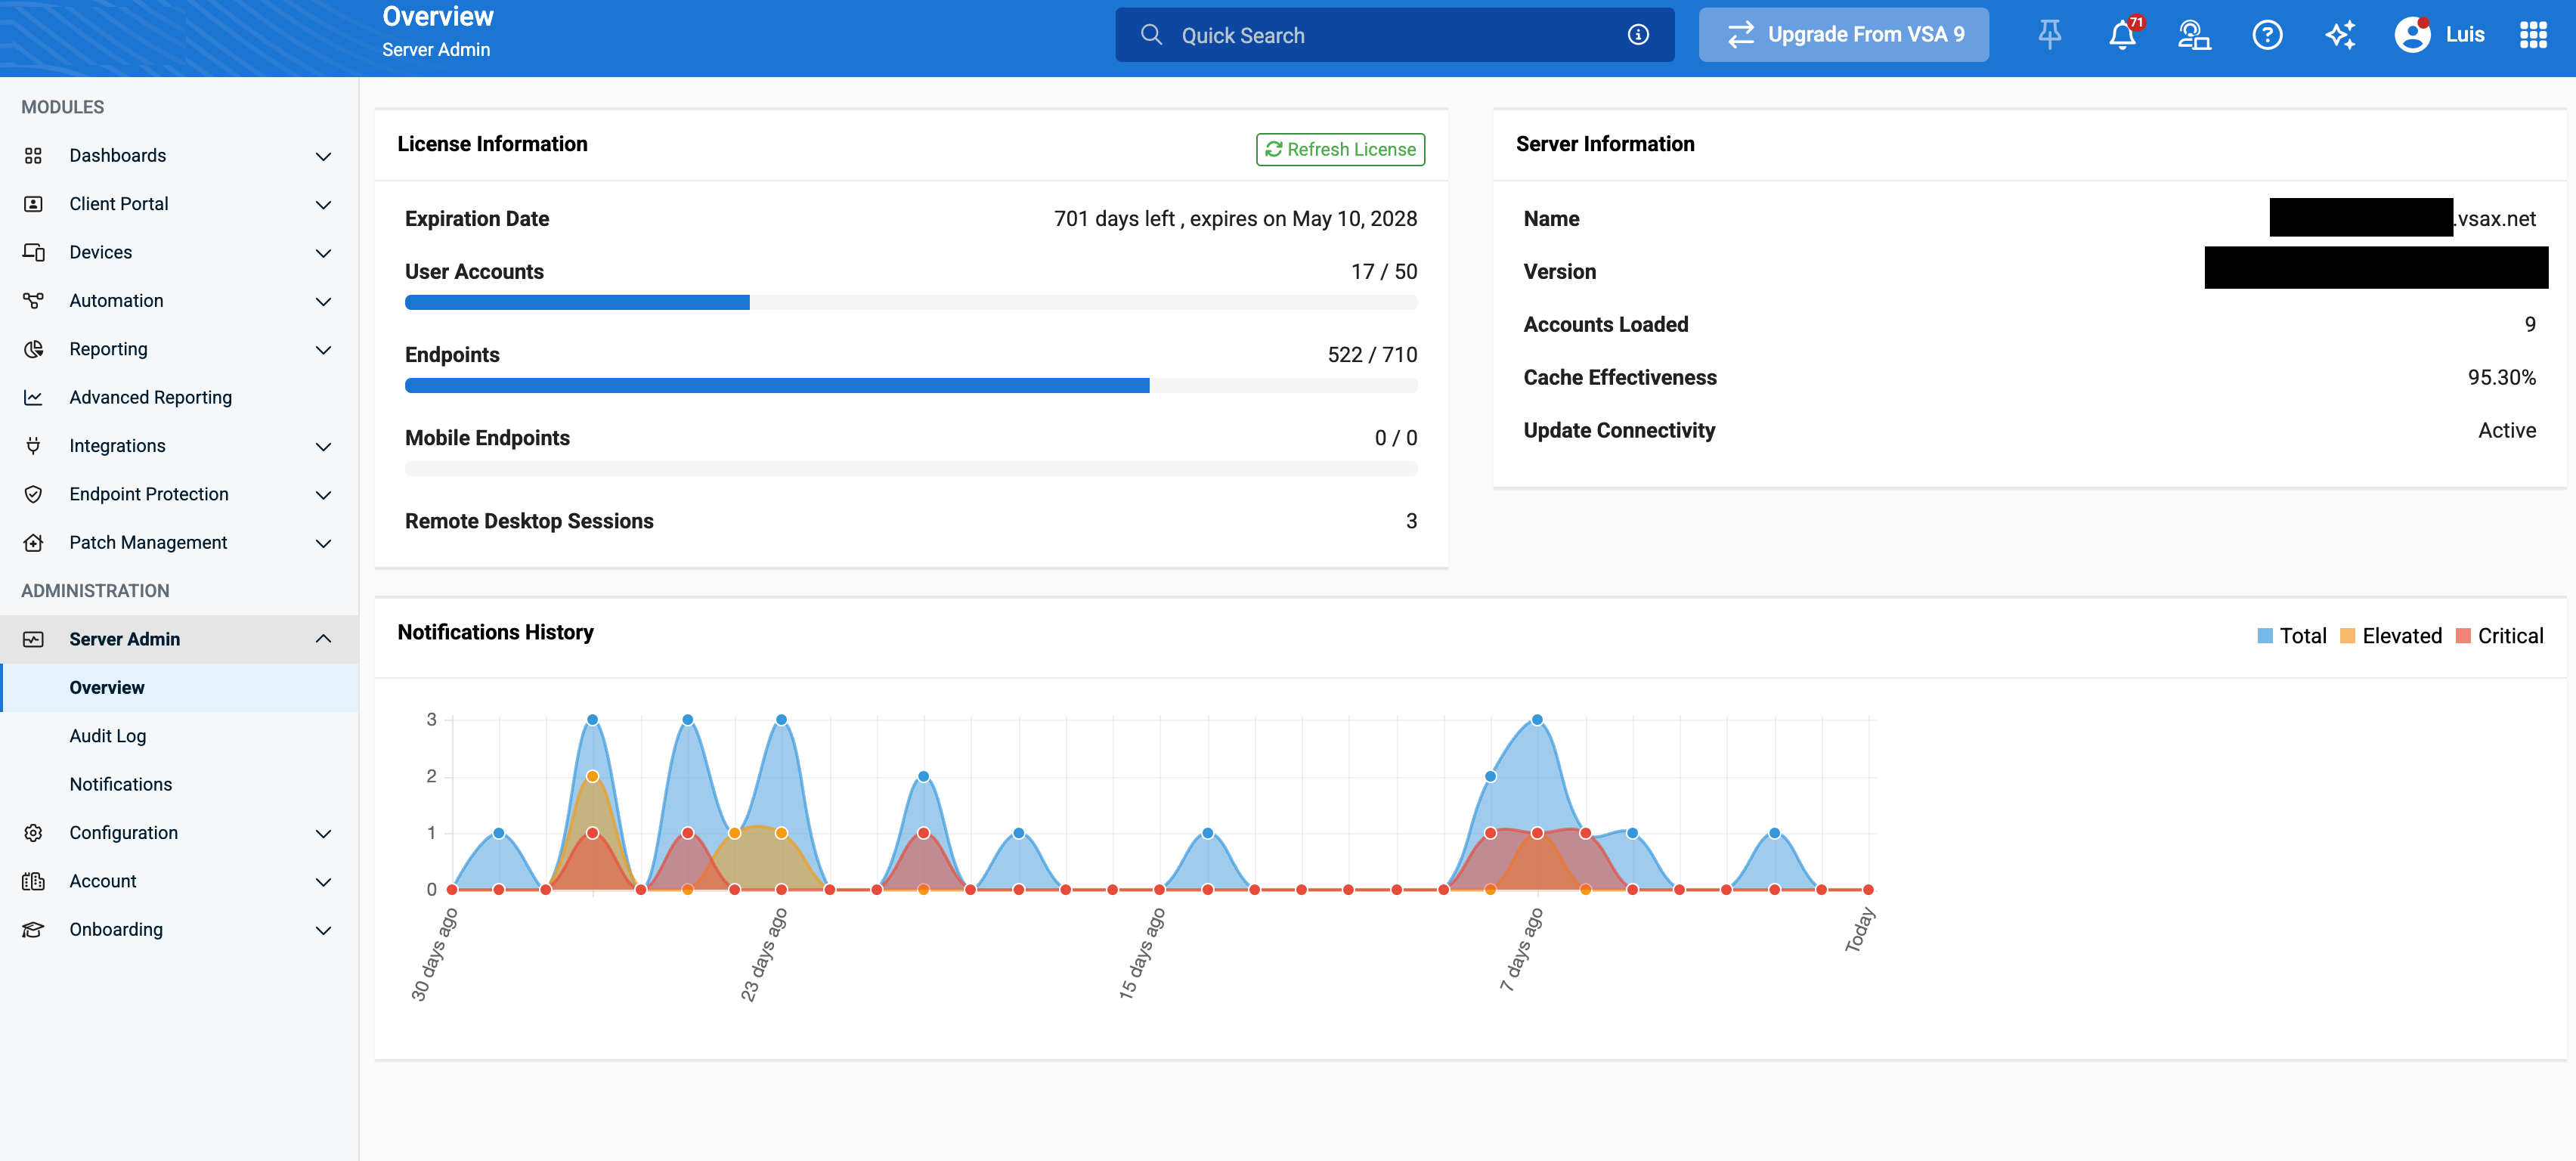
VSA X server details showing the tenant URL
Troubleshooting Connection Issues
Authentication Errors (401)
Authentication Errors (401)
- Verify the Token ID and Token Secret are correct and copied without extra spaces
- Check that the token hasn’t been revoked or expired in VSA X
- Confirm the tenant URL is correct (just the host, e.g.
https://yourtenant.vsax.net)
Permission Errors (403)
Permission Errors (403)
- Review the permissions granted to the token in VSA X (Configuration → API Access → Third-Party Tokens → Authorization)
- Ensure read access is granted to Devices, Device Assets, and Organizations at minimum
- Confirm the token is scoped to the organizations you expect Neo to manage
Devices Not Appearing
Devices Not Appearing
- Wait a few minutes for the initial sync to complete after connecting
- Verify the token has Devices read access and is scoped to the right organizations
Configuring Permission Groups
Once connected, open Agent Settings → Permission Groups to choose what the agent may do in VSA X. Each group can be Disabled, Read-only, or Read & Write:What’s Next?
With VSA X connected, Neo can:- Device lookup — pull device status, OS, organization/site, and hardware/software inventory while triaging tickets
- Hierarchy mapping — associate devices with the right PSA company
- Script suggestions — surface relevant scripts from your automation catalog
Direct script execution from Neo Agent is not yet enabled for VSA X — technicians run suggested scripts in the VSA X portal.