
Before you start
Complete Creating a Security Group first. TheNeo Agent SG group must exist and be assigned to your Neo user.
Syncro limits a token to the permissions of the user creating it: “The permissions available for selection are limited by the permissions of the current user.” The Neo user must already hold every permission you want on the token; anything it lacks is greyed out.
1
Open API Tokens
Signed in as the Neo user, go to Admin → API → API Tokens.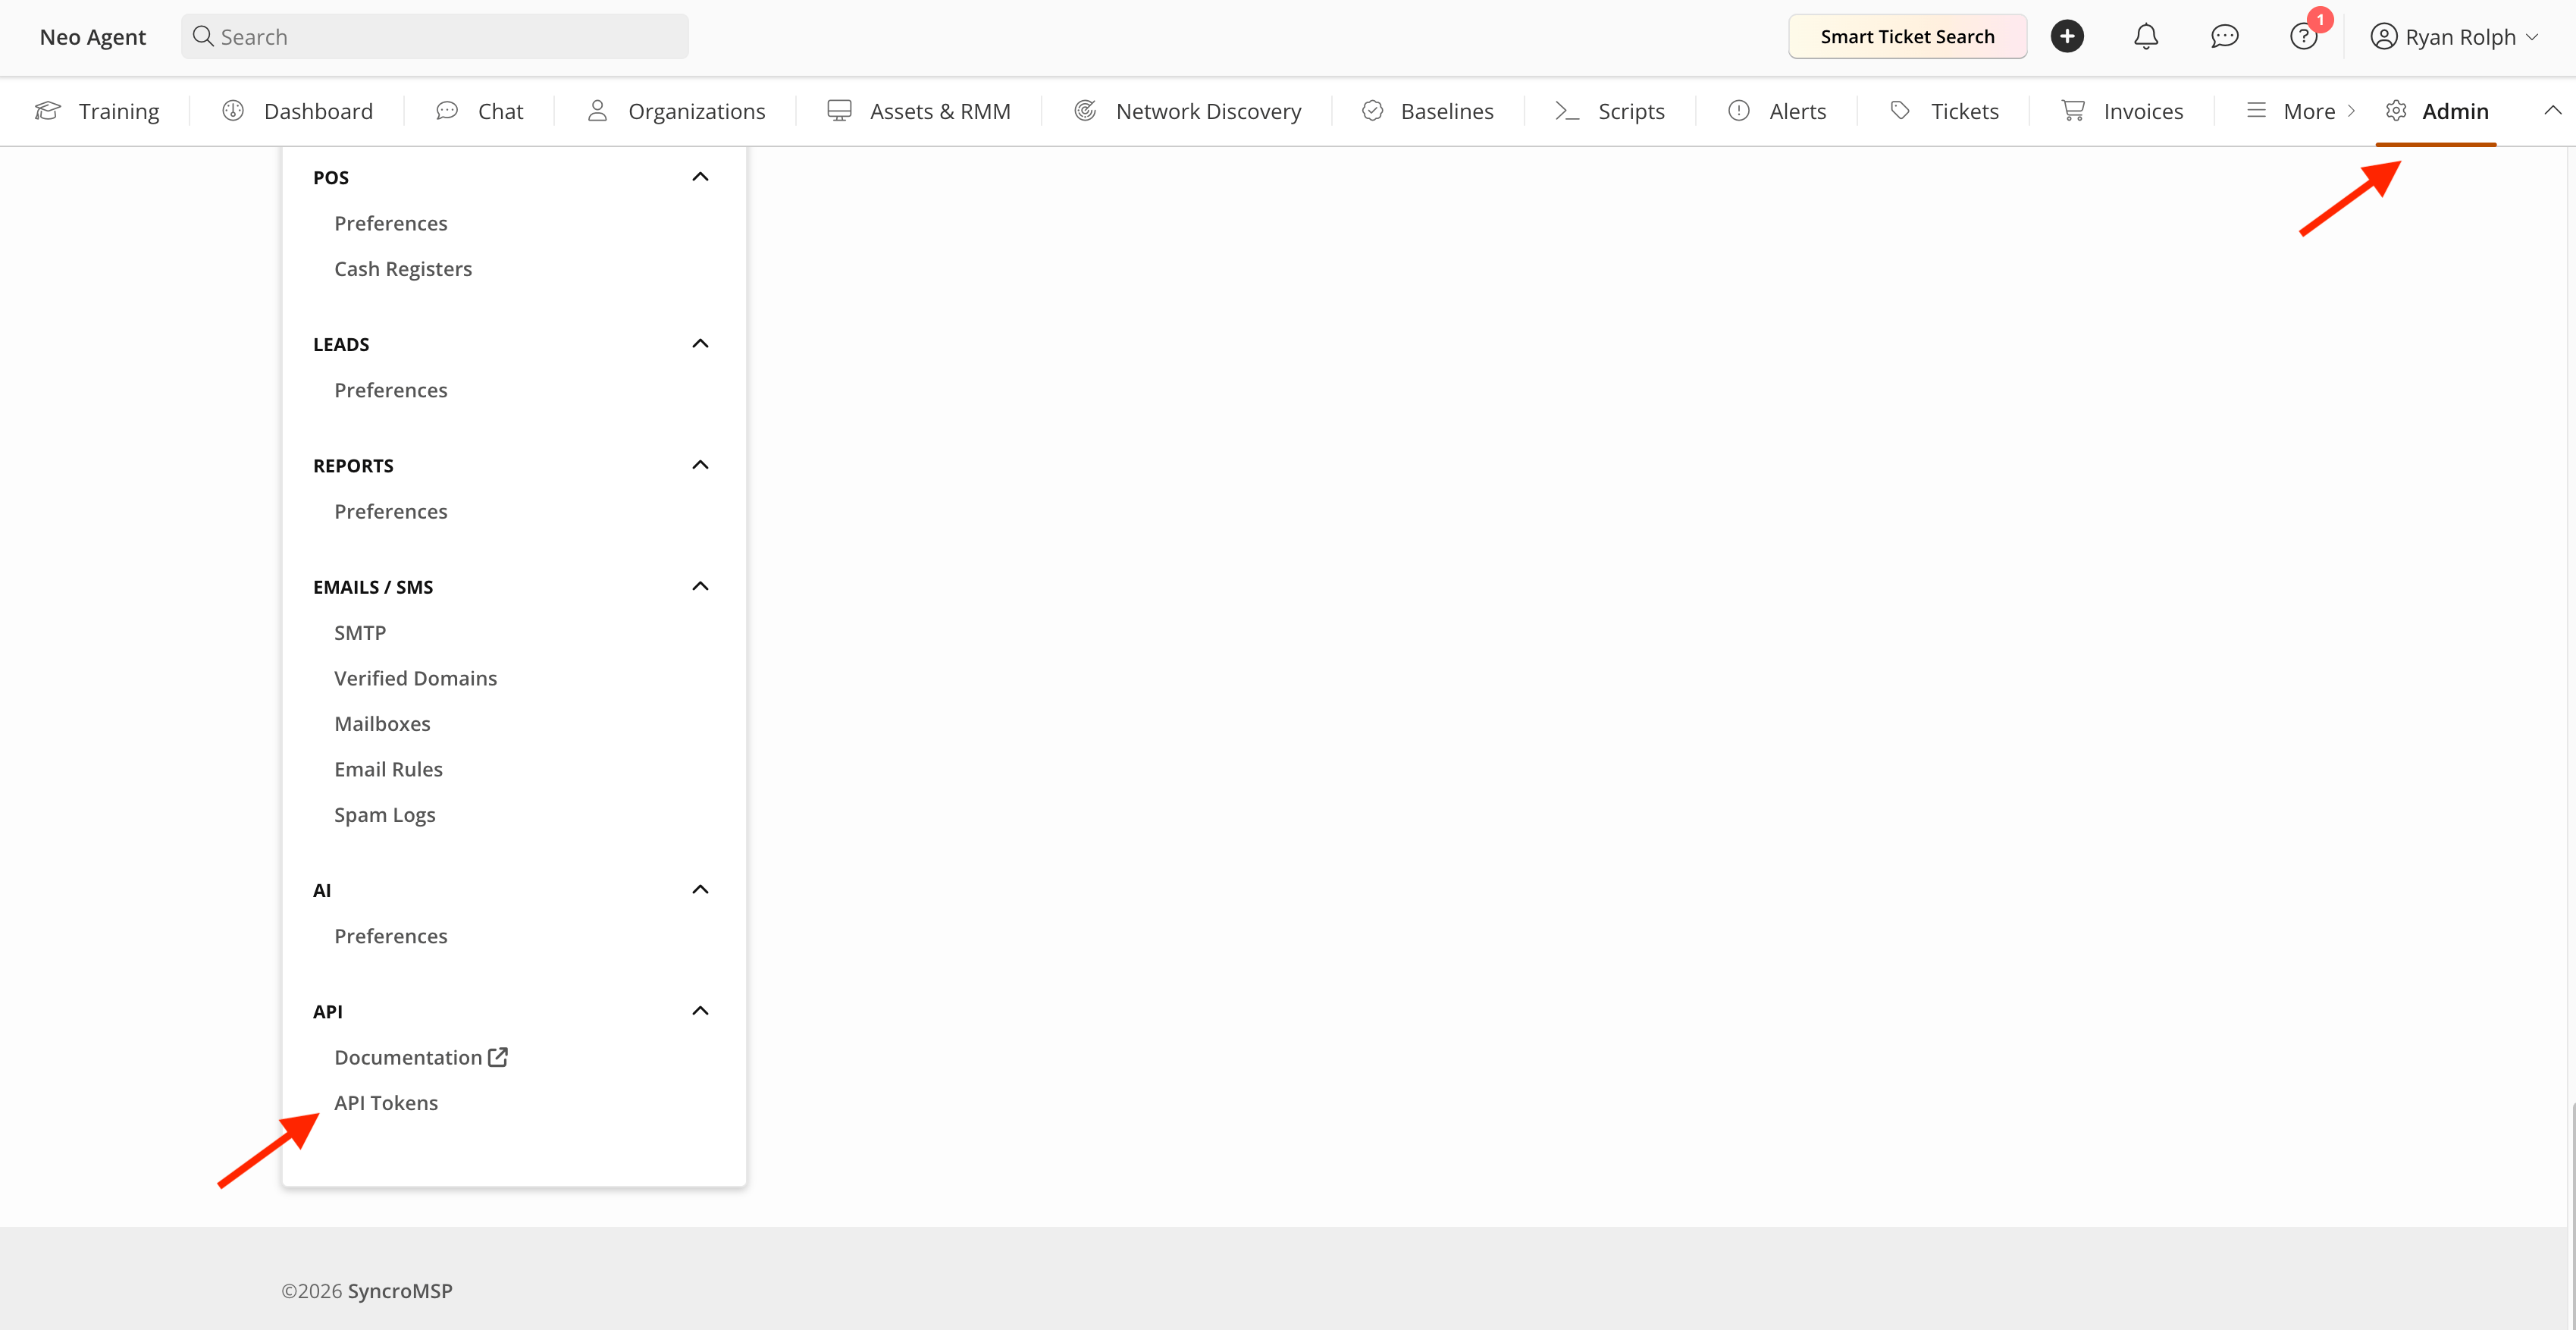
2
Create a new token
Click New Token.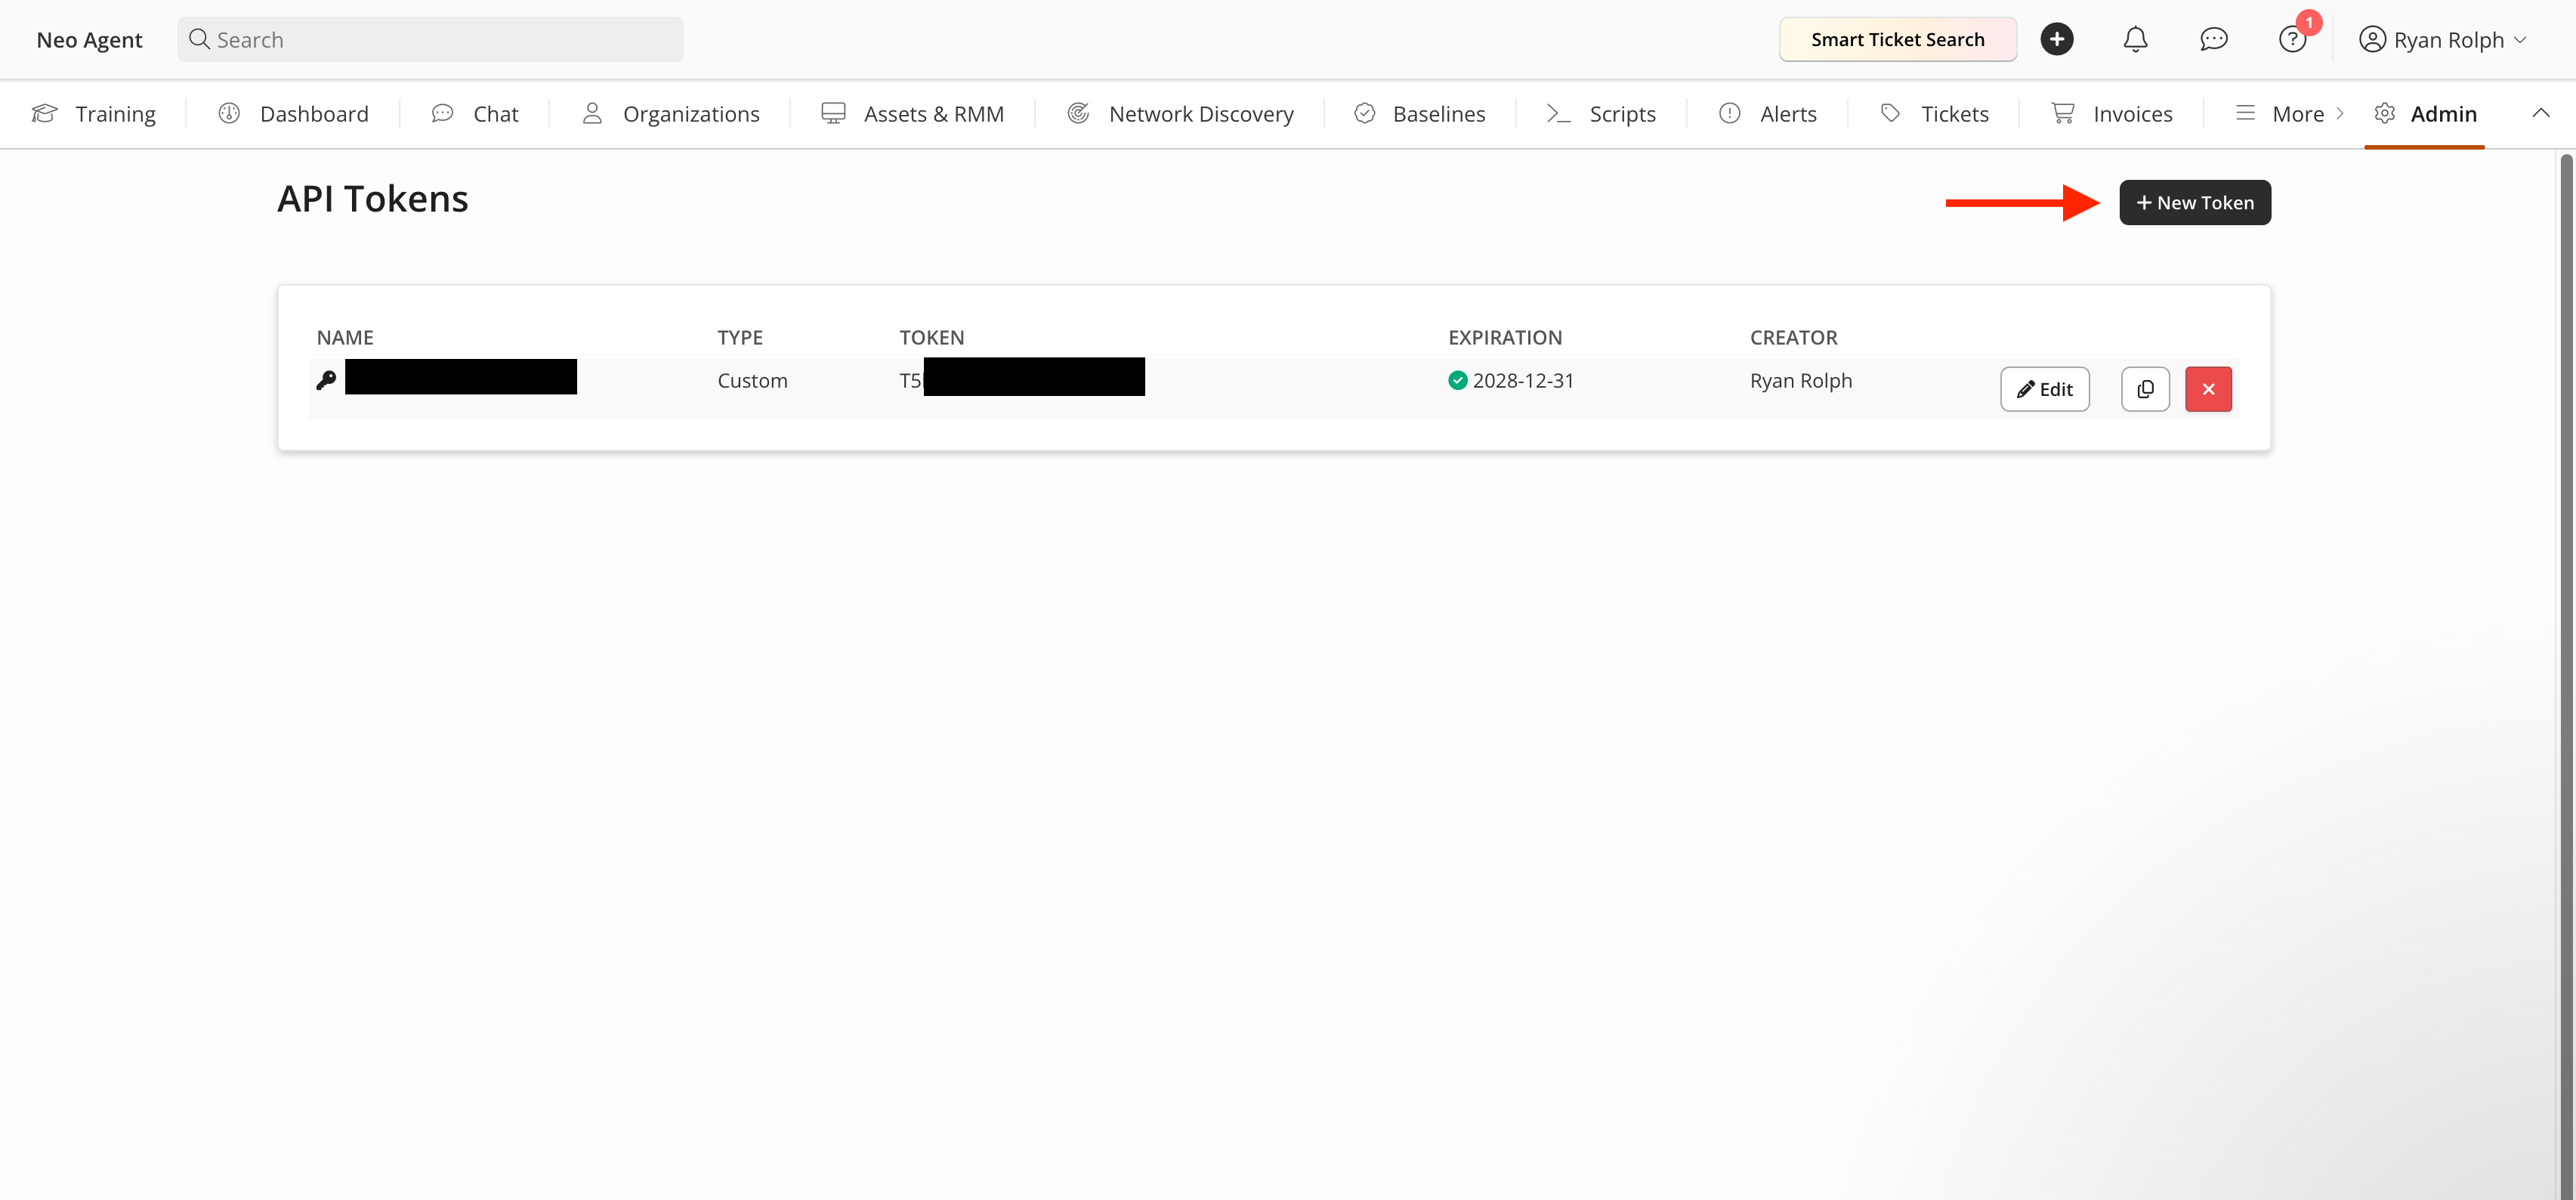
3
Choose Custom Permissions
Select the Custom Permissions tab, not App Integration. Name the token 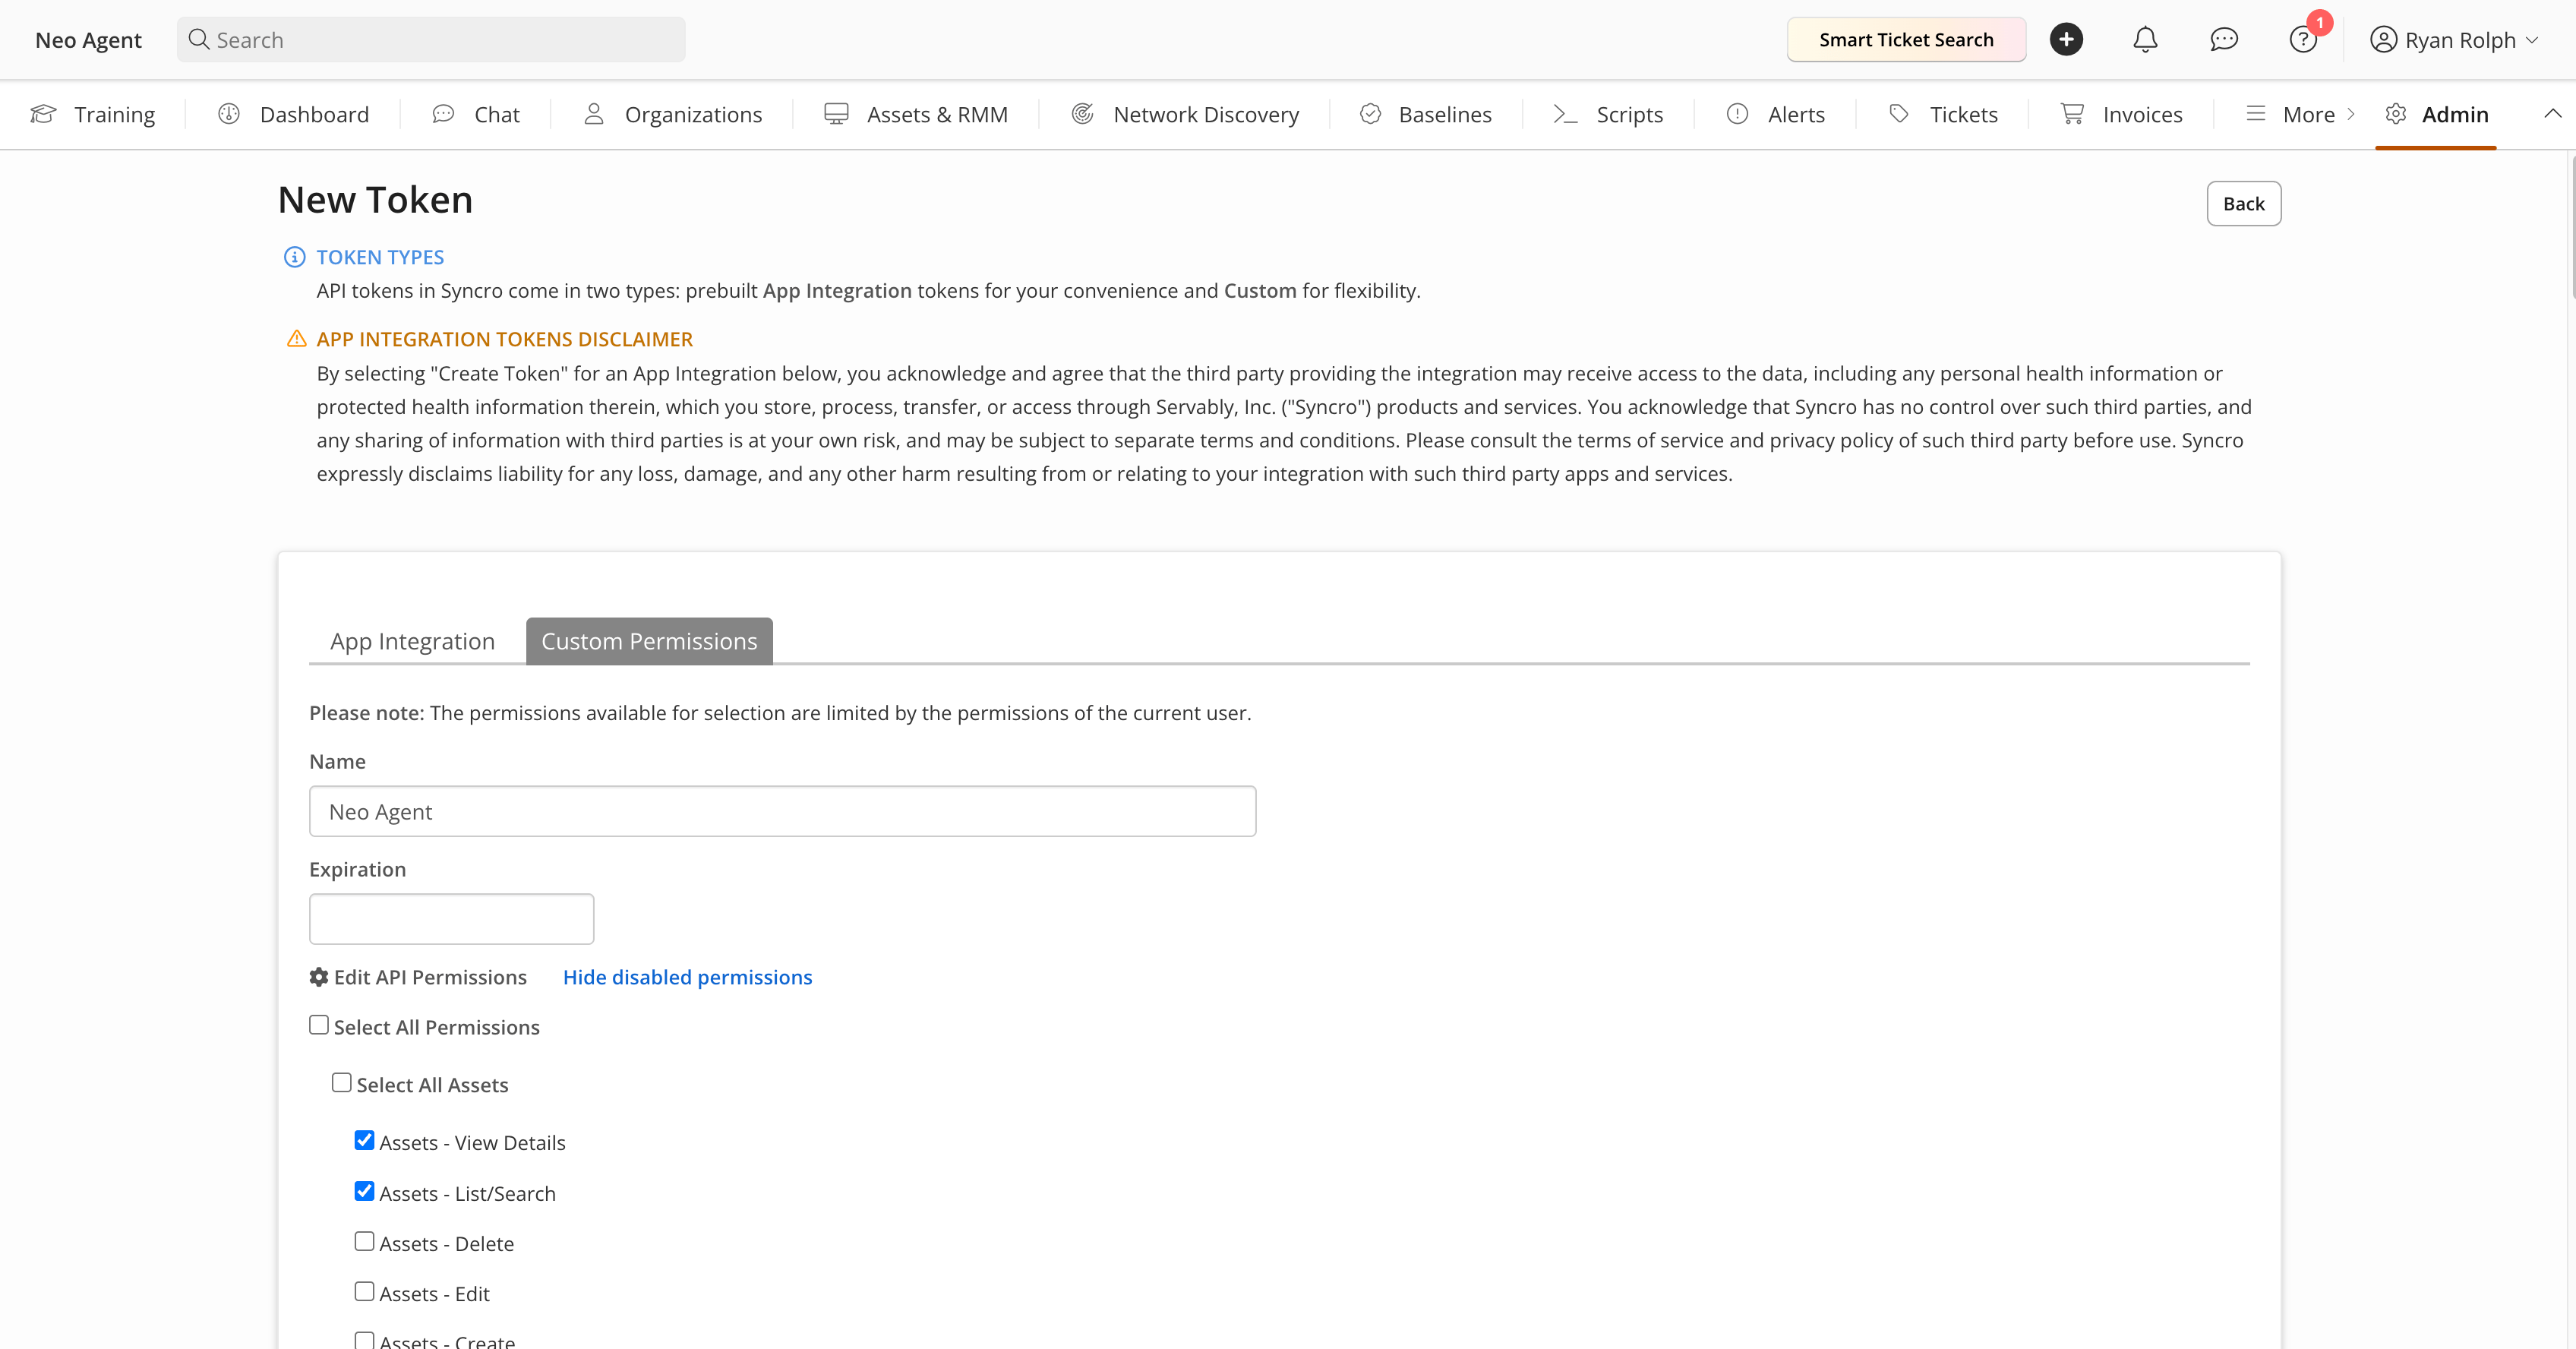
Neo Agent.4
Select the token permissions
Tick Select All Permissions. Syncro only offers permissions the Neo user holds, so “all” means all of the security group you scoped in the previous step; nothing beyond it can be granted.
If you would rather tick individual boxes
If you would rather tick individual boxes
Neo refuses to save a token without these seven:
- Tickets - List/Search
- Tickets - View Details
- Tickets - Create
- Tickets - Edit
- Ticket Comments - New
- Customers - List/Search
- Customers - View Detail
- Tickets - List/Search
- Tickets - View Details
- Tickets - View ‘Their Ticket’ Details (assigned to them)
- Tickets - Create
- Tickets - Edit
- Tickets - Merge
- Tickets - Use Ticket Charges
- Ticket Comments - New
- Ticket Custom Fields - Manage
- Ticket Canned Responses - Manage
- Ticket SLA - Edit
- Ticket Blueprints - Manage
- Ticket Blueprints - Create Ticket From Blueprint
- Ticket Timers - Overview
- Timelogs - Manage
- Customers - List/Search
- Customers - View Detail
- Contracts - List/Search
- Contracts - Edit
- Assets - List/Search
- Assets - View Details
- RMM Alerts - List
- RMM Alerts - Create
- RMM Alerts - Clear/Manage
- Scripts - Execute
- Policies - List
- Products - List/Search
- Products - Create
- Products - Edit
- Products - Edit Quantities
- Products - View Cost
- Pending Orders - View All
- Estimates - List/Search
- Estimates - View Details
- Estimates - Create
- Estimates - Edit
- Invoices - List/Search
- Invoices - View Details
- Line Item - View Cost
- Appointments - View All (see-own never restricted)
- Documentation - Allow Usage
- Documentation - Create
- Documentation - Edit
- Reports - View
5
Save and copy the token
Save the token, then copy its value from the tokens list. Paste it straight into Neo. Syncro will not show it again in full.
Next Steps
Connecting to Neo Agent
Enter your Syncro URL and this token in the Neo dashboard.