Terminology: This guide refers to two types of workflows:
- Autotask Workflow = Automation rules configured in Autotask (Admin → Automation → Workflow Rules)
- Neo Workflow = Automation configured in Neo Agent Dashboard
Find Your Scenario
How do your technicians currently notify ticket contacts?Autotask Workflow on Notes
“We have an Autotask Workflow that sends emails when notes are added”No Autotask changes needed
Autotask Workflow on Time Entries
“We have an Autotask Workflow that sends emails when time entries are added”No Autotask changes needed
Quick Notification (Manual)
“We use Quick Notification checkboxes manually”Requires Autotask setup
No Current Setup
“We don’t currently send notifications” or “Not sure”See recommendations
Scenario A: Autotask Workflow on Notes
Your situation: You already have an Autotask Workflow rule that sends emails when public ticket notes are added.Autotask Configuration
None needed. Your existing Autotask Workflow will handle notifications automatically.Neo Configuration
- Neo Workflows
- Neo Agent
Use the “Notify Ticket Contact” action with
Notification Mode = Ticket Note.No UDF configuration needed—your existing Autotask Workflow handles notifications.Testing
Add a test note via Neo and verify the customer receives an email through your existing Autotask Workflow.Scenario B: Autotask Workflow on Time Entries
Your situation: You already have an Autotask Workflow rule that sends emails when time entries are added.License Requirement: Neo needs a Non-API Member license (regular Autotask user) to create time entries. This is an additional Autotask license cost. See Creating an API Member for setup details.
Autotask Configuration
None needed. Your existing Autotask Workflow will handle notifications automatically.Neo Configuration
- Neo Workflows
- Neo Agent
Use the “Notify Ticket Contact” action with
Notification Mode = Time Entry.No UDF configuration needed—your existing Autotask Workflow handles notifications.Testing
Add a test time entry via Neo and verify the customer receives an email through your existing Autotask Workflow.Scenario C: Quick Notification (Manual)
Your situation: Your technicians use the Quick Notification (Notify via “TO”) checkboxes manually when adding notes or time entries. You don’t have Autotask Workflow rules for automatic notifications.
Why a Workaround Is Needed
- Autotask doesn’t let third-party tools (like Neo) toggle the Quick Notification checkboxes via API
- If you simply create an Autotask Workflow “notify on all notes,” ALL public notes would trigger emails—including tech notes that weren’t meant to notify customers
- Autotask Workflows can’t filter by “created by this resource” to only send Neo’s entries
- Solution: A UDF (User Defined Field) acts as a flag that ONLY Neo sets, allowing selective notifications
Choose Your Method
- Option C1: Ticket Notes (Simpler)
- Option C2: Time Entries (Track Neo's Time)
Best for: MSPs who don’t need to track Neo’s work timeHow it works:
- Neo sets UDF “Notify Contact by Email” =
true - Neo adds a customer-facing ticket note
- Autotask Workflow detects UDF =
trueAND note added → sends email - Autotask Workflow resets UDF to
false
Setting Up the User-Defined Field (UDF)
1
Access User-Defined Fields
- Open Autotask as an Administrator
- Navigate to Admin → Features & Settings → Application-Wide (Shared) Features
- Click on User-Defined Fields
- Navigate to the Tickets tab
2
Create the notification UDF
Click New and enter the following information:
- UDF Type: Ticket
- Name:
Notify Contact by Email - Description: When changed to “true”, Autotask will send email notification to the ticket contact
- Field Type: List (Single Select)
- Display Value/Stored Value:
true - Display Value/Stored Value:
false
3
Save the UDF
Click Save & Close to create the User-Defined Field.
Your UDF is now ready to be used by Neo Agent to trigger email notifications.
Creating the Autotask Workflow Rule
1
Access Workflow Rules
- Open Autotask as an Administrator
- Navigate to Admin → Automation → Workflow Rules
- Open the Workflow Rules page
- Create a New workflow rule
2
Configure basic workflow settings
Enter the following information: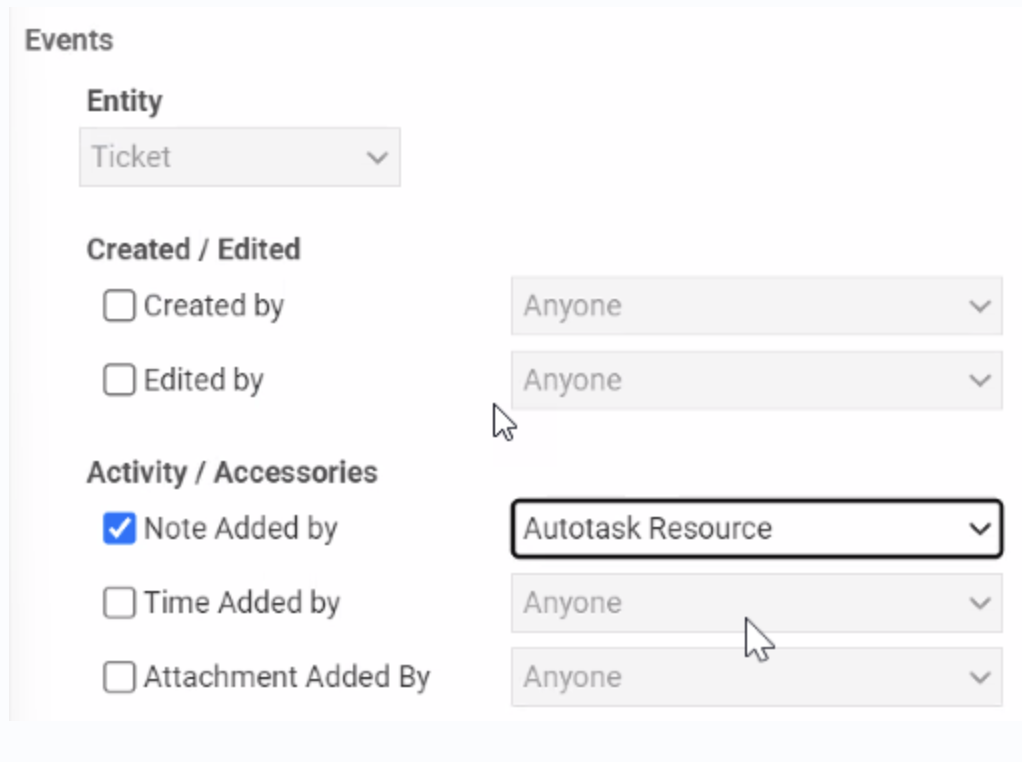
- Workflow Rule Name:
Neo Email Notification - Events → Entity → Ticket
- Events → Activity/Accessories:
- For Option C1 (Ticket Notes): Select Note Added by → Autotask Resource
- For Option C2 (Time Entries): Select Time Entry Added by → Autotask Resource
3
Set workflow conditions and updates
Configure the following:
- Conditions → UDF: Notify Contact by Email → Equal to →
true - Updates → UDF: Notify Contact by Email =
false
4
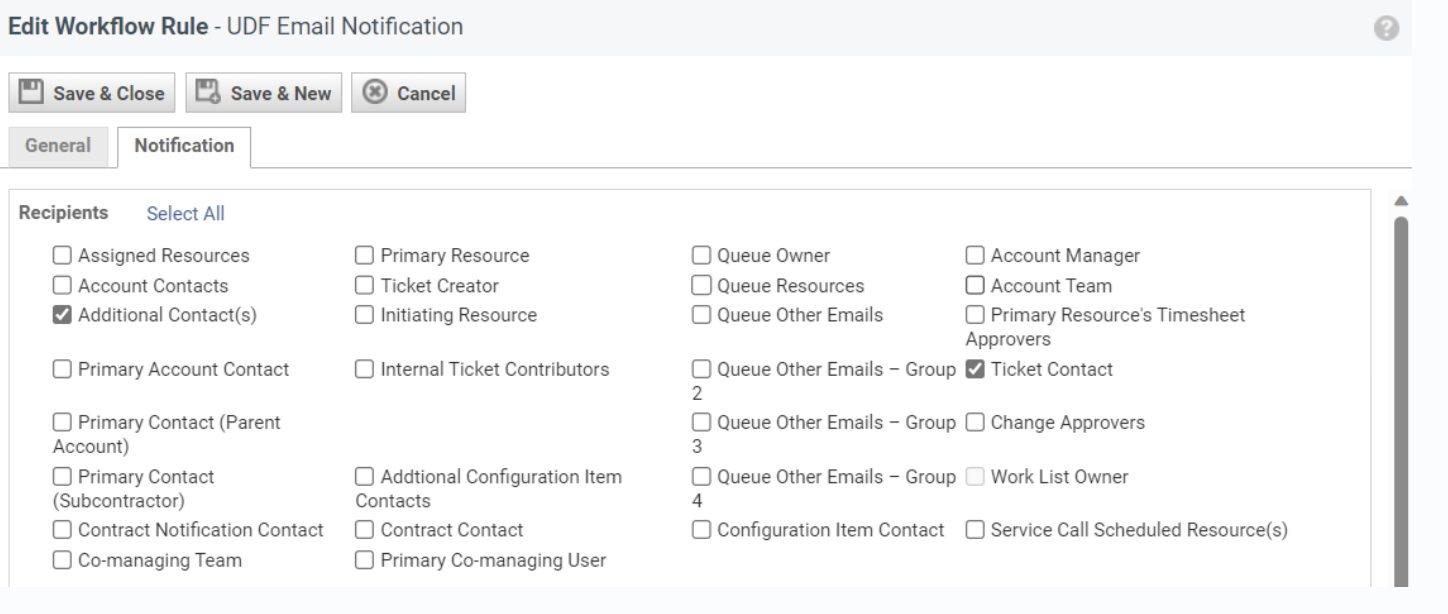
Configure email notifications
- Navigate to the Notification tab at the top of the window
- Select the user types you’d like to receive email notifications (we recommend selecting Ticket Contact and Additional Contacts)
5
Set email sender
Select the email address you’d like the email to come from.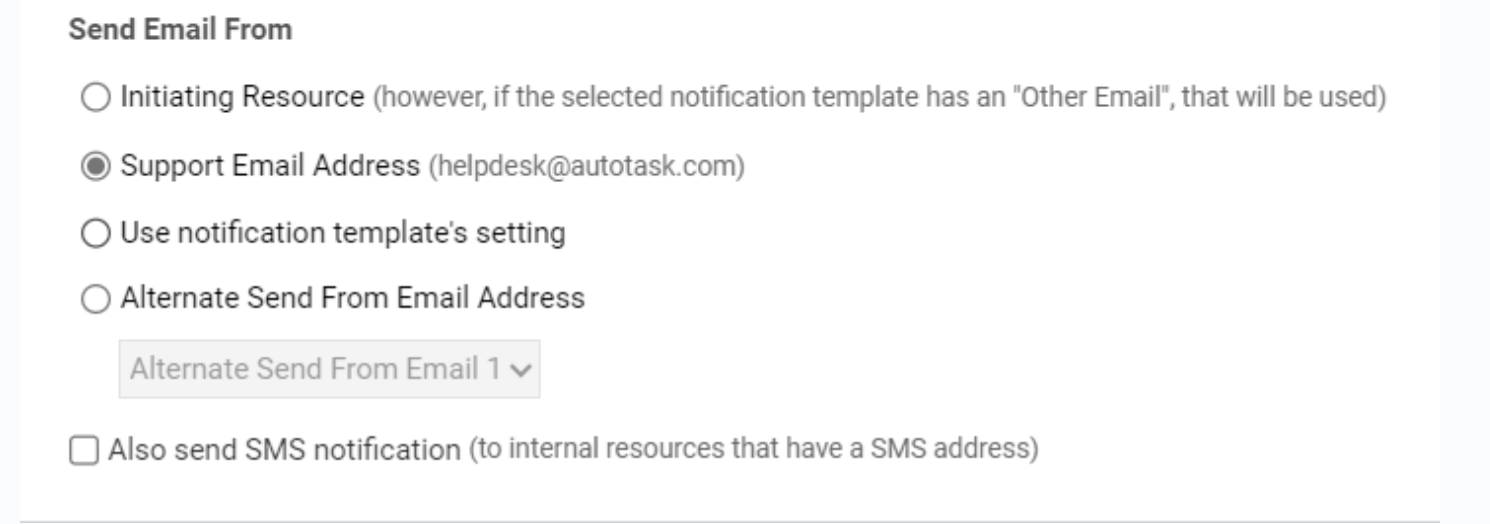
6
Choose email template
Select the email notification template you’d like to use for the emails.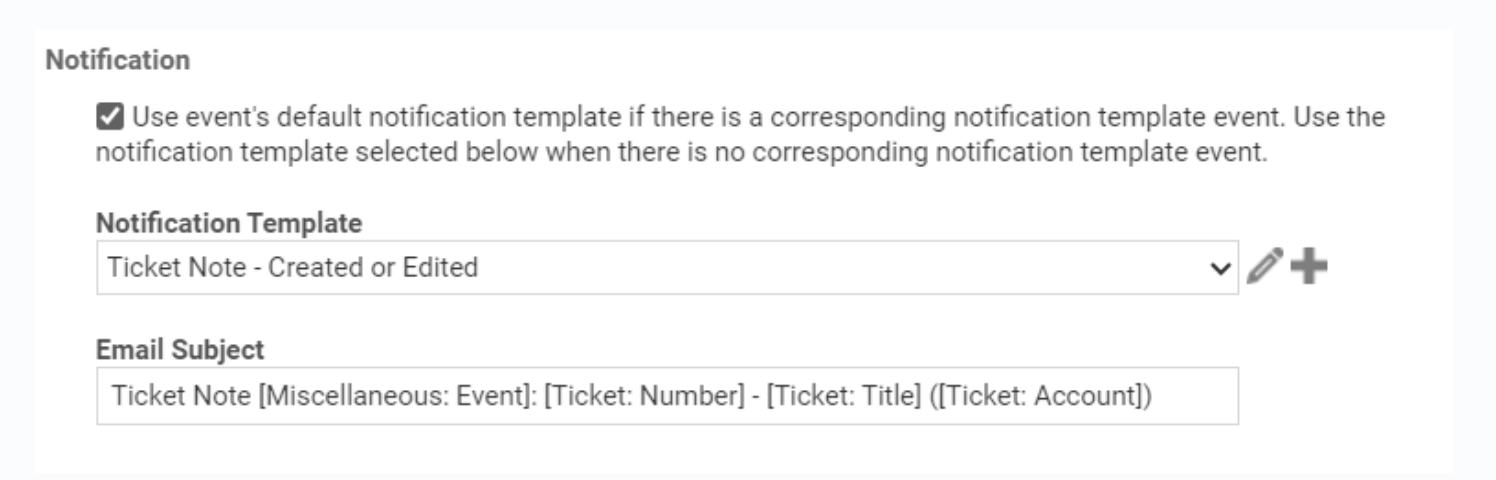
7
Save the workflow
Click Save & Close to activate your Autotask Workflow rule.
Your Autotask Workflow is now active and will automatically send emails when Neo triggers the UDF.
Neo Configuration for Scenario C
After setting up Autotask, configure Neo based on whether you’re using Neo Workflows or Neo Agent:- Neo Workflows
- Neo Agent
Configure the “Notify Ticket Contact” action in your Neo Workflow:
- Set Notification Mode:
- For C1:
Ticket Note - For C2:
Time Entry
- For C1:
- Enable “Use UDF field to trigger Autotask workflow”
- Set the UDF field name to
Notify Contact by Email
Choosing Your Notification Method
If you don’t have any notification setup yet, here’s how to choose:Ticket Notes (Recommended for most MSPs)
- Simplest setup—no additional Autotask license required
- Works well for customer communication
- Configure an Autotask Workflow rule to notify on public notes
Time Entries
- Requires a Non-API Member license for Neo (additional Autotask cost)
- Benefits:
- Track Neo’s “time spent” for ROI analysis and internal auditing
- Bill customers for work Neo has done
- Time entries show up in standard billing/invoicing reports
Do You Need the UDF Workaround?
The UDF workaround (Scenario C) is only needed if you want selective notifications—where only Neo’s messages trigger emails, not all tech notes/time entries. If you’re starting fresh and don’t need selective control, you can create a simple Autotask Workflow that notifies on all public notes or time entries, and skip the UDF setup entirely.Troubleshooting
Customer not receiving emails
Customer not receiving emails
- Verify the Autotask Workflow rule is active
- Check that the UDF is being set to
true(if using Scenario C) - Confirm the ticket has a valid contact email address
- Review the Autotask Workflow notification settings
Duplicate emails being sent
Duplicate emails being sent
- Ensure the Autotask Workflow updates the UDF back to
false - Check for multiple Autotask Workflow rules that might be triggering
Wrong email template being used
Wrong email template being used
- Verify the correct template is selected in your Autotask Workflow
- Make sure the template includes the appropriate variables (
[Ticket: Note Description]or[Ticket Time Entry: Summary Notes])
UDF not resetting to false
UDF not resetting to false
- Confirm the Autotask Workflow has an “Update” action to set UDF =
false - Check that the Autotask Workflow conditions are correctly configured