Getting Started
To integrate Neo Agent with your HaloPSA system, you’ll need to complete two main setup steps:Create an Agent Resource
Set up a dedicated agent in HaloPSA that Neo Agent will use for time entries and ticket assignments.
Create API Application
Configure API credentials with proper permissions for programmatic access to your HaloPSA data.
Security and Permissions
The HaloPSA integration follows security best practices:- OAuth 2.0 Authentication: Secure token-based authentication for all API calls
- Granular Permissions: Fine-grained control over what Neo Agent can access and modify
- Agent Attribution: All actions are attributed to the Neo Agent resource for accountability
- Audit Trail: Complete logging of all automated actions in HaloPSA
- Credential Security: Client secrets are encrypted and securely stored
Use Cases
The HaloPSA integration enables powerful automation scenarios:Automated Ticket Triage
Neo Agent can analyze incoming tickets, extract key information, categorize issues, and add structured internal notes to guide technicians toward faster resolution.Intelligent Time Tracking
Automatically log time spent on tickets when Neo Agent performs analysis, research, or automated actions, ensuring accurate billing and reporting.Technician Assistance
Provide technicians with AI-powered insights, suggested solutions, and relevant documentation based on ticket content and historical data.Workflow Automation
Trigger automated workflows based on ticket content, automatically update fields, create follow-up actions, and route tickets appropriately.Knowledge Base Integration
Connect ticket resolutions to documentation systems, suggest relevant articles, and help build your knowledge base over time.Requirements
To use the HaloPSA integration, you need:- An active HaloPSA subscription with API access enabled
- Administrative access to create API applications and agents
- A license level that supports API integrations
Next Steps
Ready to integrate Neo Agent with HaloPSA? Follow these steps in order:1
Create an Agent Resource
Set up a dedicated agent in HaloPSA for Neo Agent to use.
2
Create API Application
Configure API credentials with the necessary permissions.
3
Connect to Neo Agent
Use the credentials to connect your HaloPSA system to Neo Agent through the integrations dashboard.
4
Test and Deploy
Test the integration with a few tickets before enabling full automation.
Frequently Asked Questions
How do I find the Agent ID?
How do I find the Agent ID?
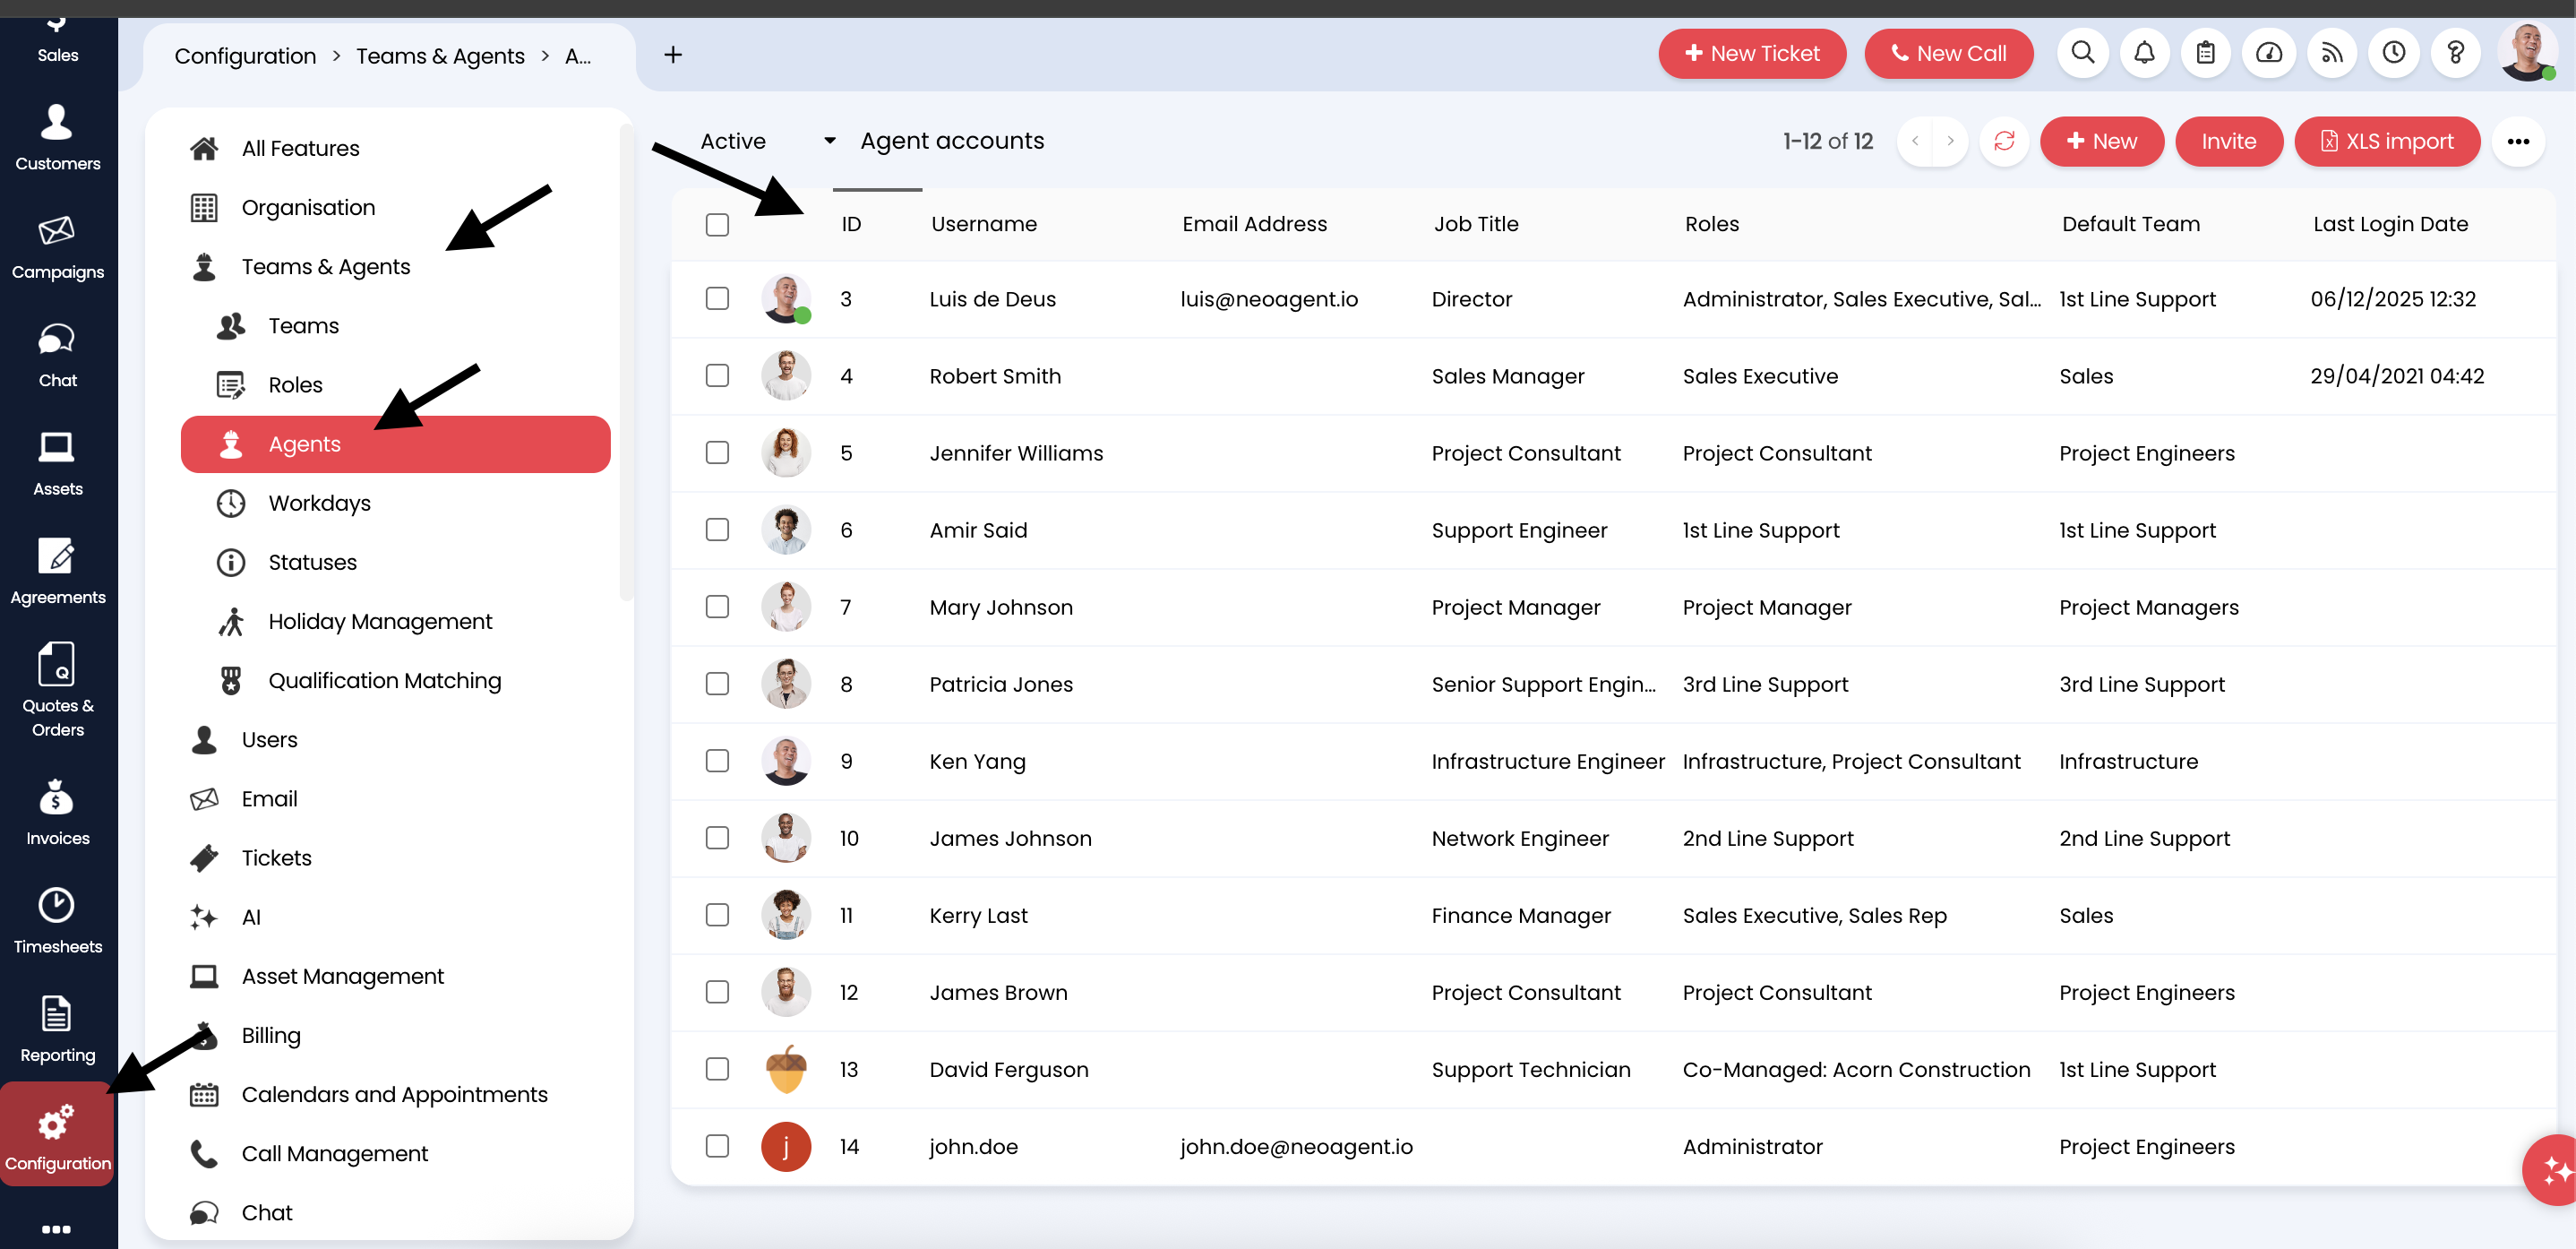
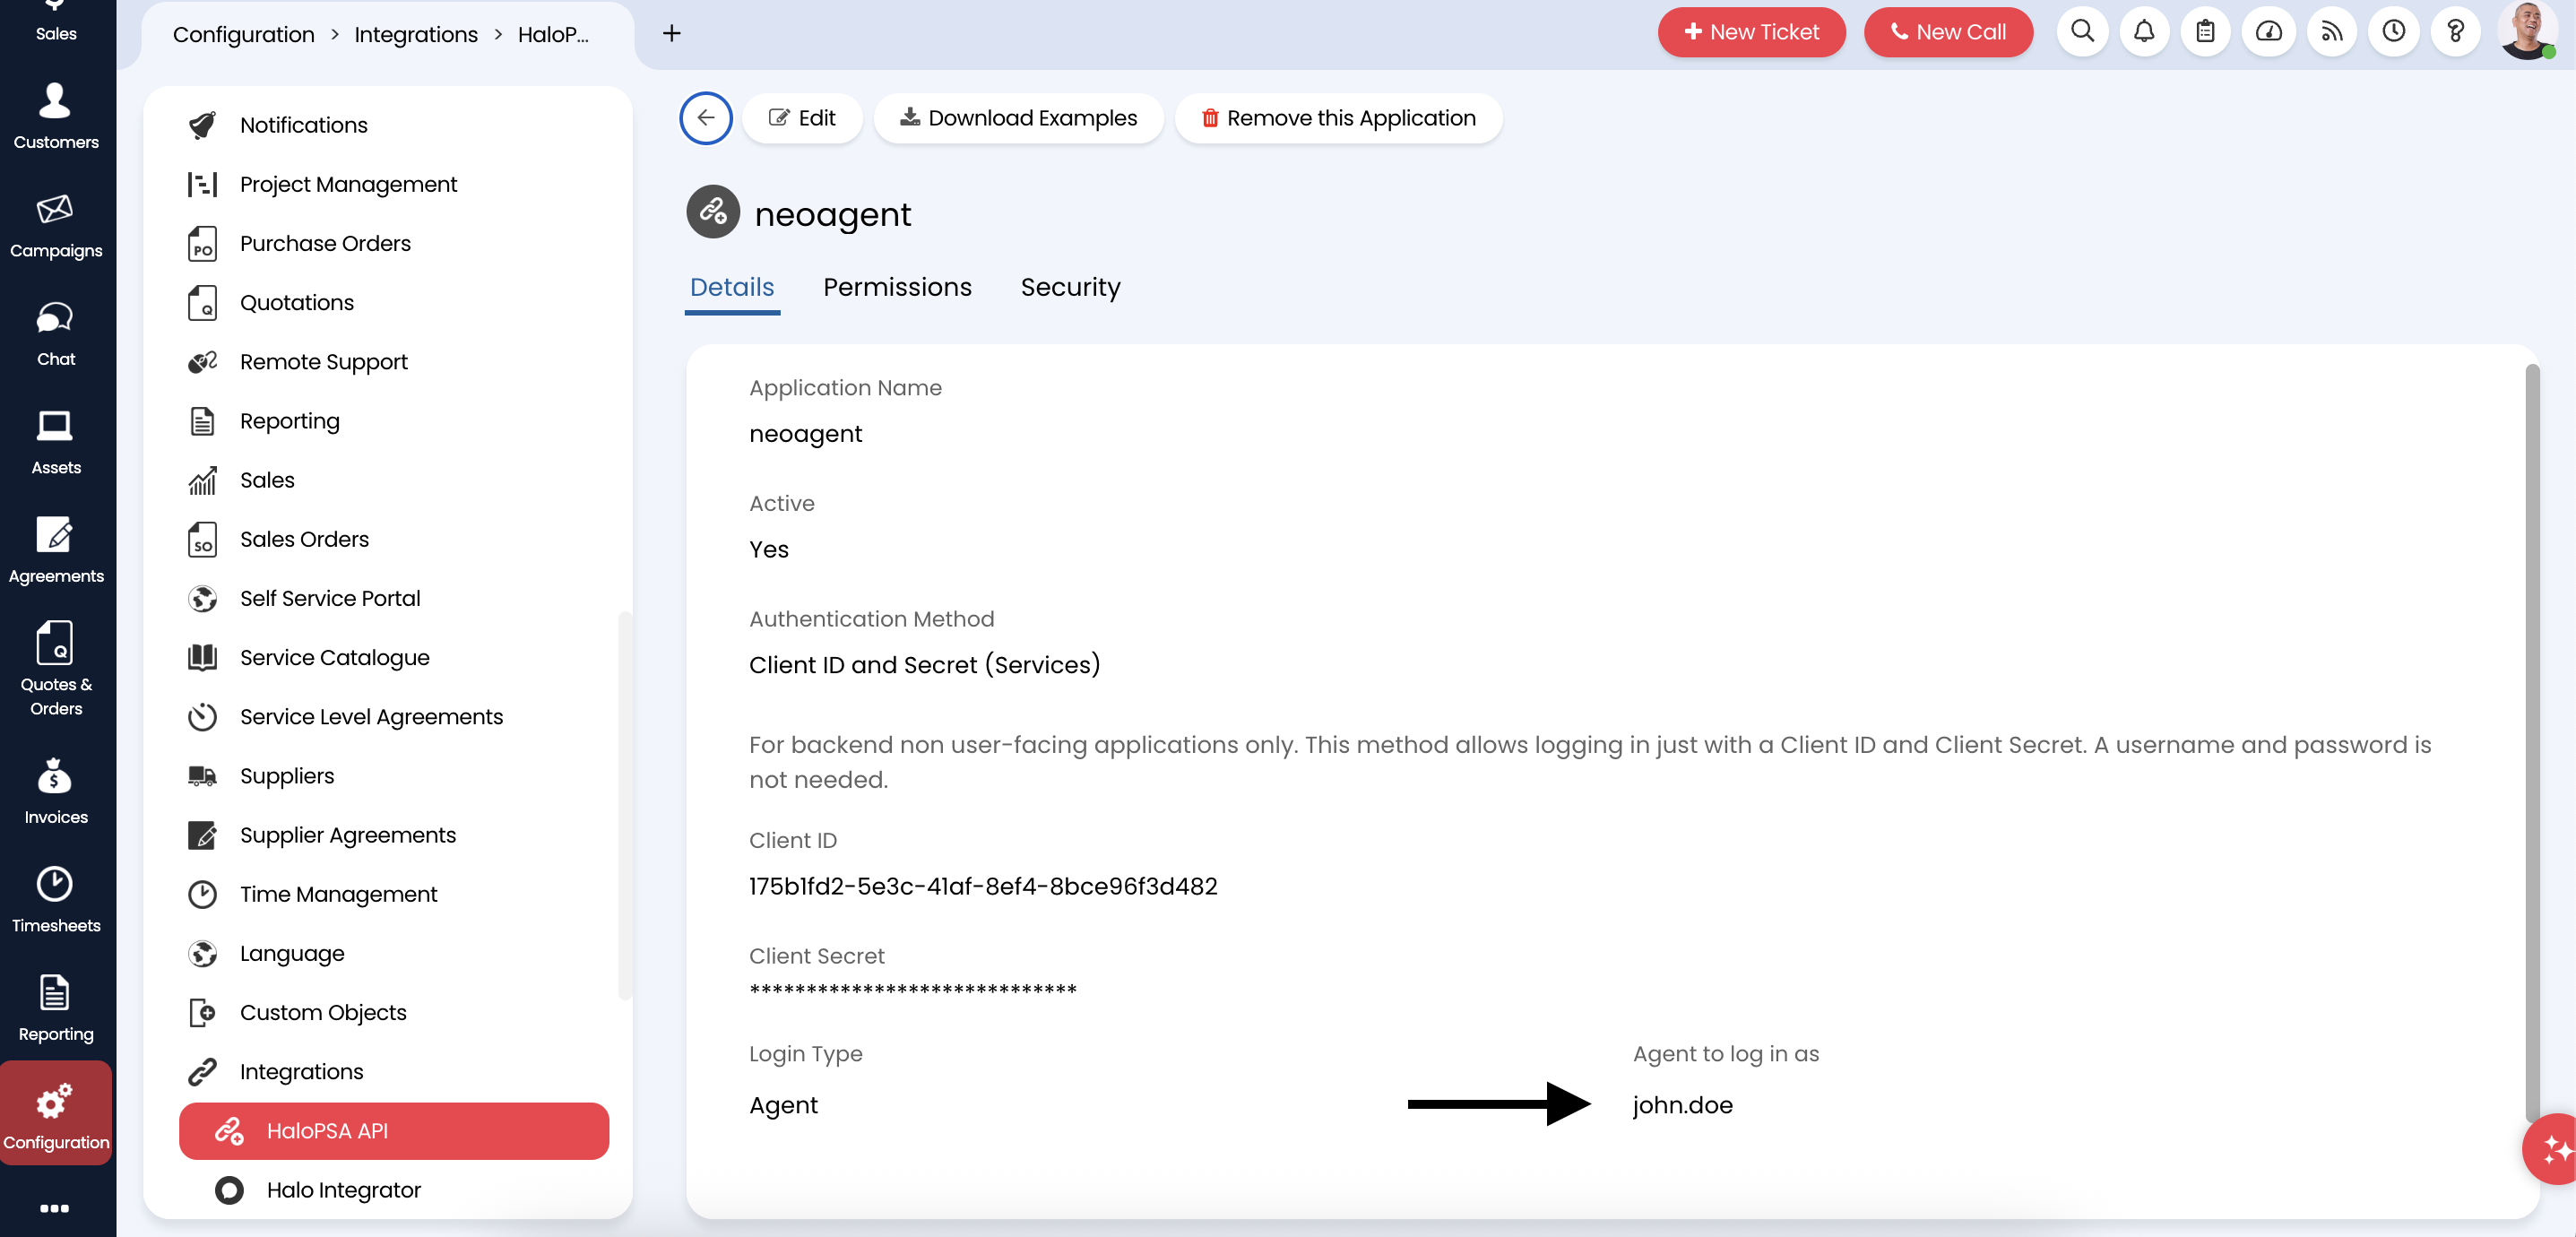
The Agent ID is needed when configuring the Neo Agent API application in HaloPSA. This is the agent that the API will impersonate when performing actions.To find the Agent ID:

1
Navigate to Agents
Go to Configuration → Teams & Agents → Agents in your HaloPSA dashboard.
2
Locate the ID column
In the Agent accounts list, find the ID column on the left side. This displays the numeric ID for each agent.
3
Note the Agent ID
Find the agent you created for Neo Agent and note its ID number.

Navigate to Configuration > Teams & Agents > Agents to view all agents and their IDs

The API application shows the selected agent that Neo Agent will impersonate
Make sure the agent you select has the appropriate permissions to perform the actions Neo Agent needs, such as viewing tickets, adding notes, and logging time entries.
