Setup
1
Generate IT Glue API credentials
- In IT Glue, go to Account → Settings → API Keys.
- Click Generate API Key.
- Copy the API key.
2
Connect IT Glue API in Neo Dashboard
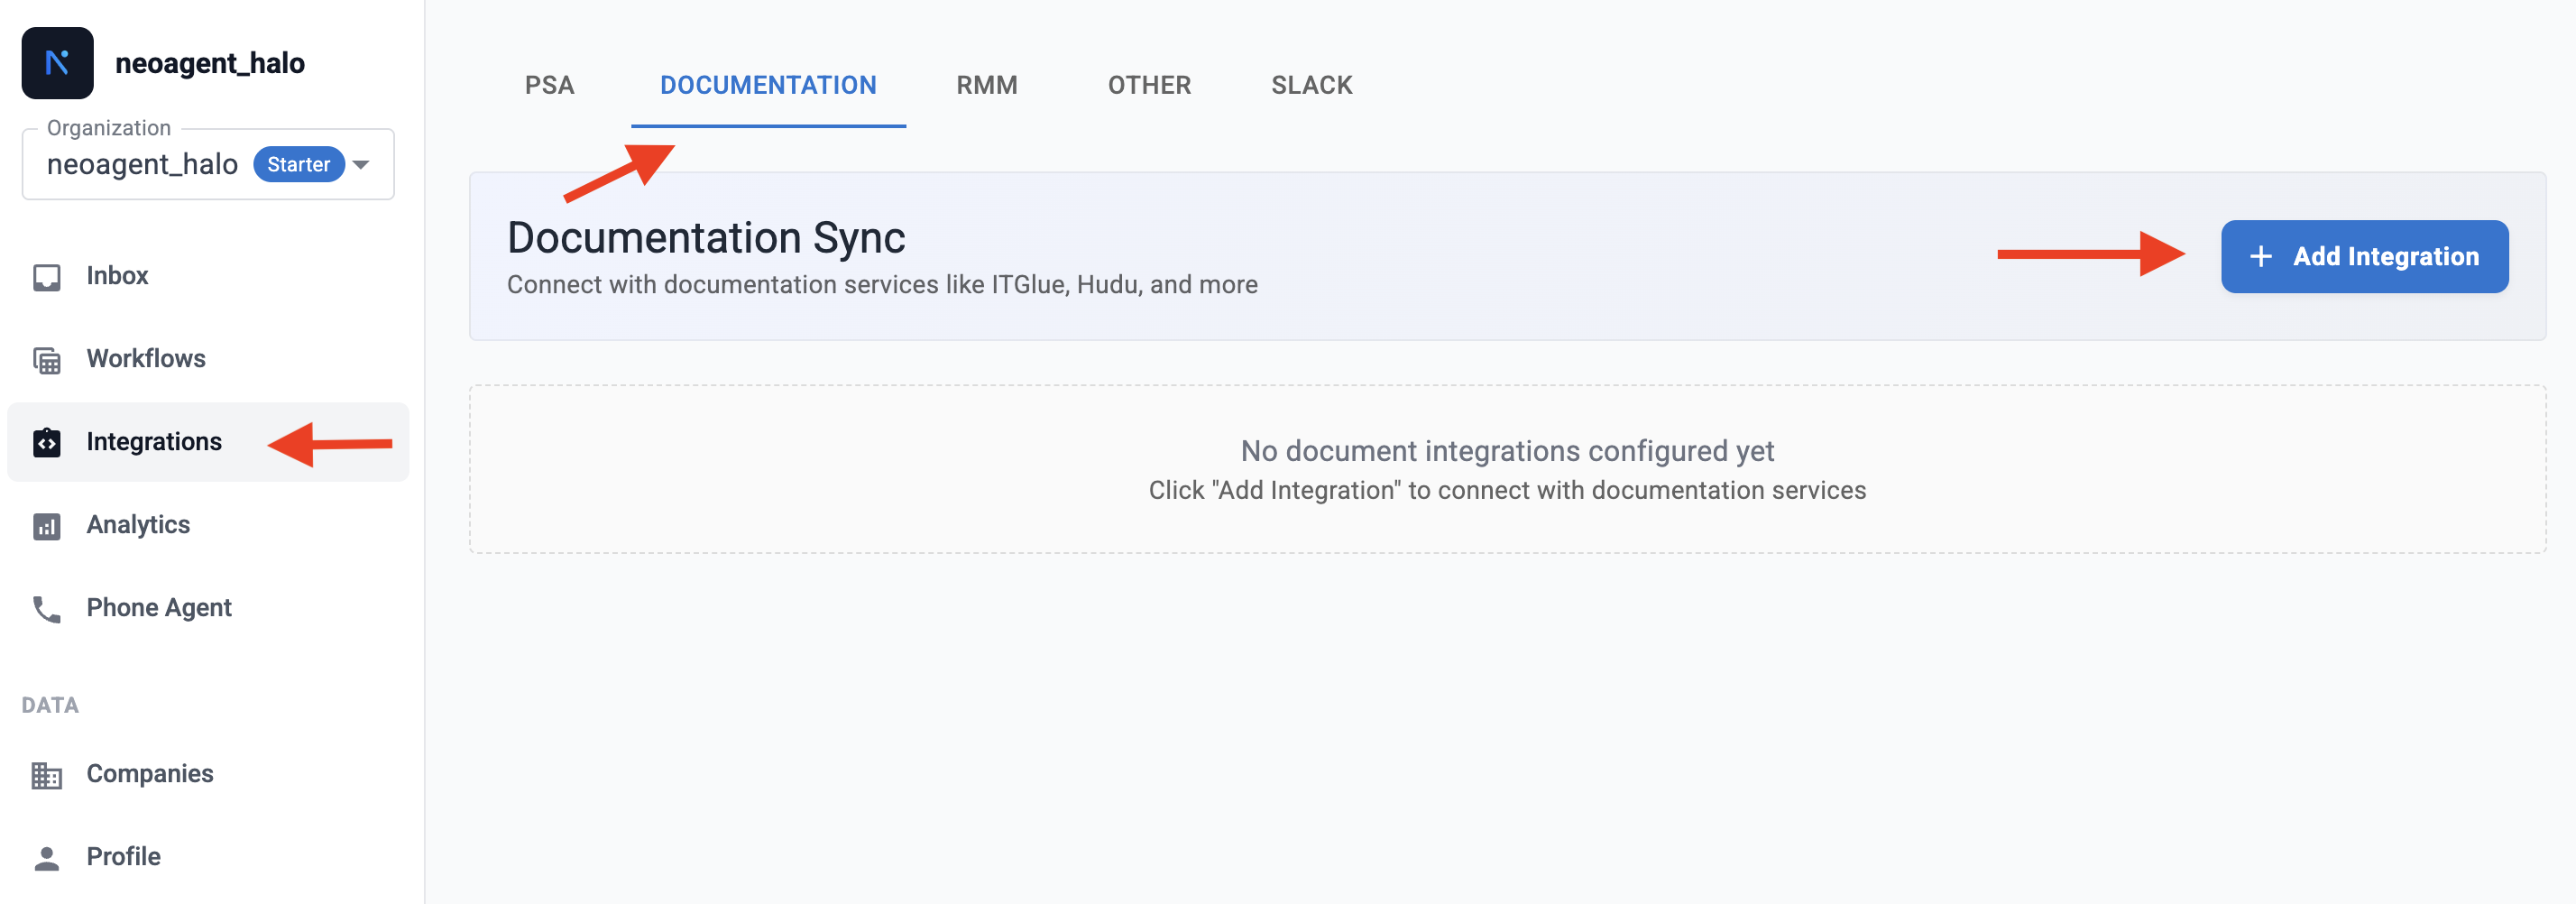
- Go to Integrations → Documentation tab.
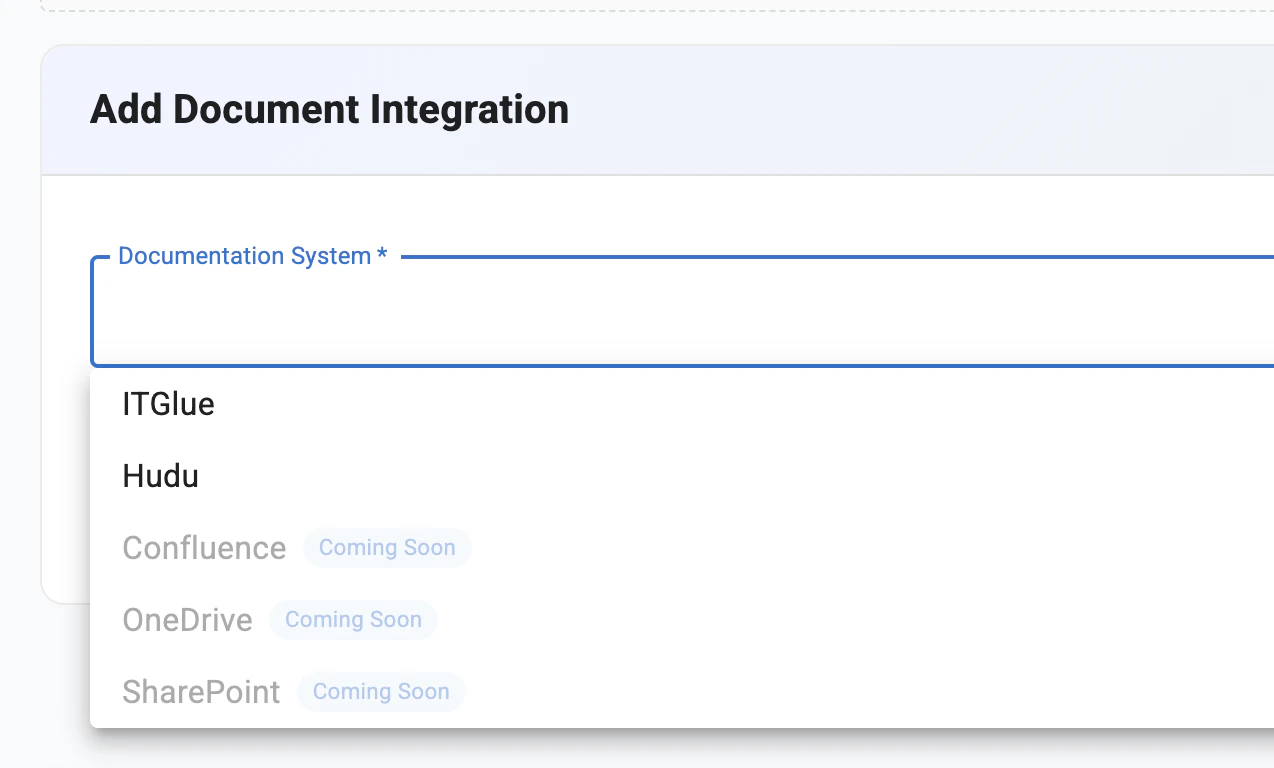
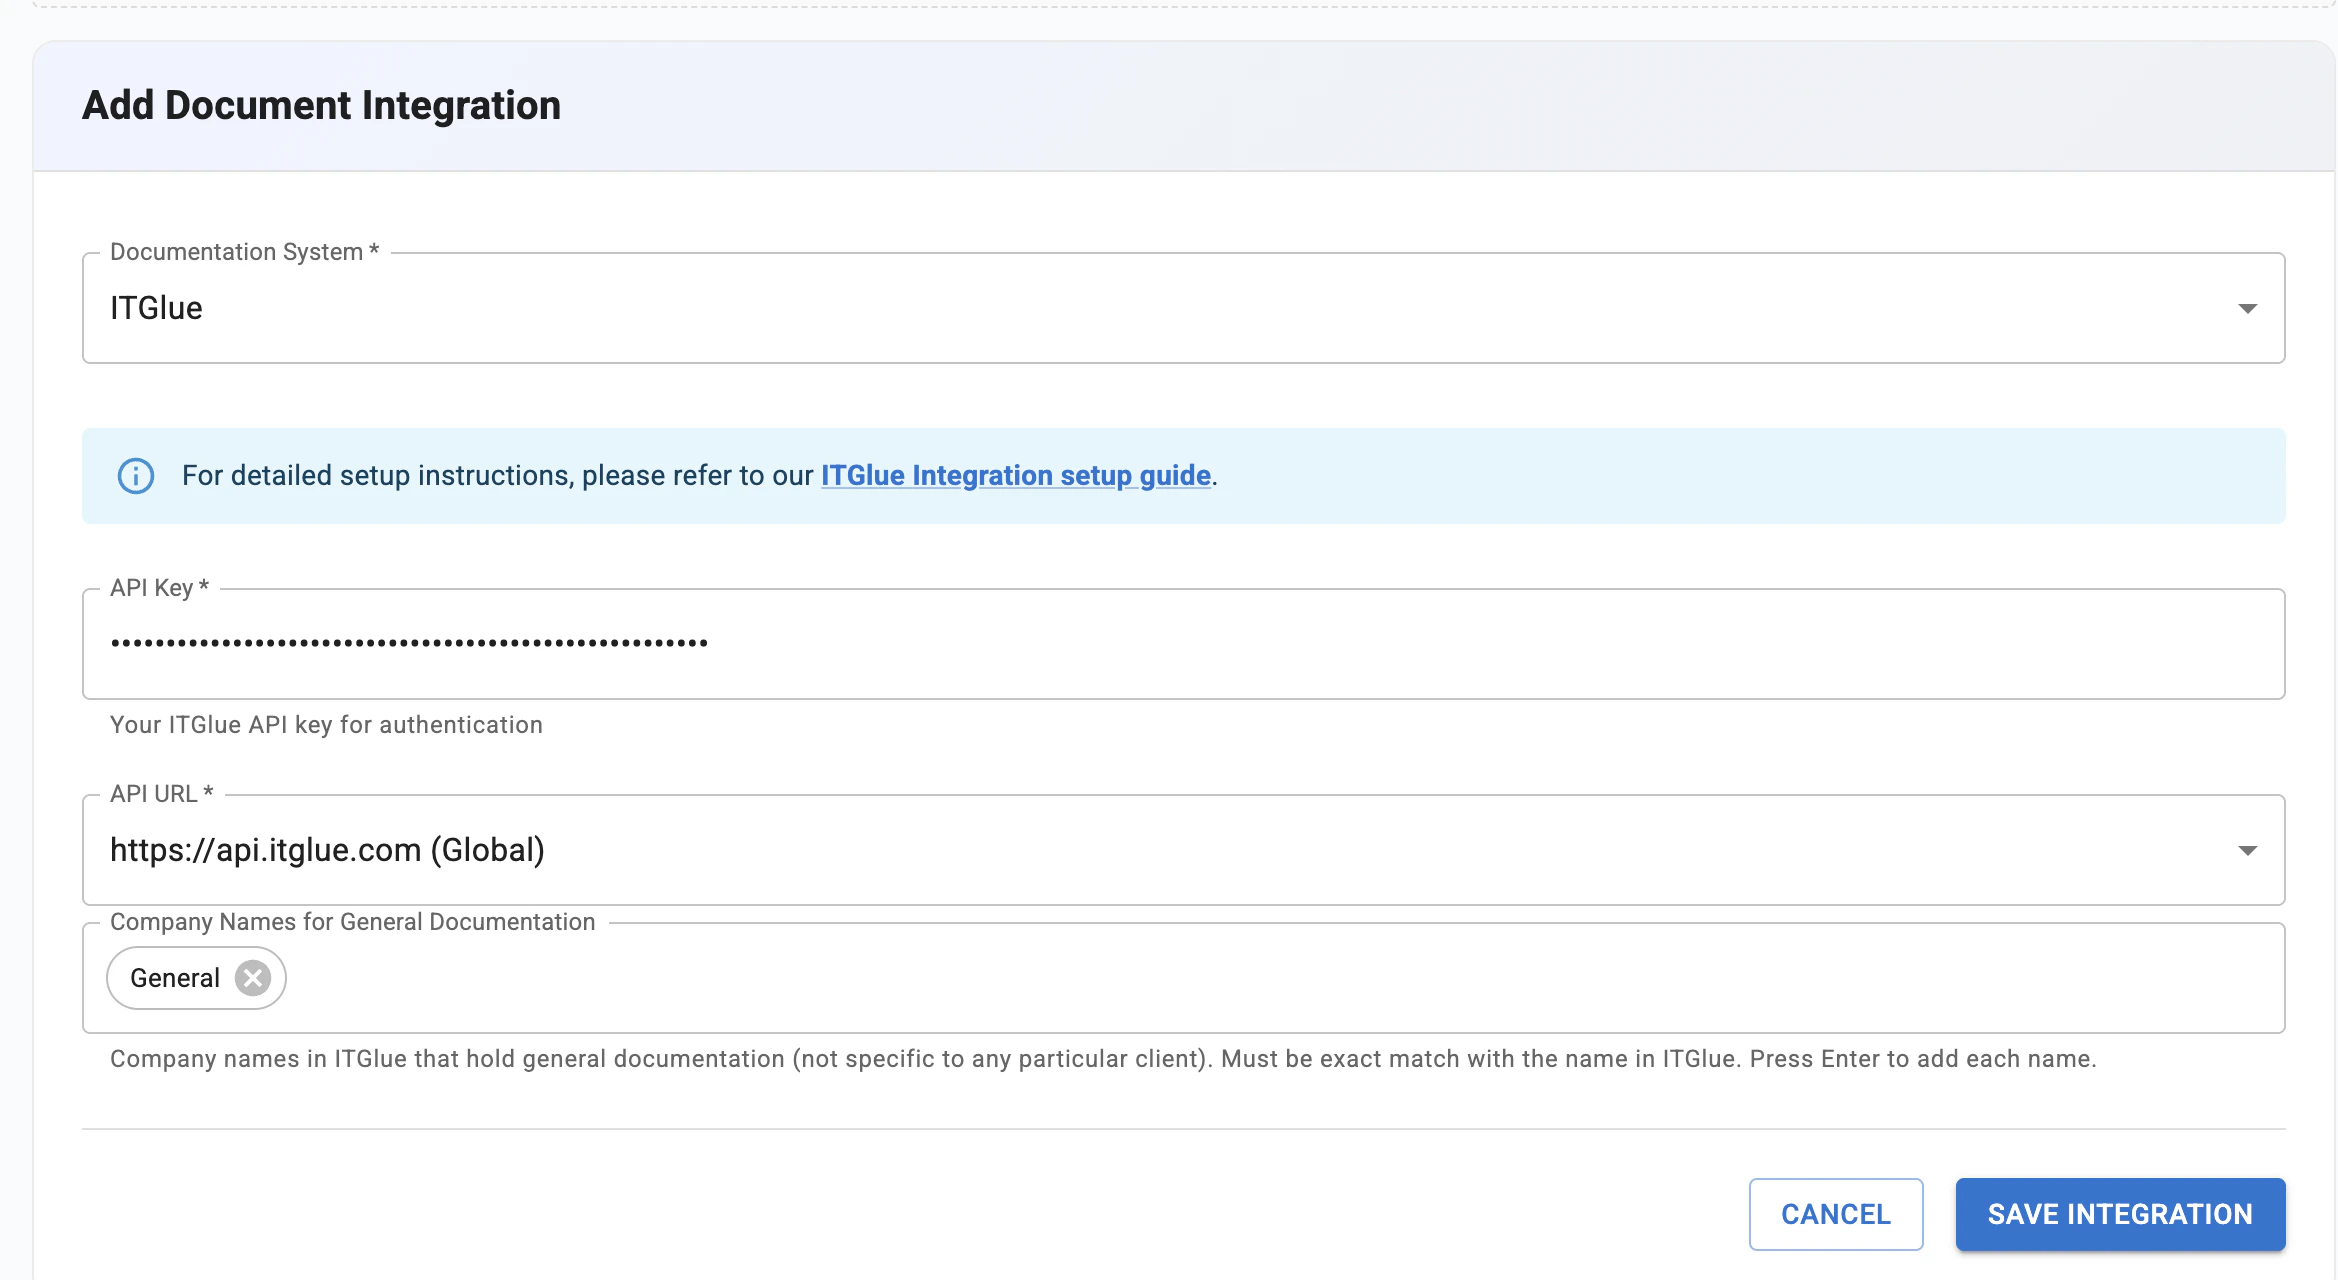
- Click Add Integration and select ITGlue API.
- Enter your IT Glue API key.
What Gets Synced
Once connected, Neo syncs the following daily for search during ticket resolution:Restricted documents
IT Glue lets you mark a document or folder as Restricted access. By default, Neo honors that restriction — its internal (technician-facing) agents won’t surface those documents, so a technician can’t read through Neo what they can’t open in IT Glue. (The IT Glue API itself returns restricted documents to Neo regardless — a single API key sees everything, and IT Glue’s per-user permissions aren’t exposed to the API — so Neo enforces the restriction on its side.) You can change this from the IT Glue integration:This is an all-or-nothing tenant choice, not per-technician enforcement — Neo can’t reconstruct who a document is restricted to, only that it is. If you want a trusted subset of staff to keep using restricted docs through Neo, switch to Include and instead limit who can message the agent via Chat Agent Access.
End-user (client-facing) agents never see restricted documents, regardless of this setting — they are always excluded from anything served to your clients.
ITGlue API Tool
Beyond sync, agents can interact with the full IT Glue API in real time — reading, creating, updating, and deleting documents, flexible assets, configurations, contacts, organizations, and passwords. Access is controlled through 7 permission groups with configurable access levels and technician approval requirements.See the ITGlue API tool documentation for permission groups, access profiles, and safety controls.
Security
- Permission-based access control across 7 resource categories
- Technician-in-the-Loop for write operations on sensitive resources
- Password writes always require technician approval, regardless of settings
- Organization deletion always blocked
- Restricted documents can be withheld from internal agents, and are always withheld from end-user agents (see Restricted documents)
- All data encrypted in transit and at rest