How Neo Agent Permissions Work
Neo Agent uses two layers of access control to keep your ServiceNow data safe:- ServiceNow OAuth Application (what you configure here) — sets the maximum API access available, controlled by the role of the user the agent authenticates as.
- Neo Agent Dashboard — where you choose exactly what Neo can do. You configure permission groups that control which areas Neo can read, write, or ignore — and whether actions require technician approval first.
Creating the OAuth Application
Find Application Registry
In ServiceNow, use the navigation search (top-left) to find System OAuth → Application Registry and open it.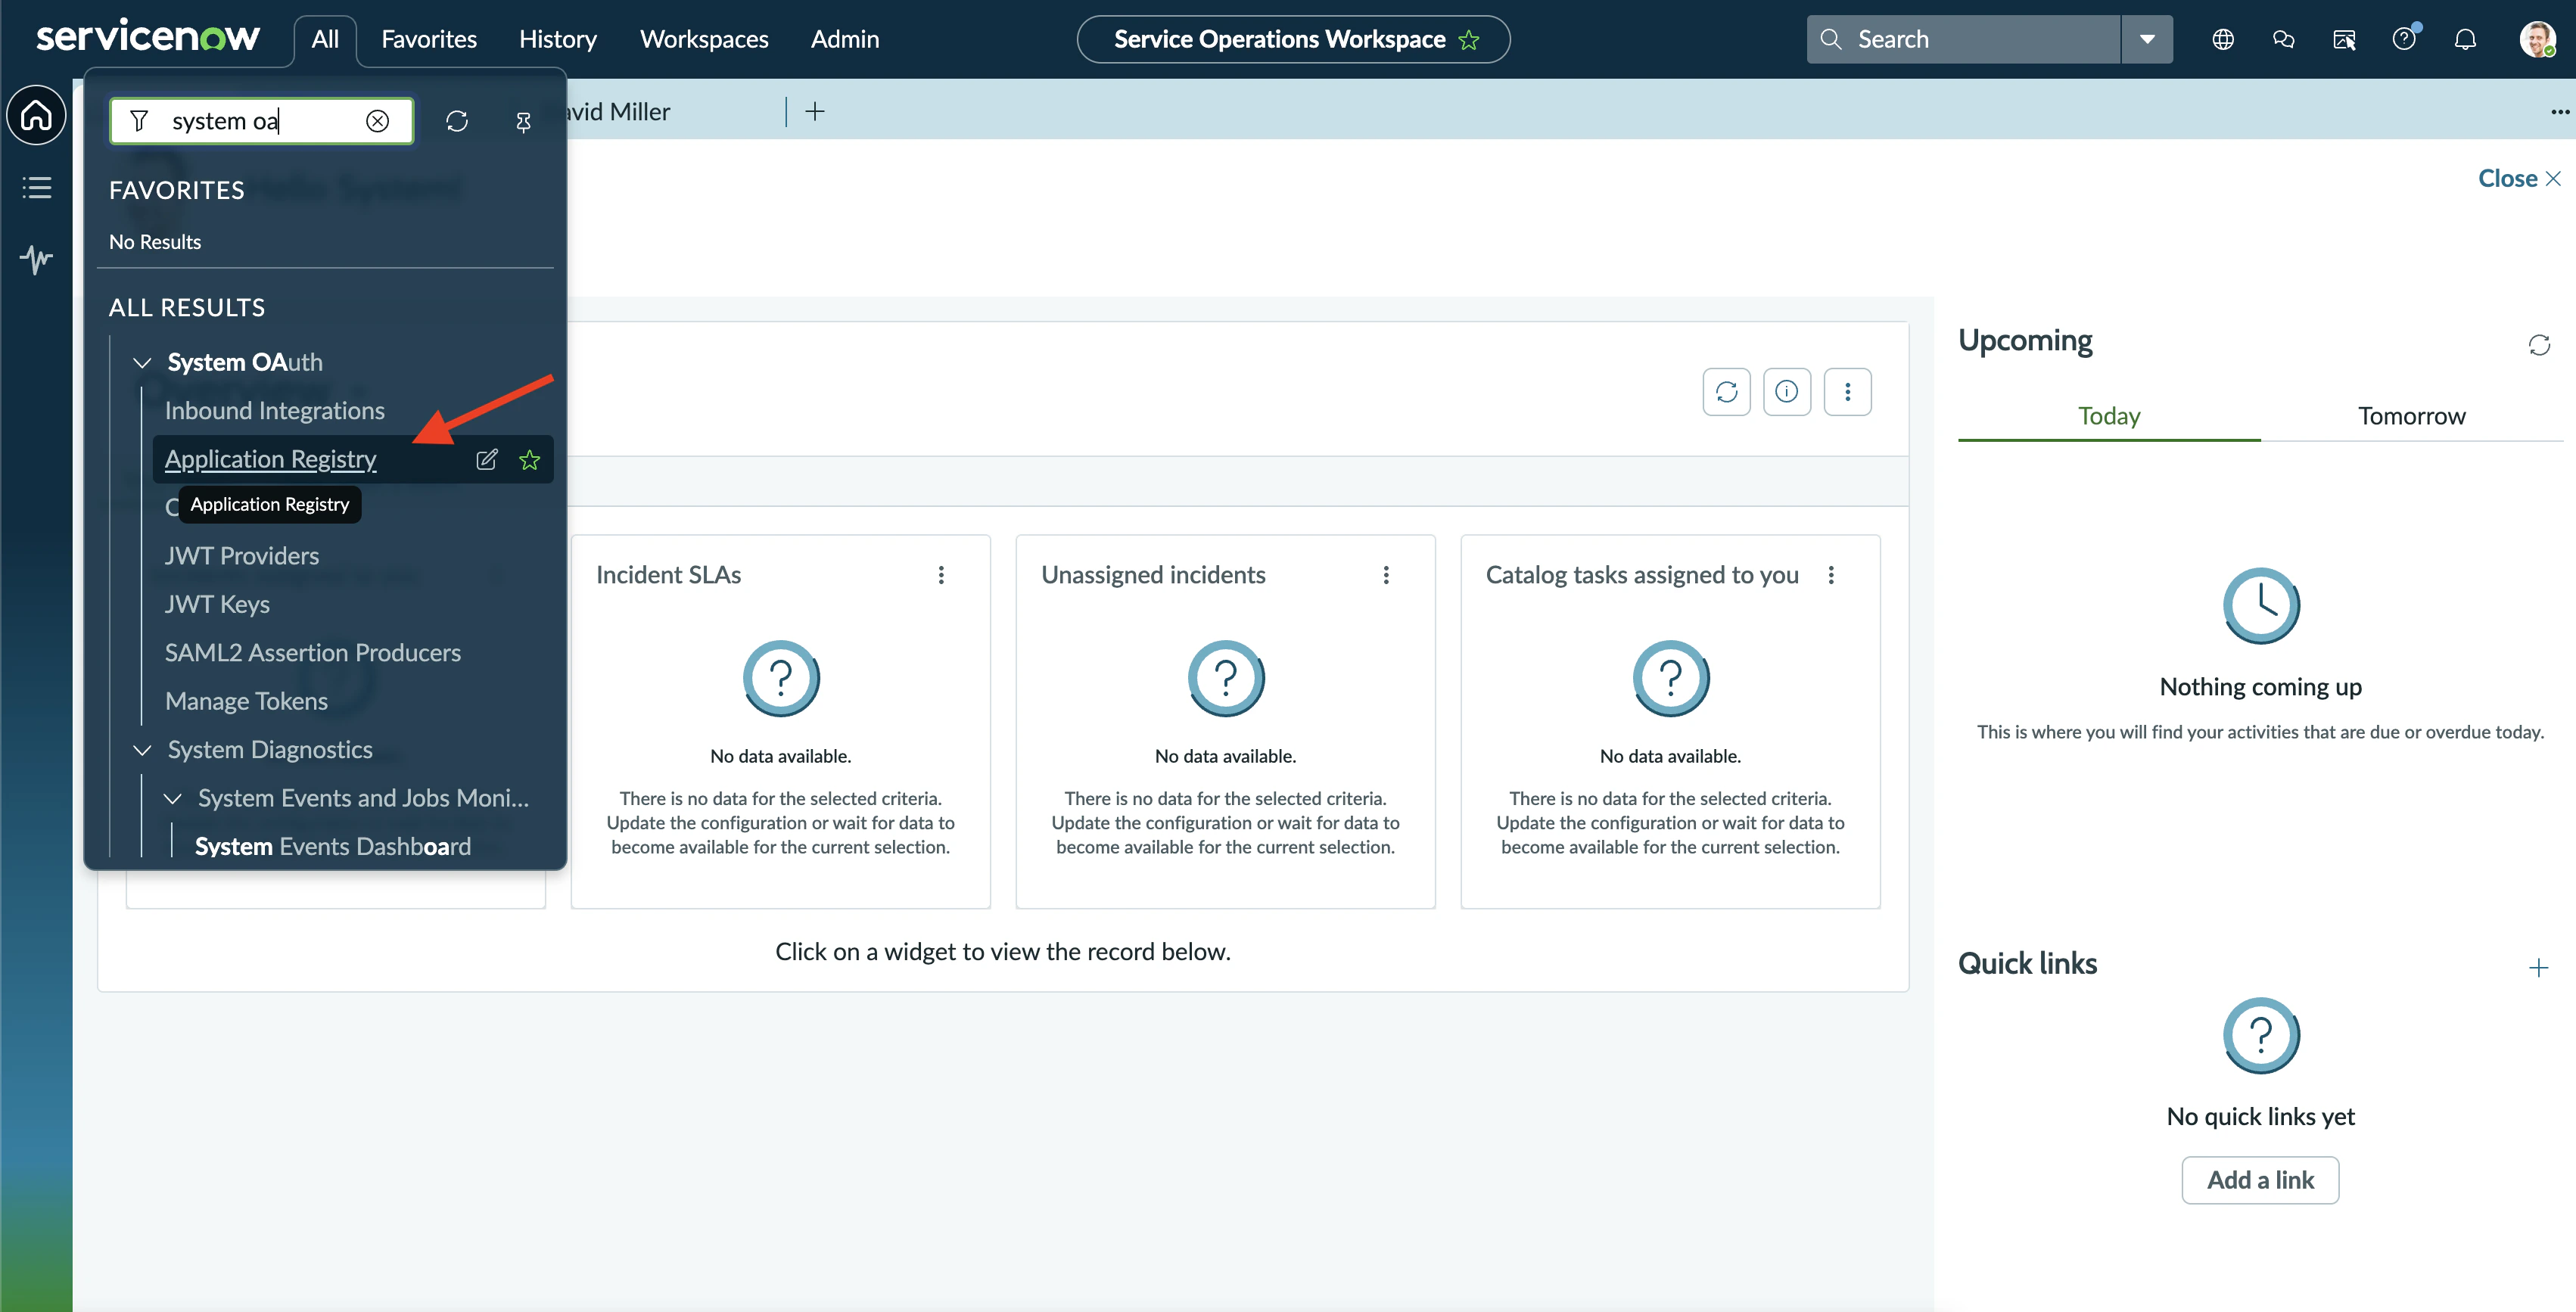
Create a new OAuth integration
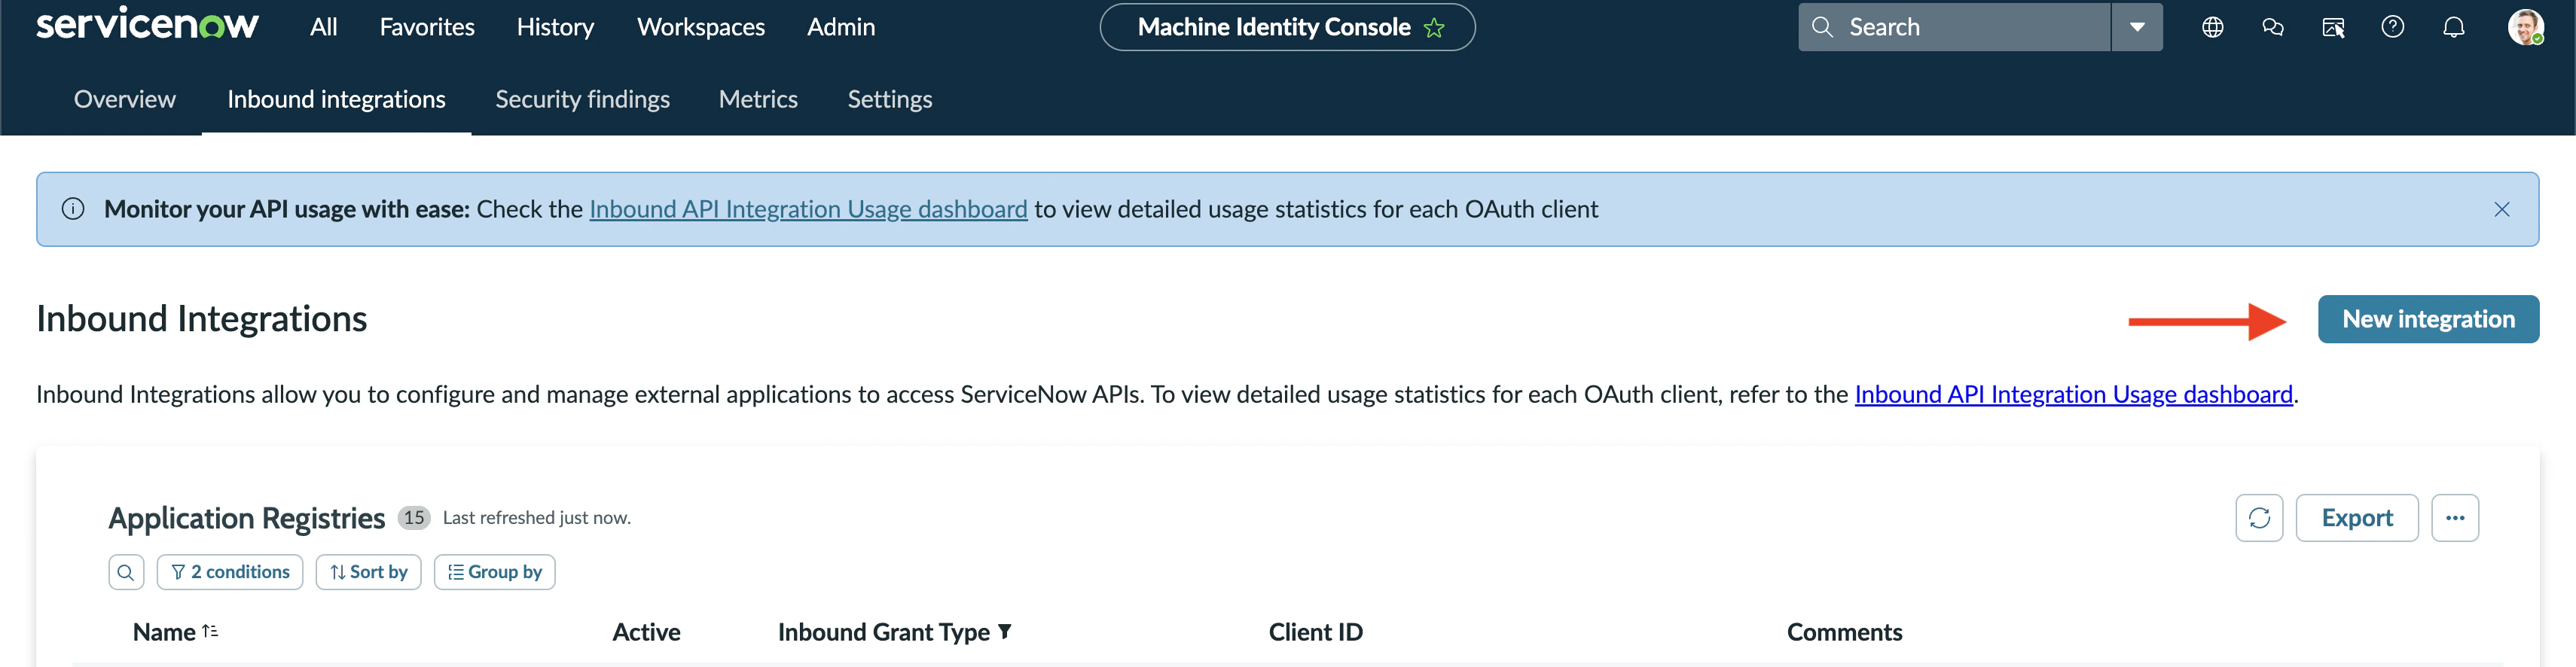
You’ll land on the Application Registries list. Click New (top-right) to create a new OAuth app.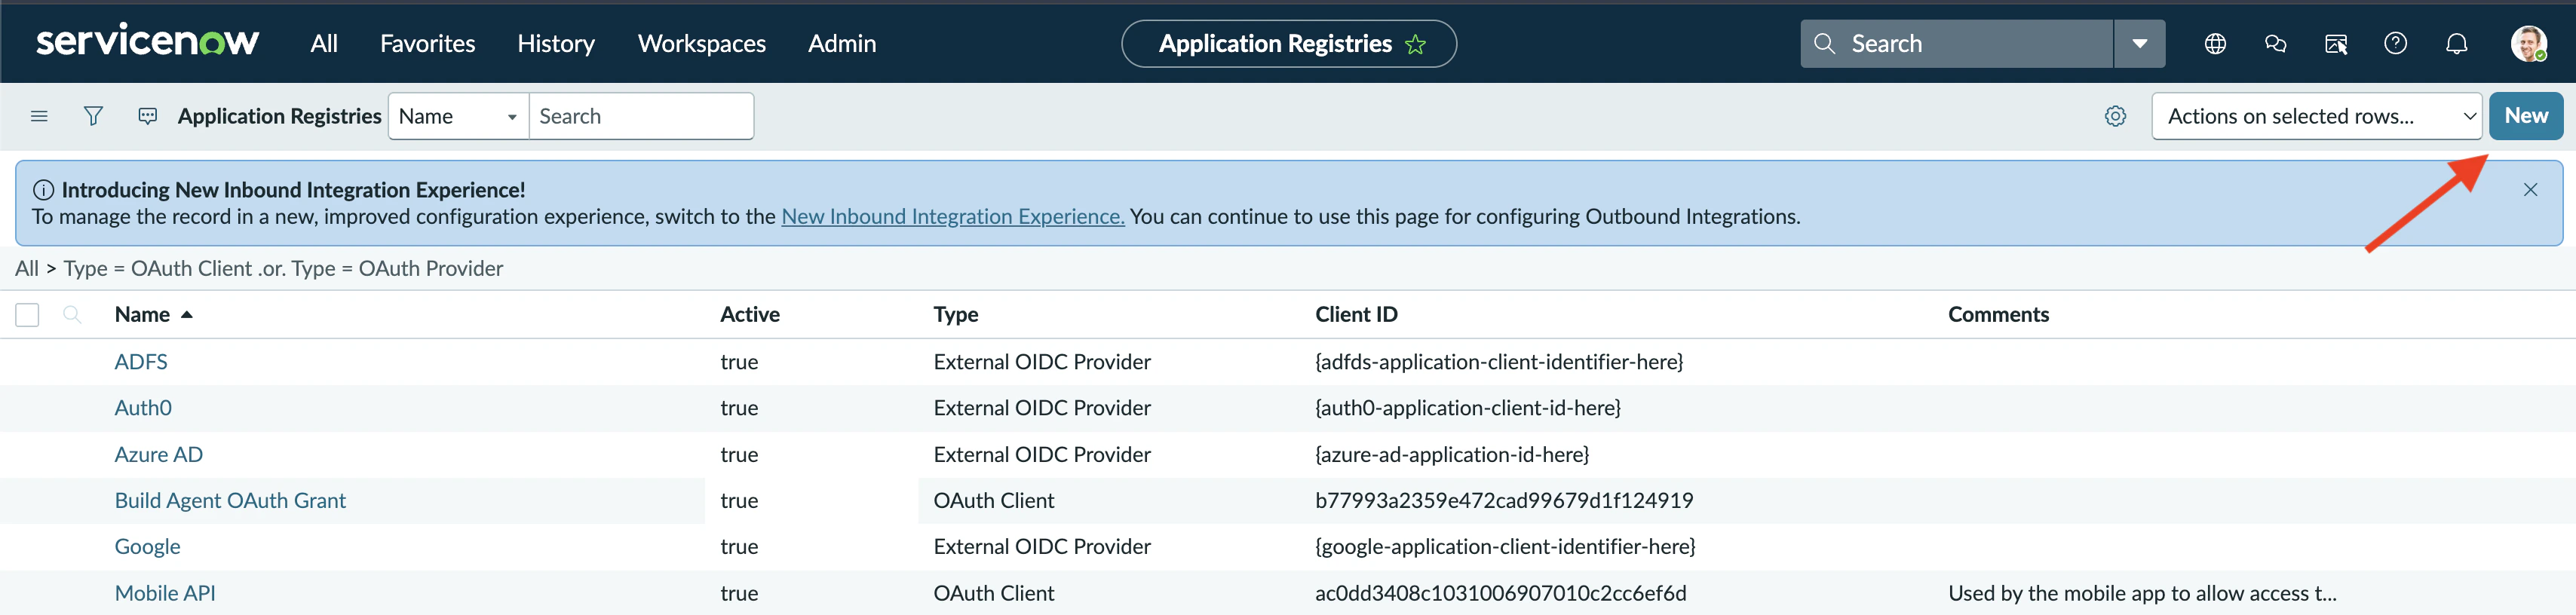
Pick the OAuth grant type
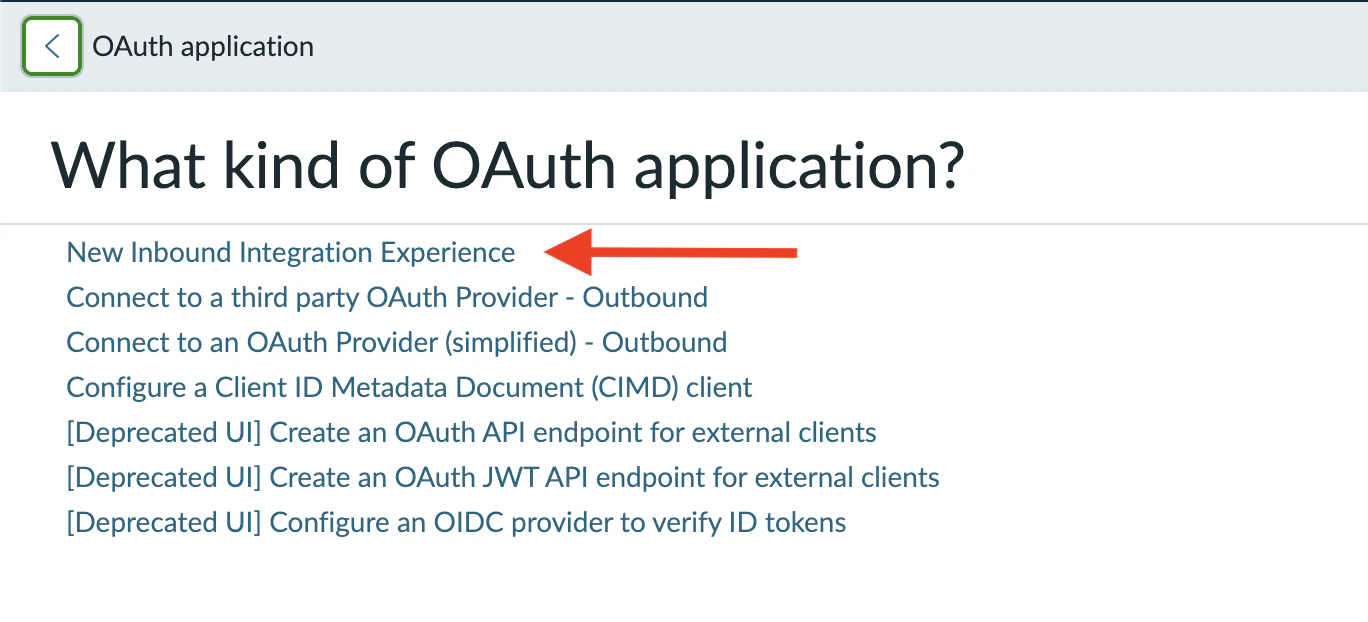
ServiceNow asks you to Select your application connection type. Choose OAuth - Authorization code grant (the first option).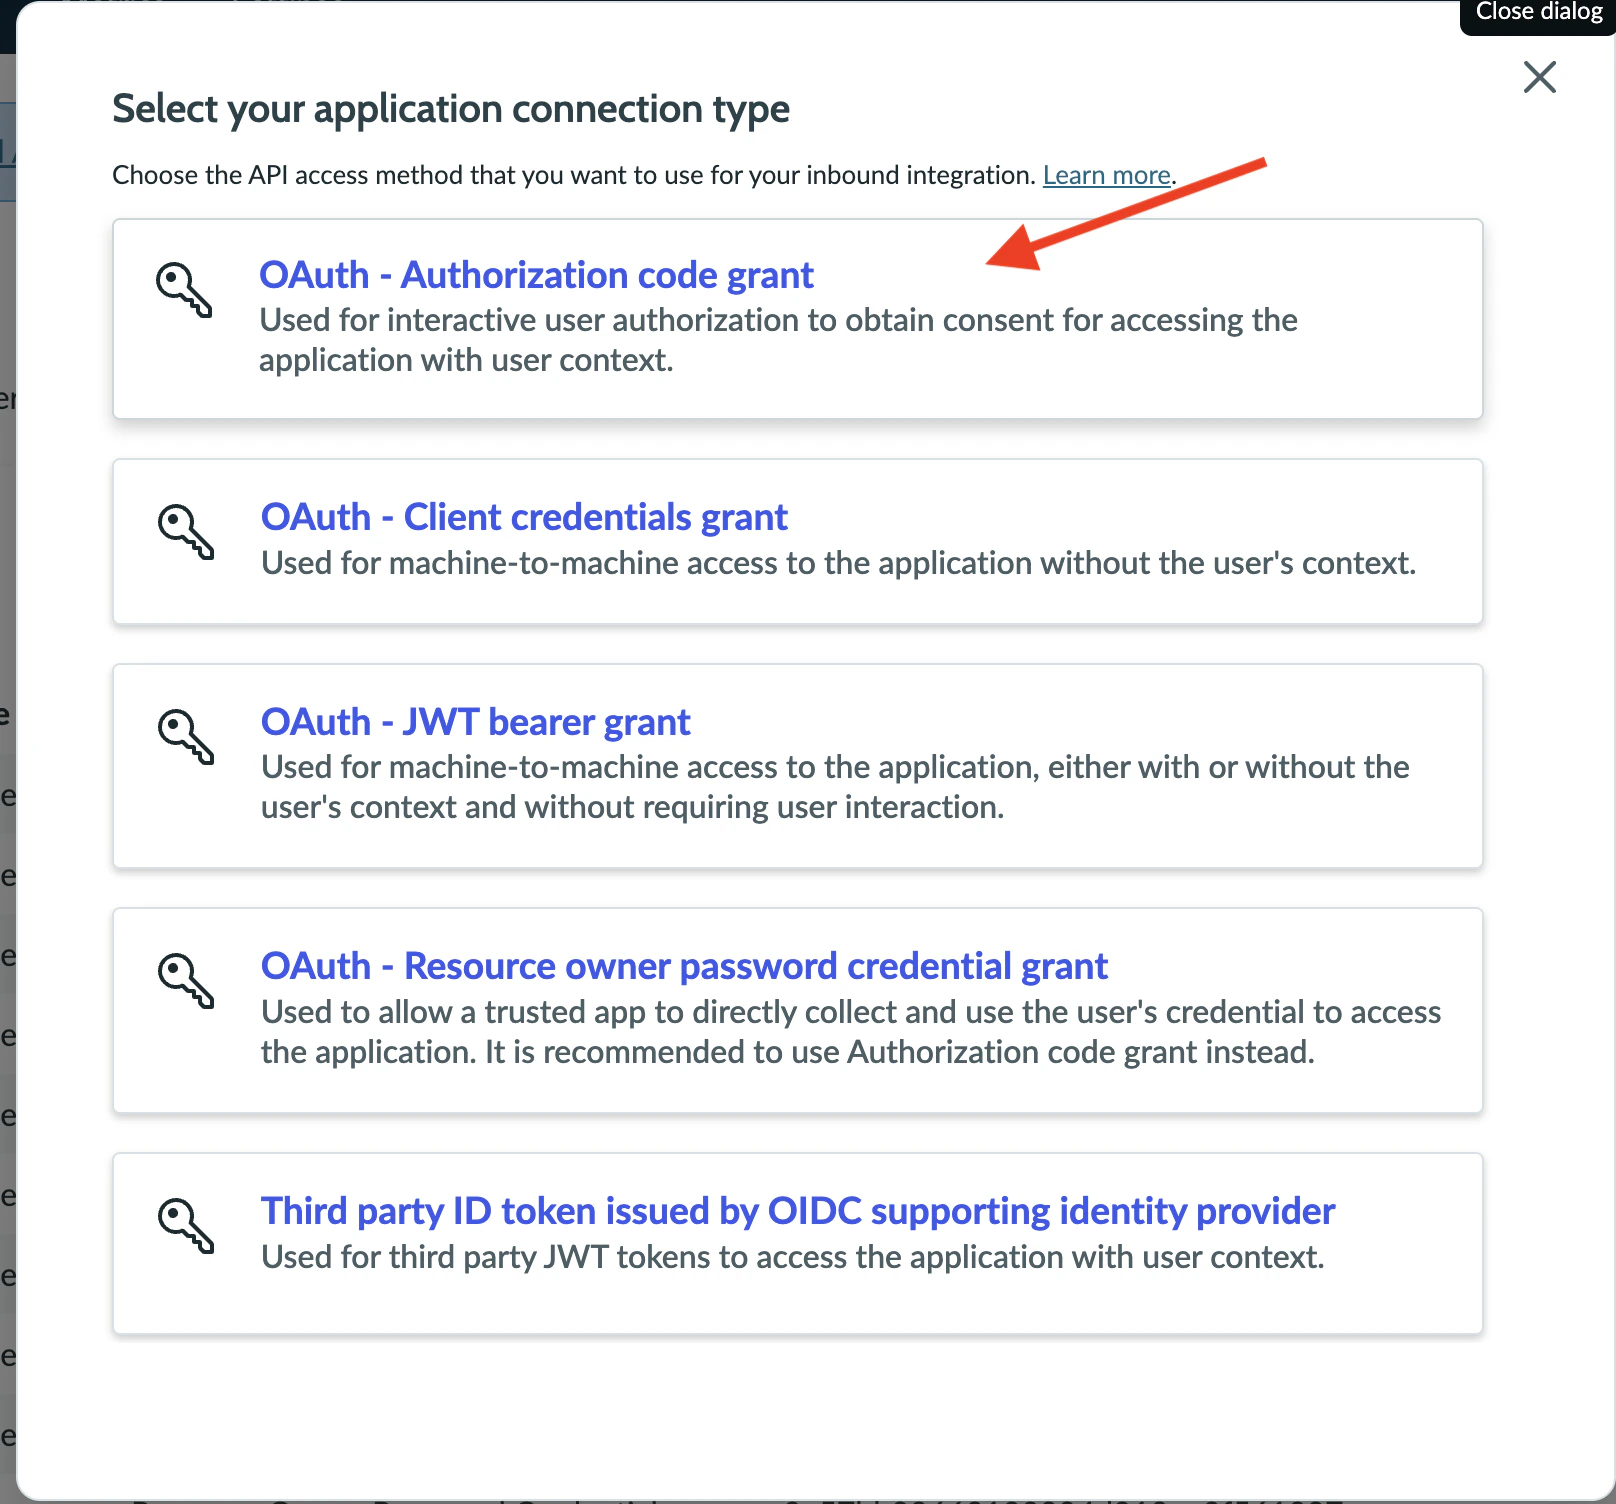
Neo uses the Authorization Code grant deliberately so every action Neo takes (notes, state changes, time entries) is attributed to the OAuth user in your ServiceNow audit logs. Other grant types either lose user attribution (Client credentials, JWT) or require Neo to know the user’s password directly (Resource owner password) — none are appropriate.
Configure application details
Fill in the basic information for the new OAuth application: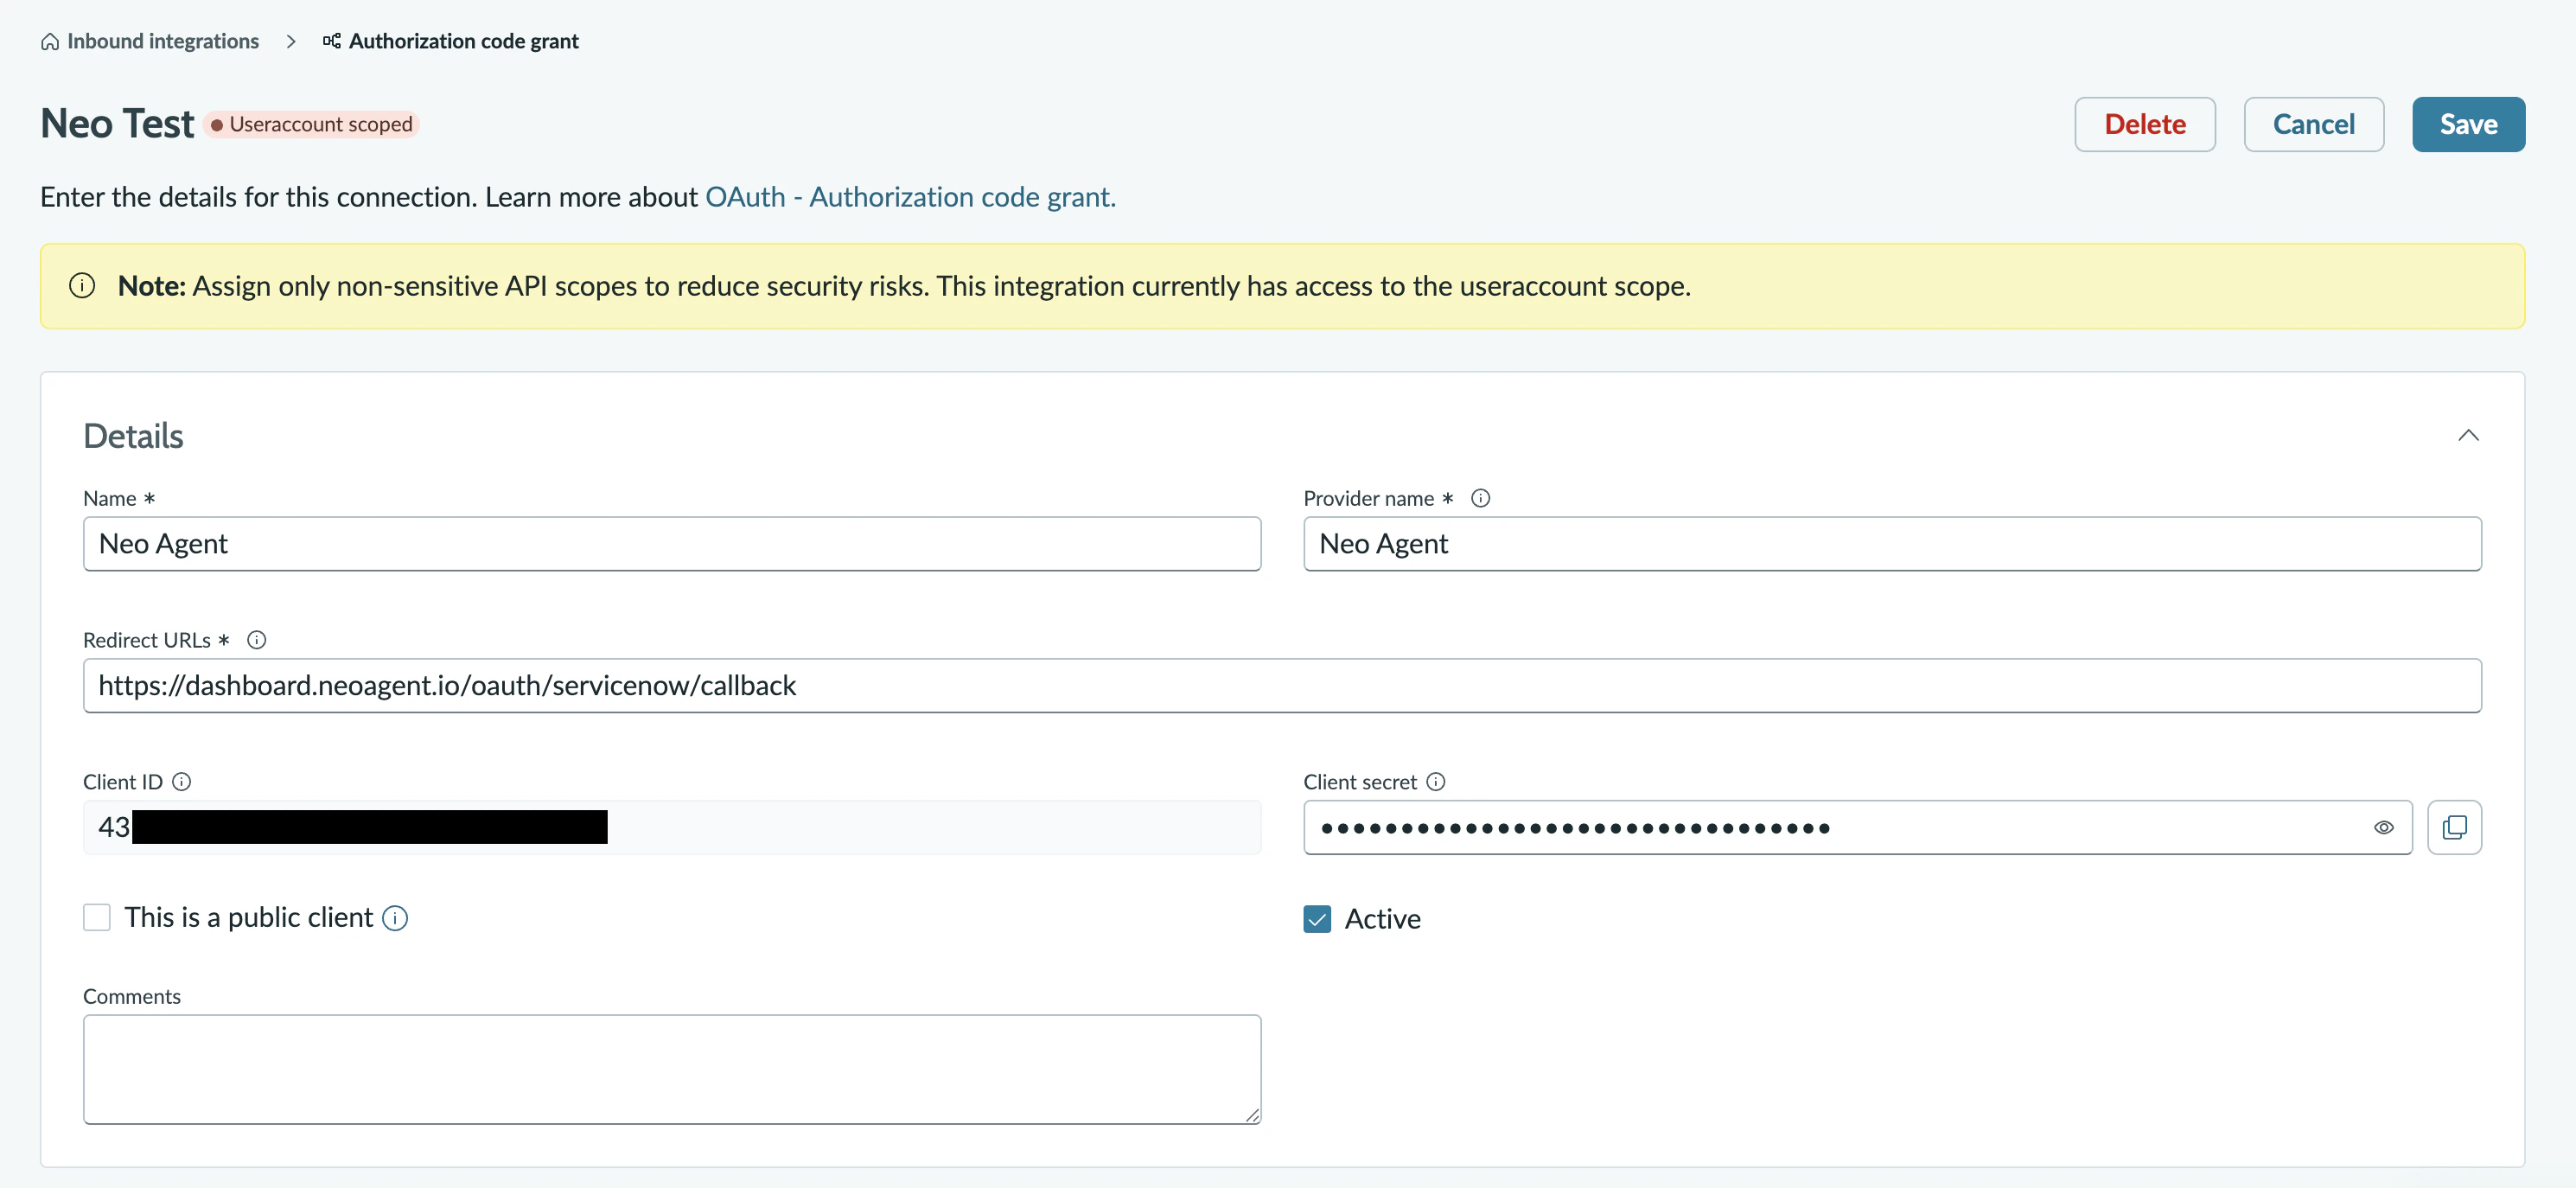
A descriptive name like
Neo Agent or Neo Agent Integration. This appears in your ServiceNow audit logs whenever Neo authenticates.Set this to exactly:This is where ServiceNow sends the authorization code back to Neo after consent. The URL must match exactly — extra trailing slashes or query parameters will fail.
The default of
8,640,000 seconds (100 days) is recommended. Shorter lifespans force more frequent reconnects.The default of
1800 seconds (30 minutes) is fine. Neo refreshes access tokens automatically using the refresh token.Create the Neo service account user
ServiceNow’s Authorization Code grant runs as a specific user — and that user choice is permanent for the lifetime of the integration. Every note, comment, state change, time entry, and ticket assignment Neo creates is attributed to that user in your audit trail. The
assigned_to field on tickets Neo claims also points at that user.Strongly recommended: create a dedicated Neo Agent service-account user before connecting. Don’t reuse a personal admin account or a shared “integration” user that already handles other systems — Neo’s actions will be indistinguishable from theirs.Create the user with:- A clear
user_namelikeneo.agentand display name likeNeo Agent (Service Account)so audit-log readers immediately recognize automated activity - The
itilrole (so it can read and update task-family records, be assigned tickets, and post customer-visible comments) - Table API read/write on the parent
tasktable and every subclass your agents will work with —incident,sc_request,sc_req_item,sc_task,change_request,problem - Table API read/write on
sys_journal_field(notes),task_time_worked(time entries),sys_userandsys_user_group(assignment lookups), and any customu_*columns your agents need to set - The
email_api_sendrole if you plan to use Neo’s “Email (sent via PSA)” notification mode. This is what lets Neo POST to/api/now/v1/email— the same path the SN UI Email tab uses. Skip this role if you only need note-based notifications; Neo will surface a clear inbox alert if it’s missing and you try to send. - Active = true. Don’t enable email notifications on this user — Neo doesn’t need them and they create noise
- A password you can sign in with (you’ll log into ServiceNow as this user during the connect step)
Save your credentials
After saving, the form shows the application’s authentication credentials (visible in the screenshot above) — Client ID and Client Secret. Make note of:
- Client ID — a unique identifier (string of letters and numbers)
- Client Secret — the password-equivalent (treat it like a password, don’t share)
- Your instance URL — for example
https://acme.service-now.com(no trailing slash, no path)
Before continuing, confirm:
- The OAuth application is Active
- The Redirect URL is exactly
https://dashboard.neoagent.io/oauth/servicenow/callback - You’ve saved the Client ID and Client Secret somewhere secure
- You’ve created a dedicated Neo Agent service account user (not a personal admin account) with the
itilrole and Table API read/write on the task family - You know the password for the service account user — you’ll need to sign into ServiceNow as that user on the next page
What’s Next?
Once you’ve created the OAuth application, you’re ready to connect ServiceNow to Neo Agent using:- The Client ID from your OAuth application
- The Client Secret from your OAuth application
- Your ServiceNow instance URL
- A login for the Neo service account user you just created — not a personal admin account