You’ll need the API credentials and configuration details from your ConnectWise API member to complete this setup.
Required Information
Before starting the connection process, gather the following information from your ConnectWise system:The text-based Member ID you created for the Neo API member (e.g.,
neo_agent). This is found in System → Members → API Members.The Public Key generated for your Neo API member. This acts as the username for API authentication.
The Private Key generated for your Neo API member. This acts as the password for API authentication.
Your ConnectWise API base URL (e.g.,
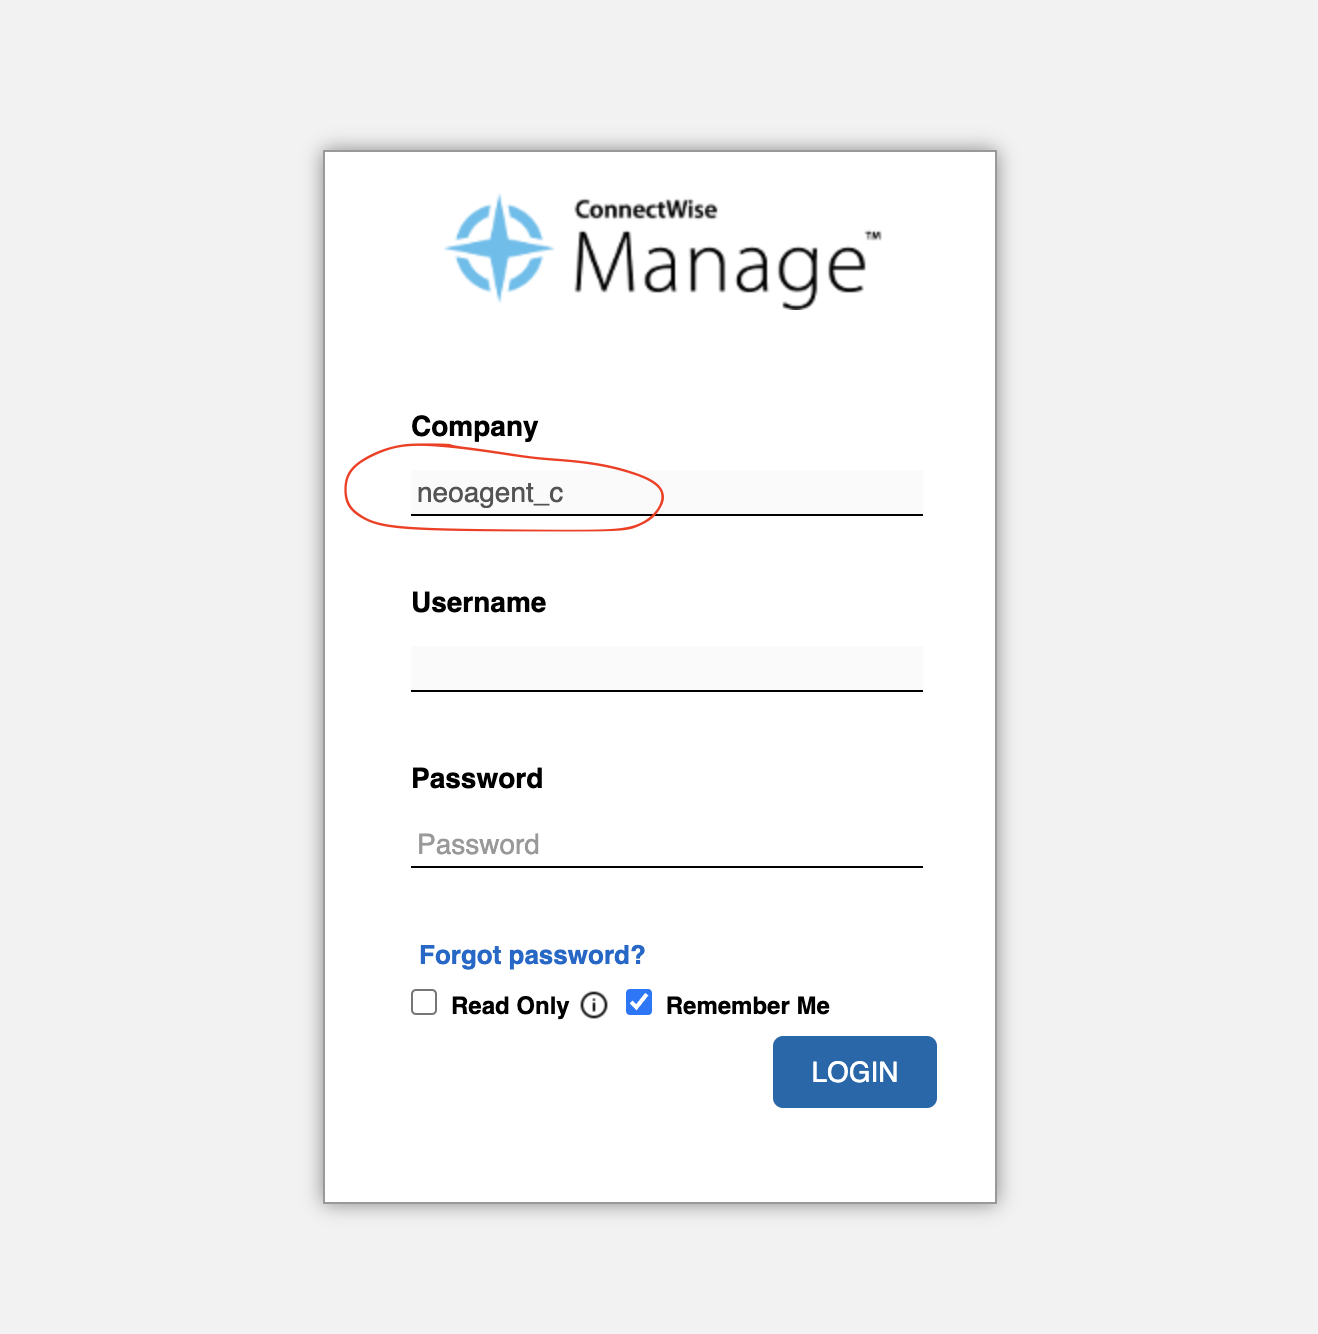
https://api-na.myconnectwise.net/). This is the URL used for API access to your ConnectWise instance.Your company name exactly as shown on the ConnectWise login screen. This must match precisely for authentication to work.
Optional. The Member ID of the regular (non-API) member you created for time entries. Provide this if you want Neo to log its own time entries — ConnectWise won’t let the API-only member create them. Leave blank to skip time-entry logging.
Configuring the Integration
1
Access the Neo Agent Dashboard
Navigate to the Neo Agent Dashboard and log in with your credentials.
2
Select ConnectWise Integration
From the integrations page, find and select ConnectWise from the list of available PSA integrations.
3
Enter Your Credentials
Submit the credentials you gathered from your ConnectWise system: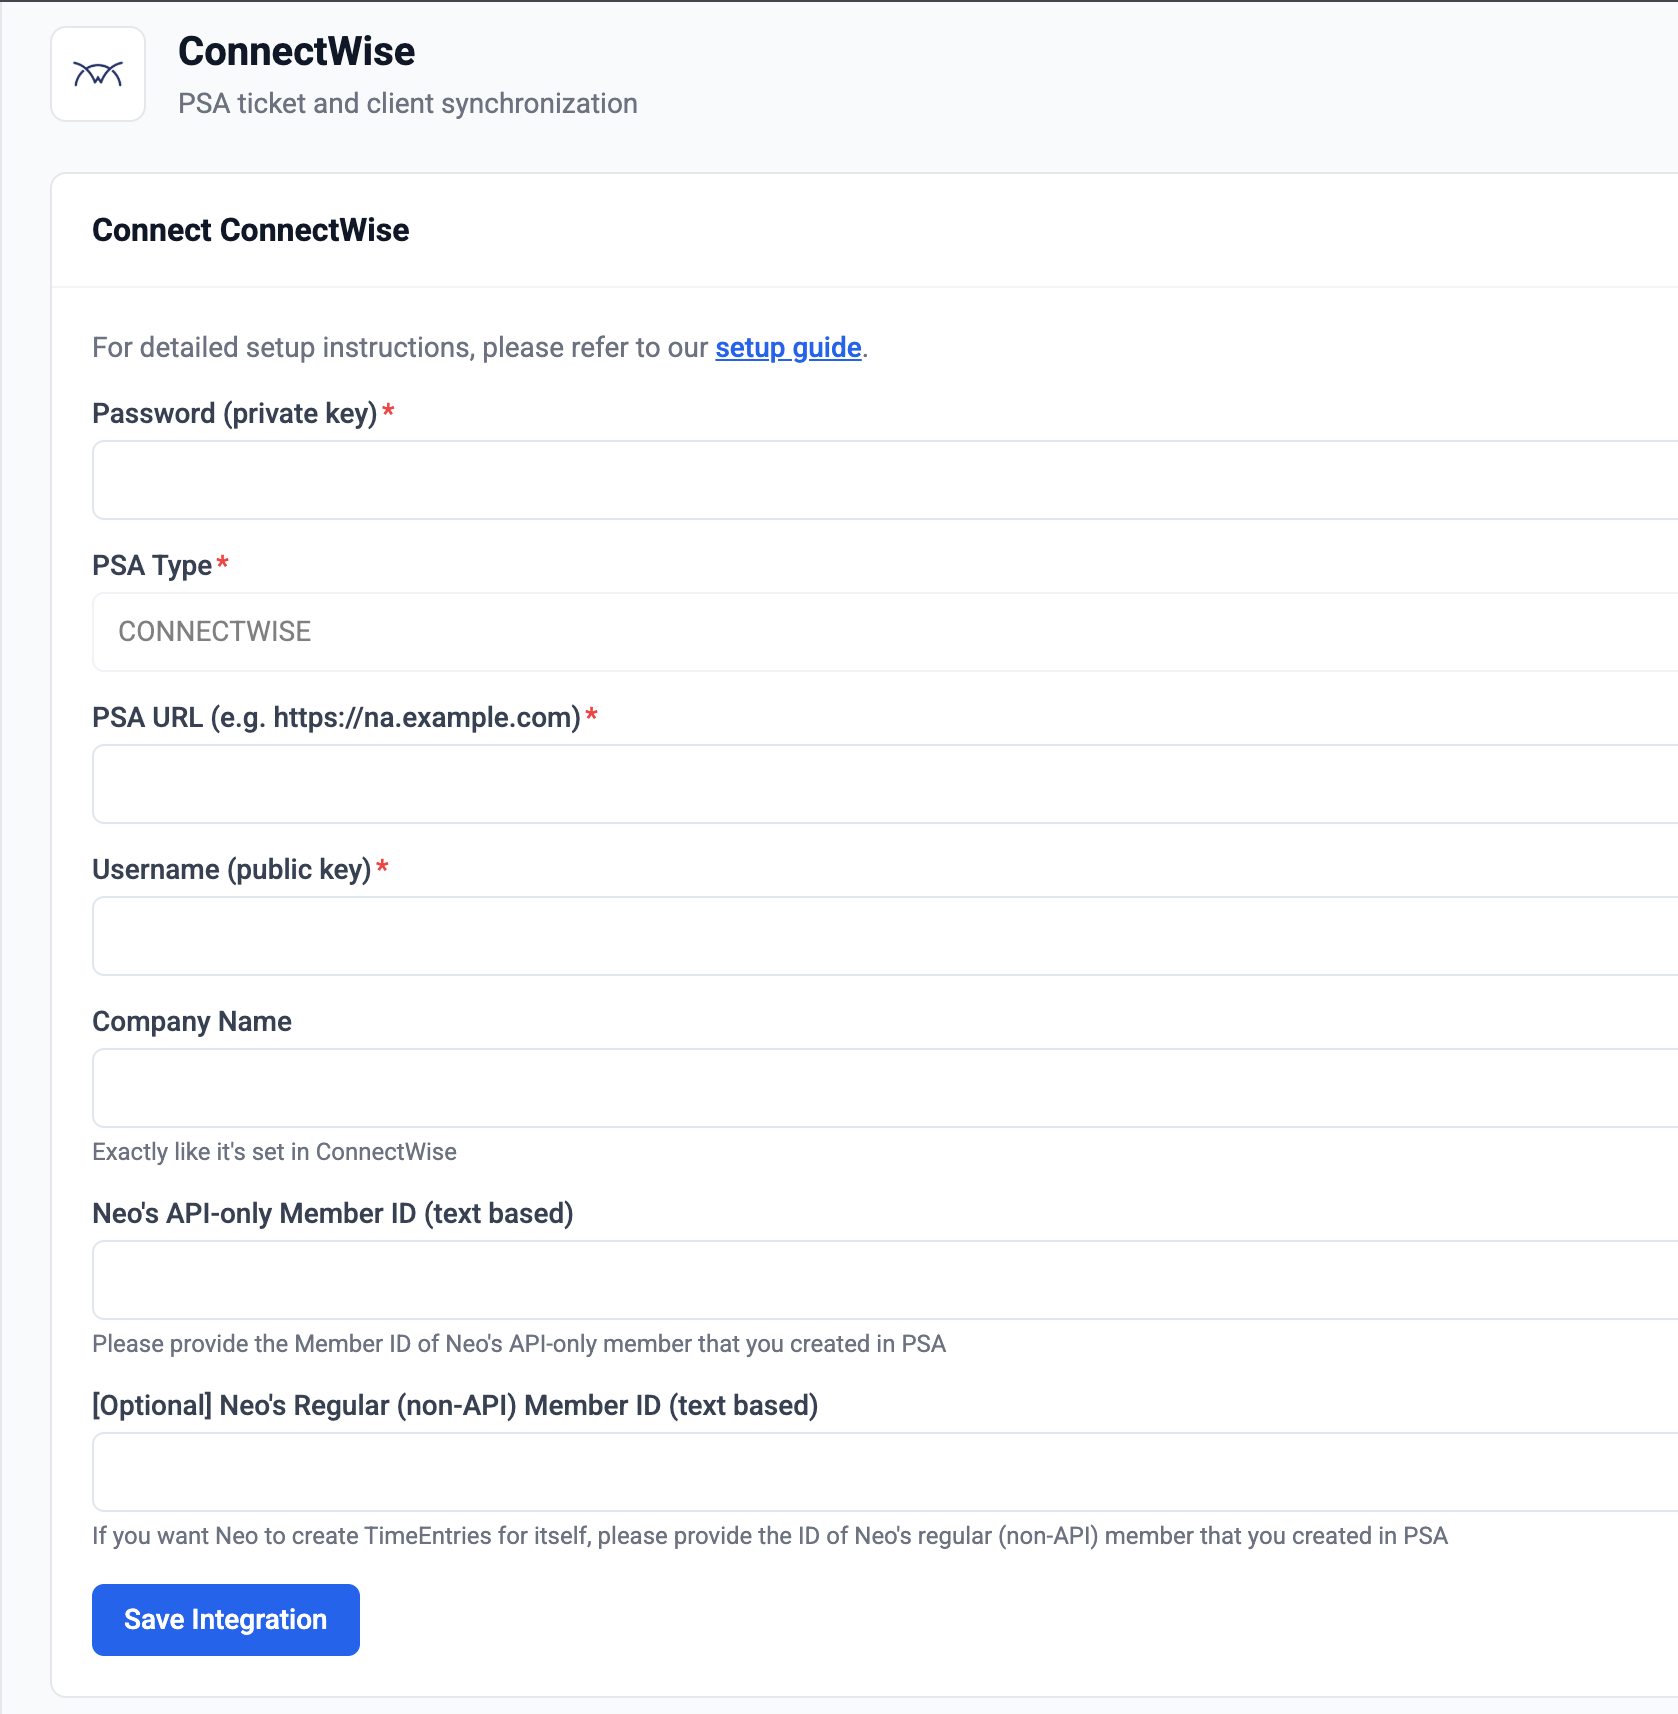
- Username (public key): Enter the generated public key
- Password (private key): Enter the generated private key
- PSA URL: Enter your ConnectWise API base URL
- Company Name: Enter your exact company name from the login screen
- Neo’s API-only Member ID: Enter the Member ID of your Neo API member
- Neo’s Regular (non-API) Member ID (optional): Enter the regular member’s ID if you want Neo to log time entries
4
Test the Connection
Once you’ve entered all credentials, Neo Agent will attempt to establish a connection to your ConnectWise system to verify the configuration.
A successful connection test confirms that Neo Agent can access your ConnectWise system with the provided credentials and security permissions.
5
Save Configuration
After successful testing, save your integration configuration to enable Neo Agent workflows to interact with your ConnectWise system.
Troubleshooting Connection Issues
If you encounter issues during the connection process, check the following:Authentication Errors
Authentication Errors
- Verify that the API Member Identifier is correct and corresponds to an active API member
- Ensure the Public and Private keys were generated correctly in ConnectWise
- Check that the company name matches exactly what appears on the ConnectWise login screen
- Confirm the ConnectWise PSA URL is correct and accessible
Permission Errors
Permission Errors
- Review the security role permissions for your Neo API member
- Ensure all required permissions listed in the API member creation guide are assigned
- Verify that both Inquire and Add/Edit levels are set correctly
- Check that the “Neo” security role is properly assigned to the API member
Network Connectivity
Network Connectivity
- Confirm your ConnectWise PSA URL is accessible from external networks
- Check if any firewall rules might be blocking API connections
- Whitelist Neo Agent’s IP address if your system restricts access by IP
- Test the URL accessibility from outside your network
Time entries fail with 'API member does not have access to the Time module'
Time entries fail with 'API member does not have access to the Time module'
ConnectWise blocks API-only members from creating time entries — this is a ConnectWise restriction, not a permissions setting. Granting Time & Expense on the security role is necessary but not sufficient: the time entry must be owned by a regular (non-API) member.To fix it:
- Create a regular (non-API) member for Neo and assign it the Neo security role.
- Enter that member’s ID in the Neo’s Regular (non-API) Member ID field and save the integration.
What’s Next?
With your ConnectWise system successfully connected to Neo Agent, you can now:- Create Workflows: Build automated workflows that interact with your ConnectWise tickets and data
- Set Up Pod Integration: Consider setting up the ConnectWise Pod for seamless in-PSA access