M365 Automation Setup Guide
Neo performs M365 actions using MS Graph API and PowerShell scripts.
To do that on behalf of an MSP's end client, Neo needs access to the end client's Azure Tenant.
The below steps must be performed for every end client.
The person who executes them should be logged in the end_client's tenant and have Admin permissions
Step 1: Obtain the end client's tenant ID
-
Below we'll use your end client's tenant ID to authenticate
Neo AutomationsAzure App -
You can find the Tenant ID in
Azure Portal → Microsoft Entra ID:
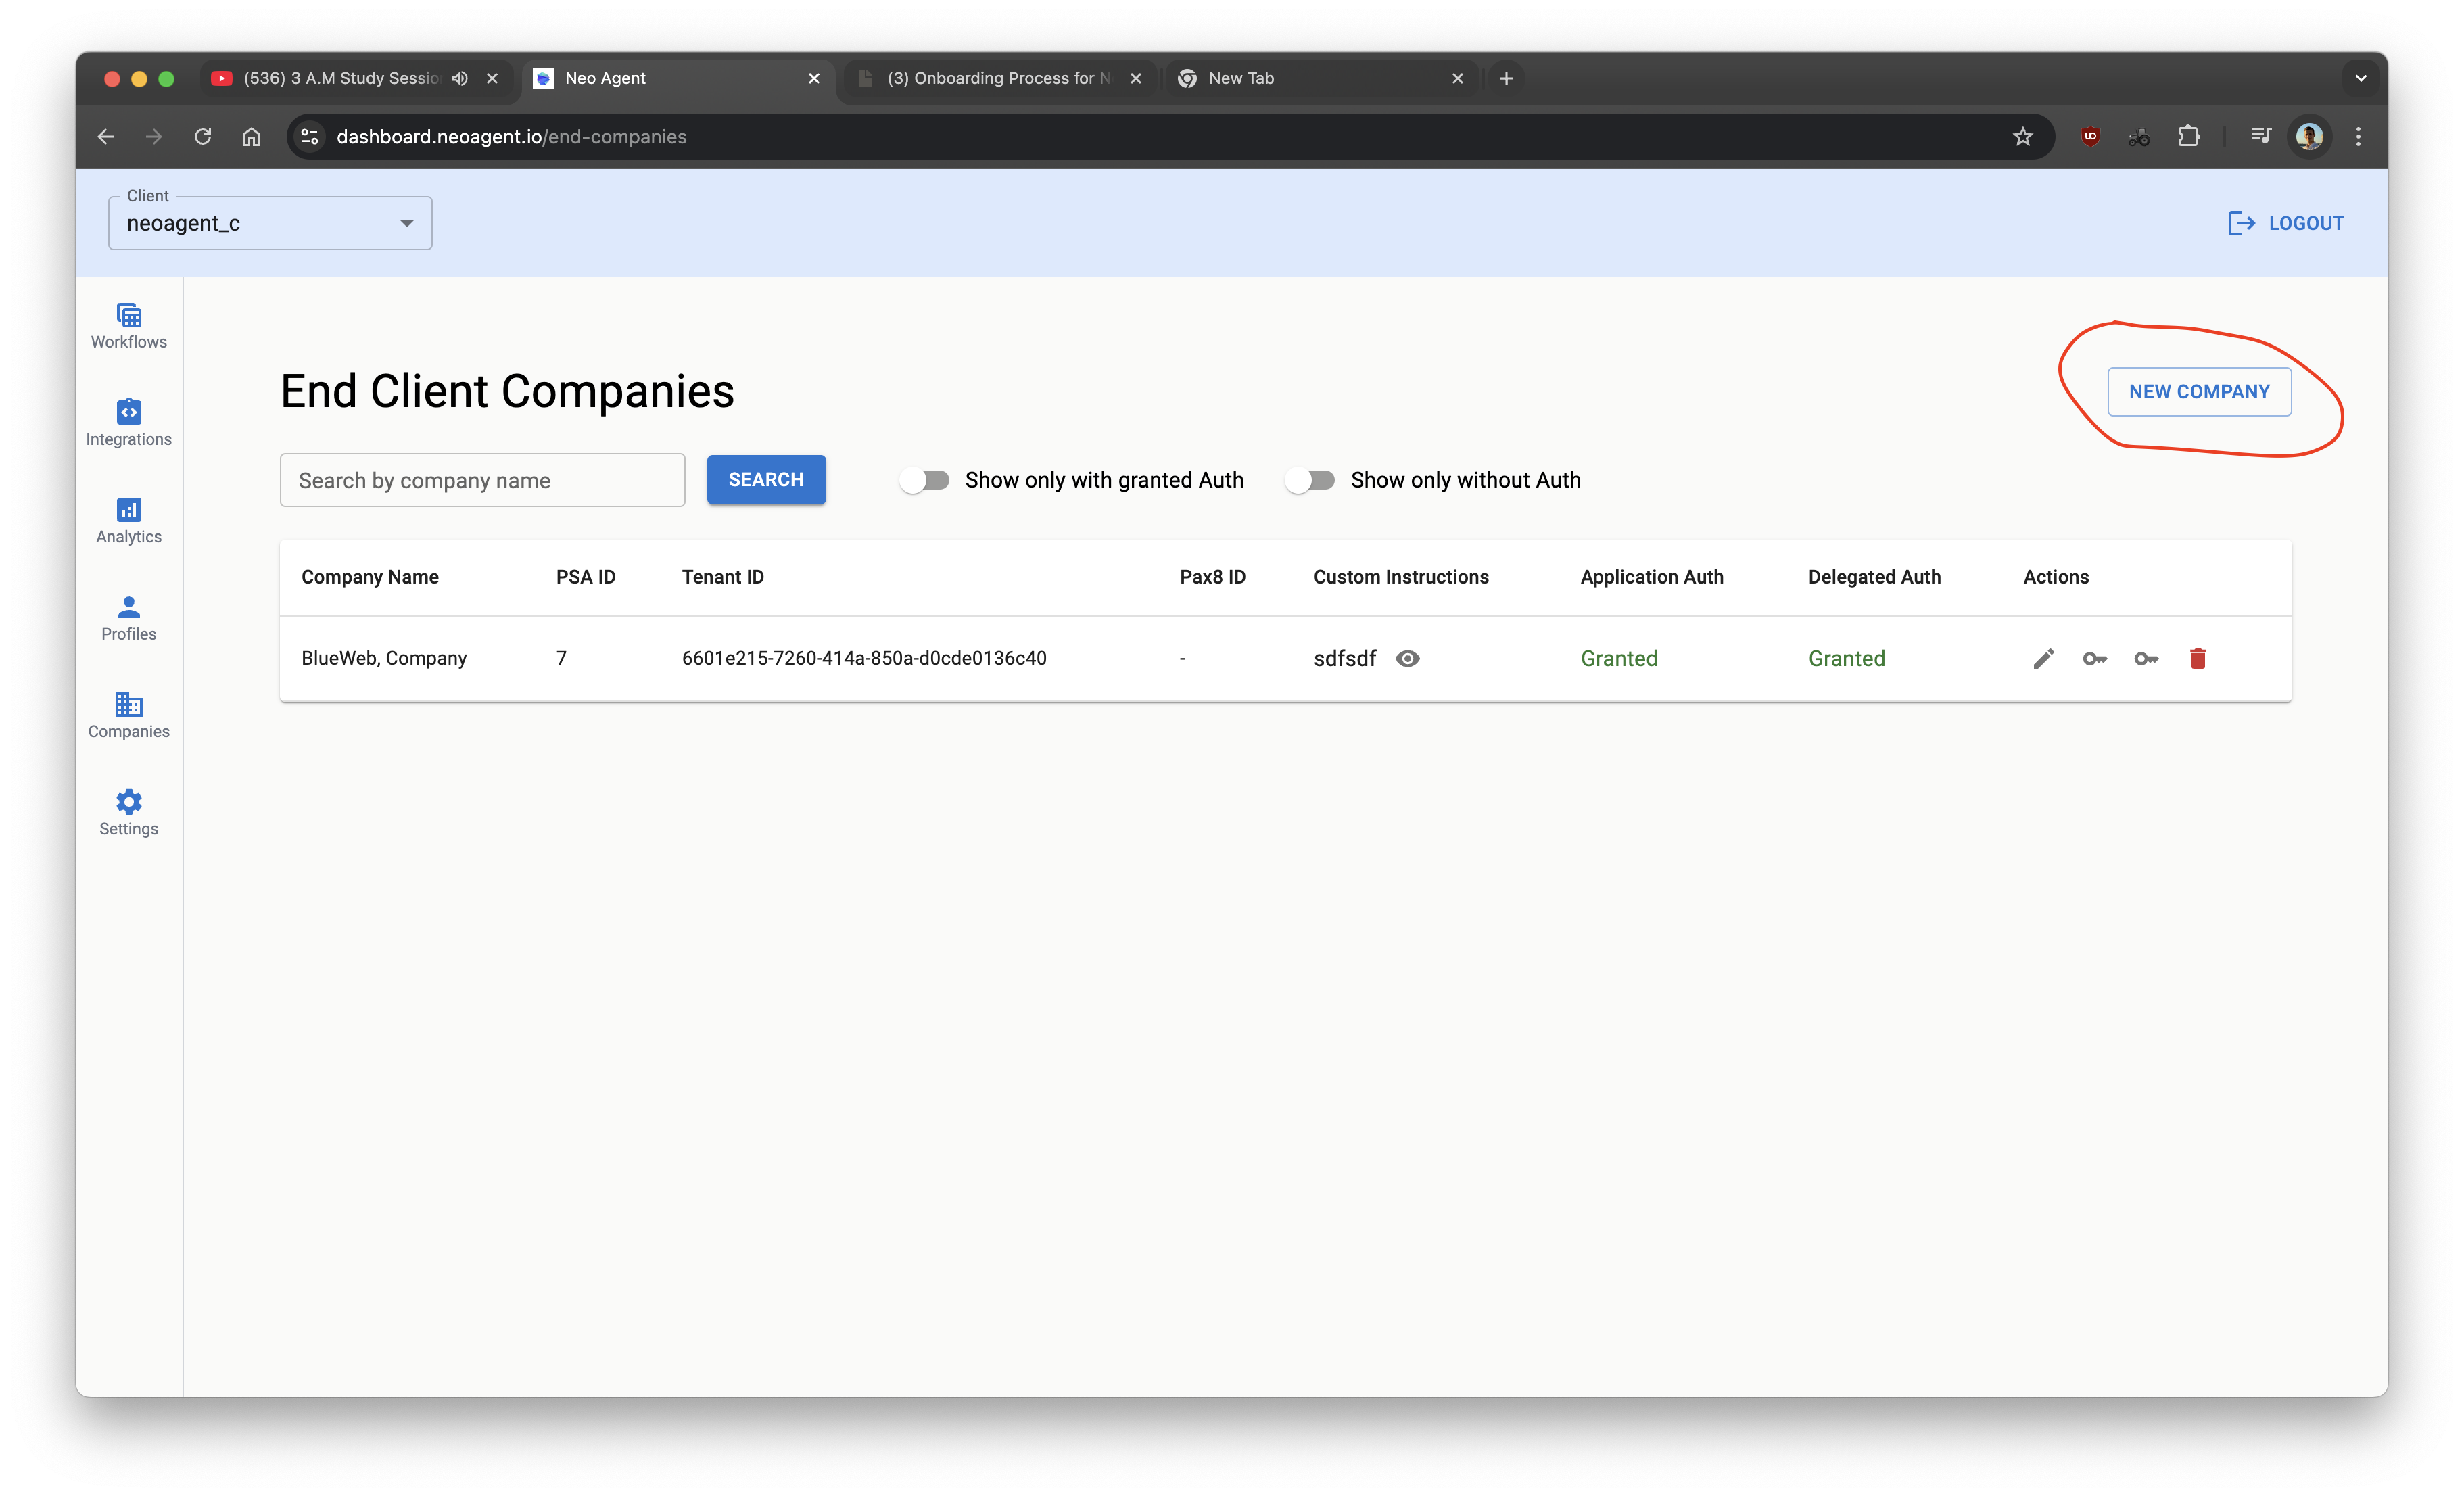
Step 2: Add a company in Neo Dashboard
- Go to https://dashboard.neoagent.io/end-companies and click
New Company
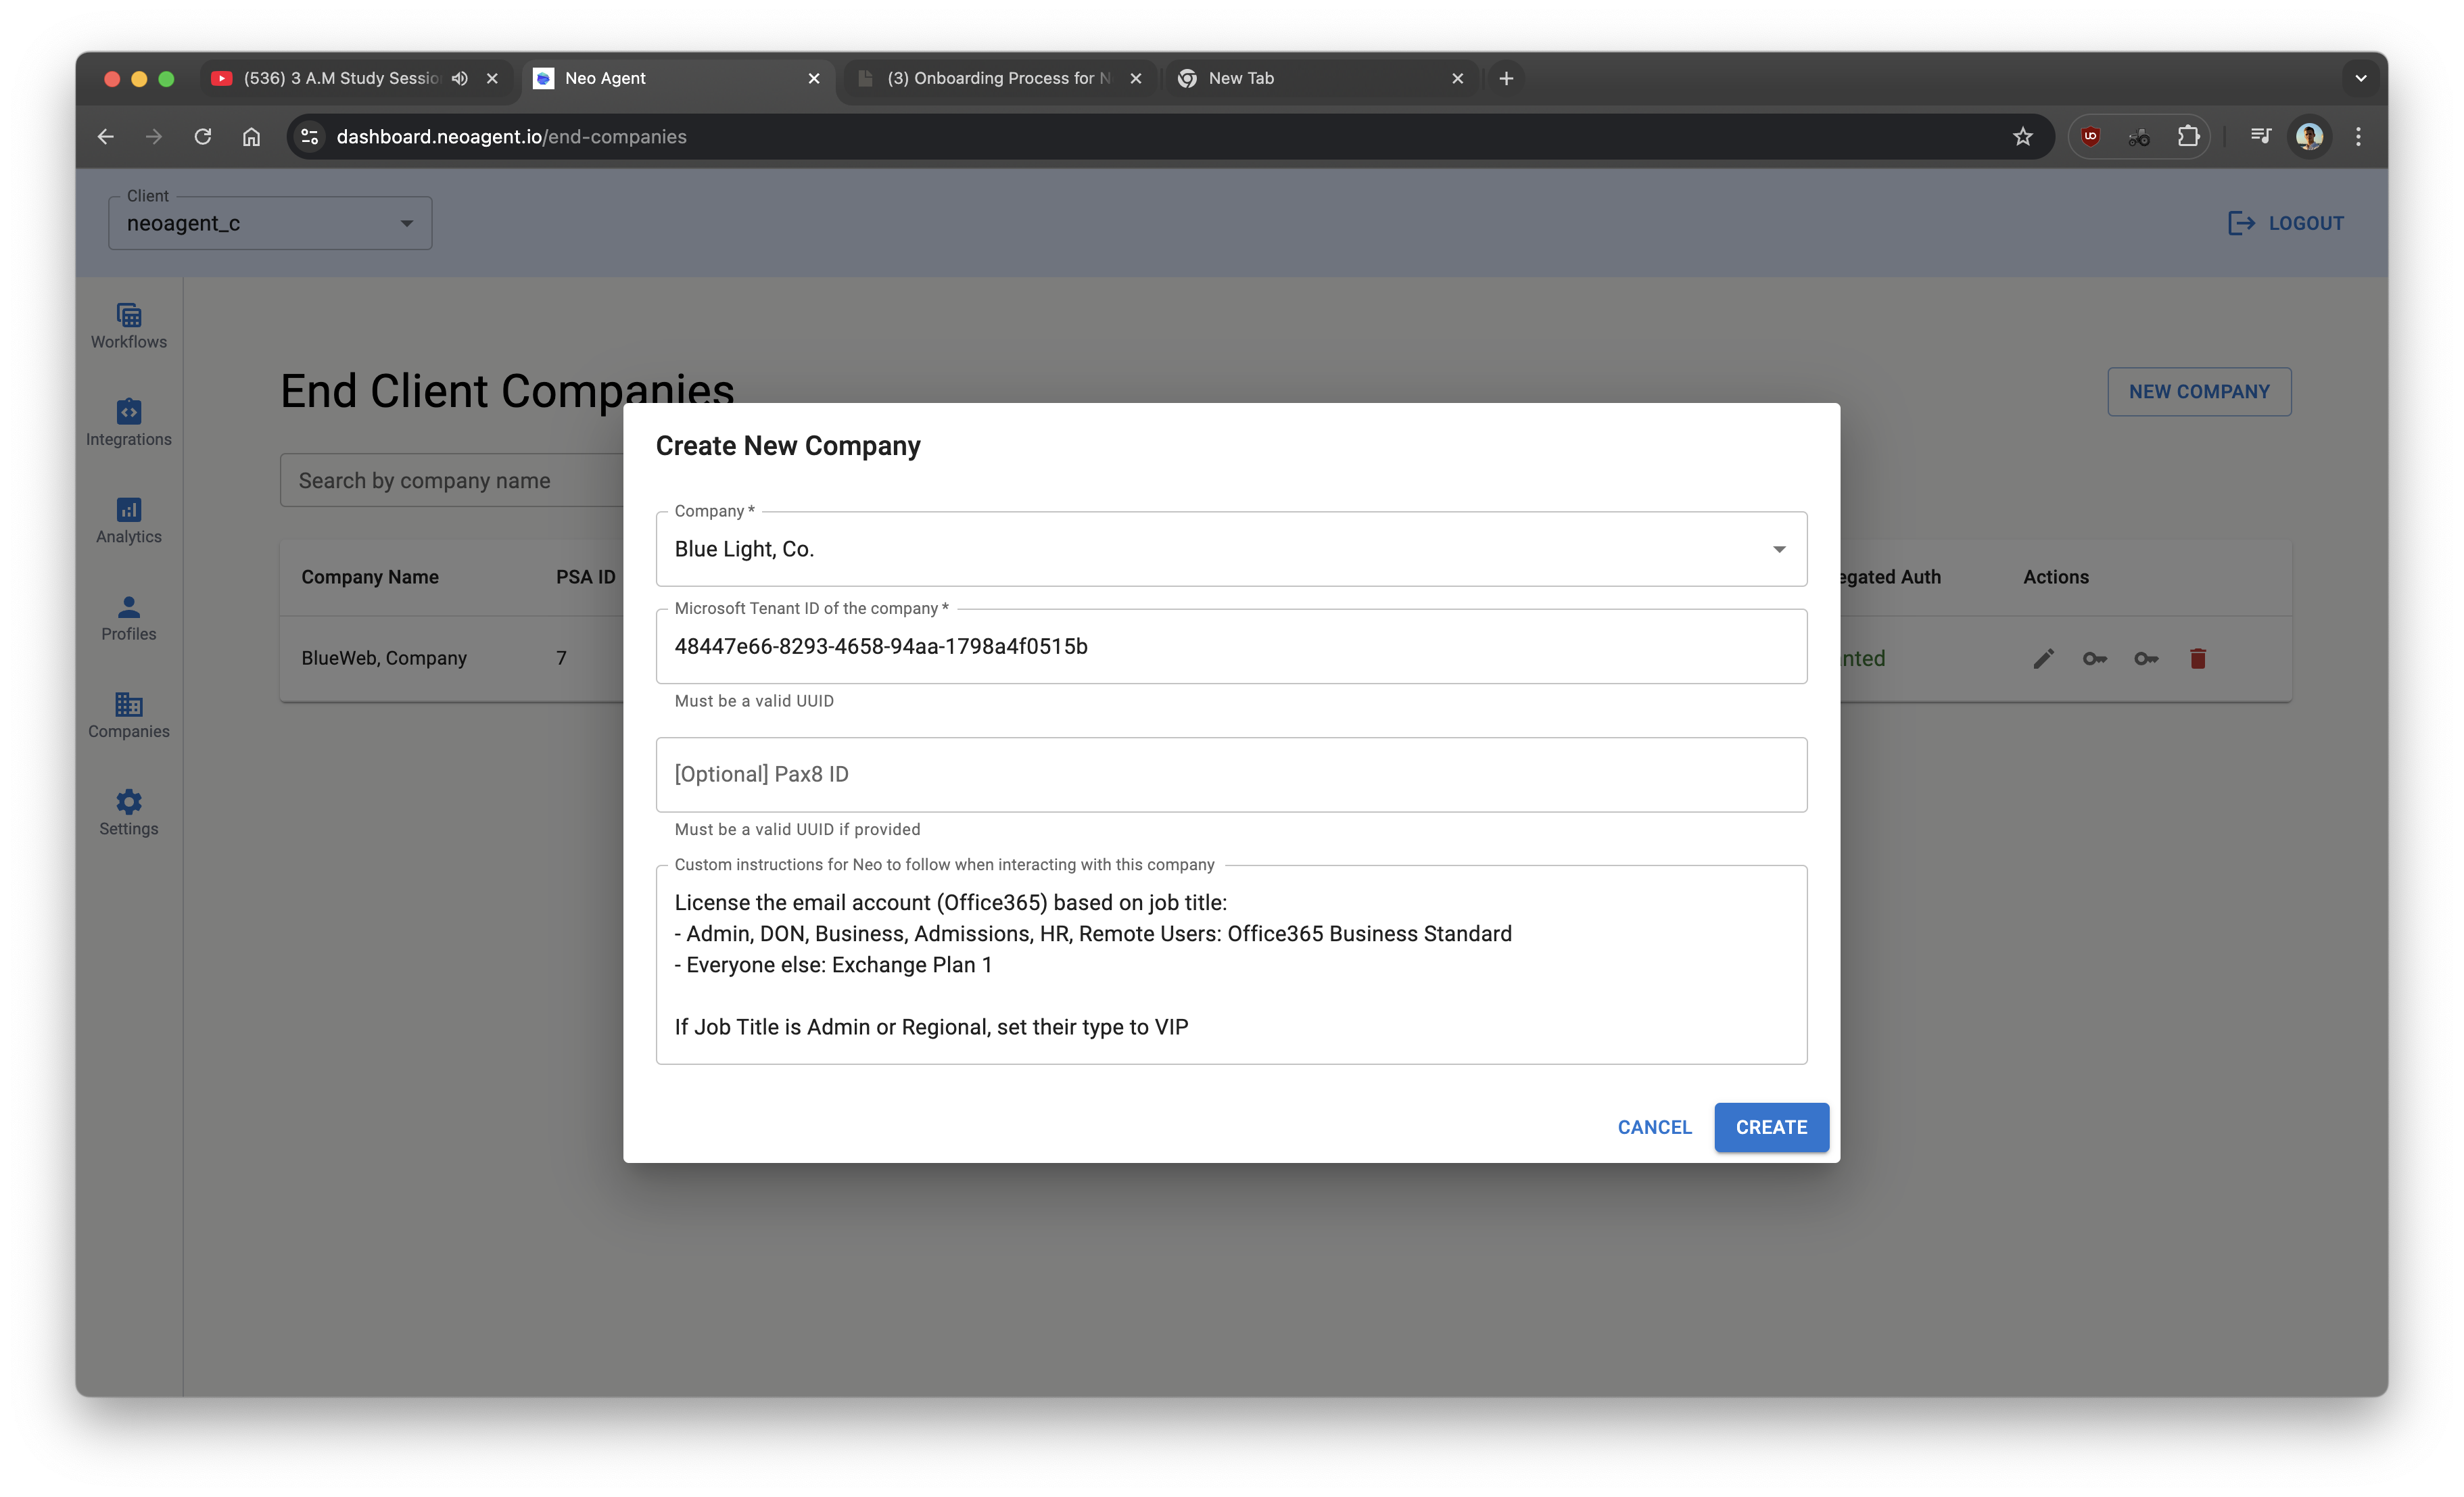
- Fill data
- Pax8 is Optional. Fill it if you use Pax8 to manage Microsoft Licenses
- Custom instructions are Optional. They allow Neo to follow customer-specific rules during Onboarding and Offboarding
- Click
Create
- Click on both key icons to grant Application and Delegated access to Neo
- You must be logged in Tenant's Directory as Admin with one of Azure AD roles:
- Global administrator
- Privileged authentication administrator
- Authentication administrator
- Grant permissions in a standard Microsoft Auth flow
- You must be logged in Tenant's Directory as Admin with one of Azure AD roles:
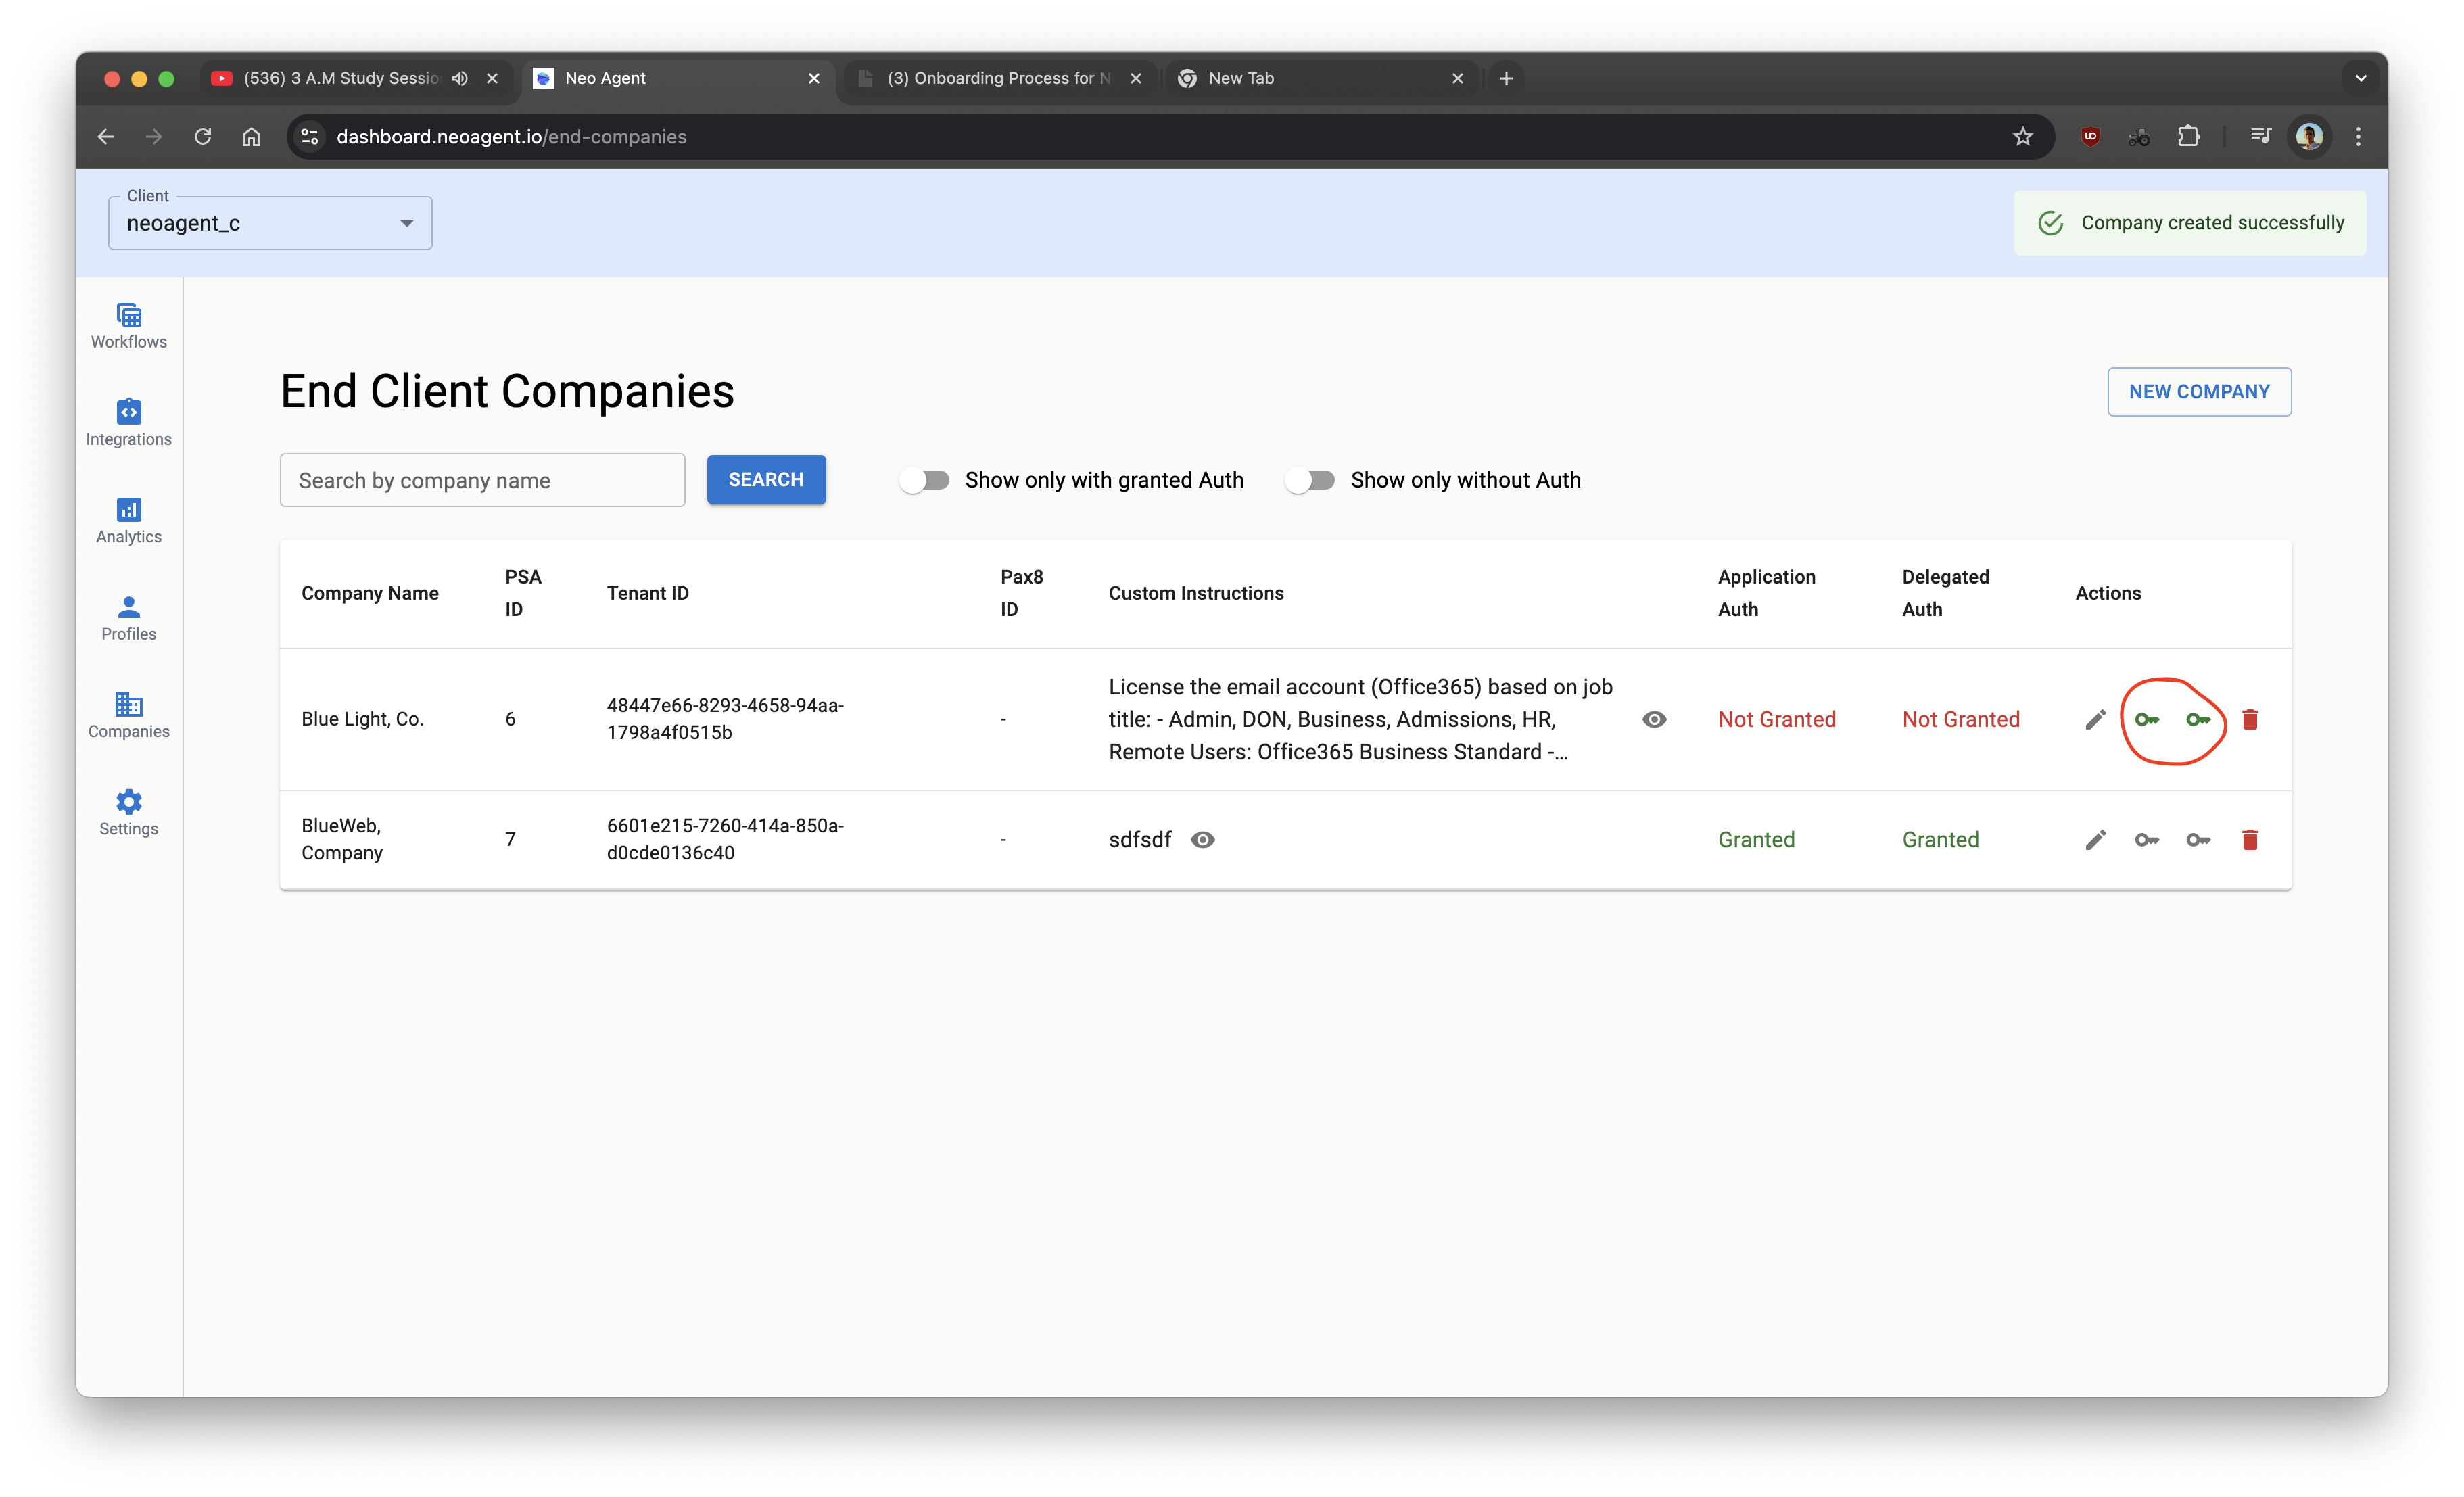
Application access allows Neo to perform actions in Azure. We need it to be able to create users, assign licenses, etc.
Delegated access allows Neo to make actions in Azure on behalf of the signed in Admin. We need it to be able to reset passwords and disable users during Offboarding.
Step 3. [OPTIONAL] Assign "Exchange Administrator" Role for Enhanced Exchange Online Actions
This allows additional Exchange Online actions like adding a user to a shared mailbox or forwarding emails
To grant the necessary permissions:
Go to Azure Portal
Navigate to the Azure Portal.
Sign in
Sign in with your Microsoft Account.
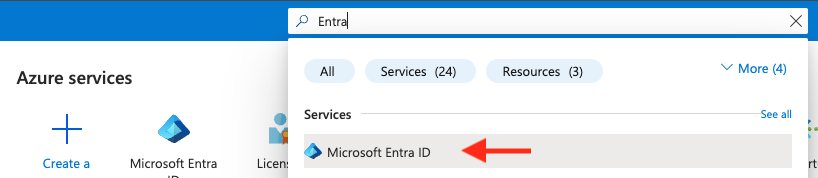
Search for Microsoft Entra ID
In the Azure Portal, search for "Microsoft Entra ID".
Go to Roles and Administrators
Navigate to "Roles and Administrators" within Microsoft Entra ID.
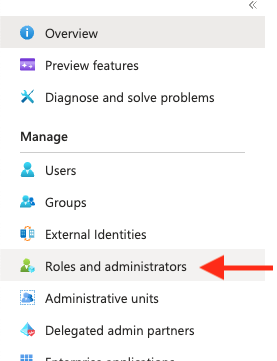
Search for Exchange Administrator
In the "Roles and Administrators" section, search for "Exchange Administrator".

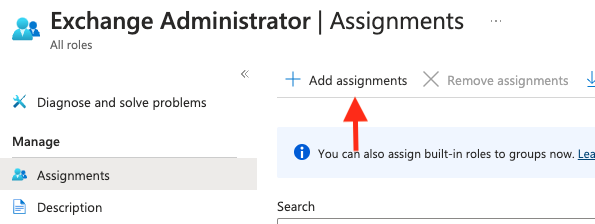
Add assignments
Click on "Exchange Administrator" and then click "Add assignments".
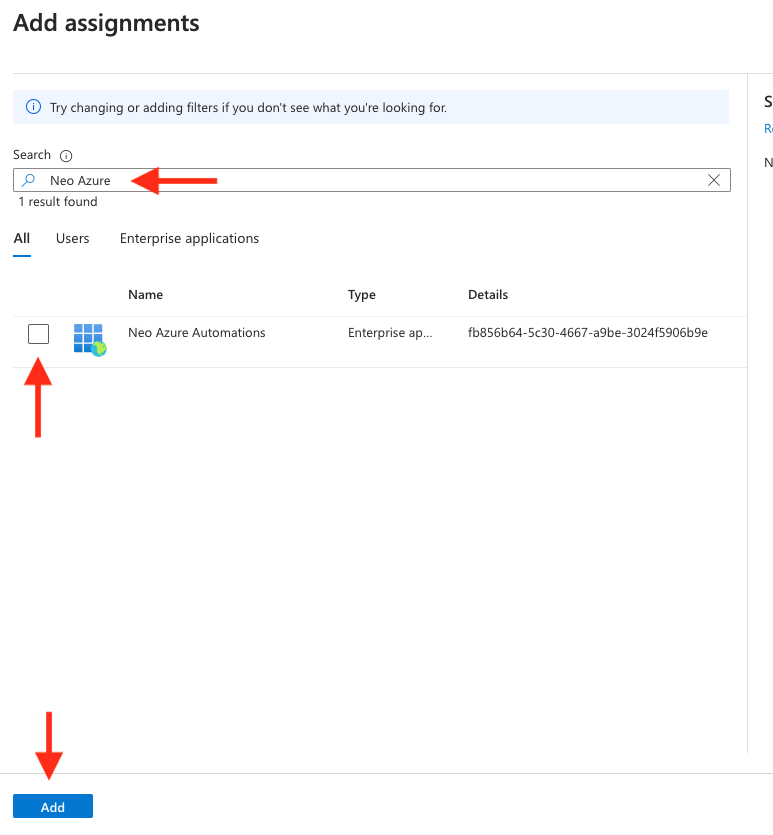
Add Neo Automations App
In the "Add assignments" pane, search for and select the "Neo Automations" App.
Completion
That's it with permissions. Neo Automations now has the necessary rights for enhanced Exchange Online actions.