> ## Documentation Index
> Fetch the complete documentation index at: https://docs.neoagent.io/llms.txt
> Use this file to discover all available pages before exploring further.
# Notify Contact After Ticket Dispatch
> Automatically notify customers when their ticket is assigned, confirming details and introducing the assigned technician
## Overview
Improve customer communication by automatically notifying contacts when their ticket is dispatched and assigned to a technician. This workflow sends a professional confirmation message that includes ticket details and introduces the assigned technician, creating transparency and setting clear expectations.
This is a Triggered workflow that activates immediately after a ticket has been dispatched and assigned to a technician.
## Setup
Name it "Notify Contact After Dispatch" and set the type to Triggered.
Set triggers for "Workflow Finished" and point to your Dispatch workflow
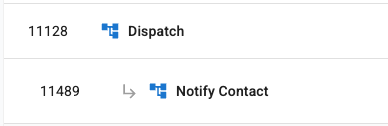 Filter to only target tickets that have been assigned to a technician:
Use the filter: **Owner.Name is not null**
This ensures the workflow only runs when a ticket has an assigned owner.
Use the filter: **assignedResourceId is not null**
This ensures the workflow only runs when a ticket has an assigned resource.
You may also want to add filters for specific ticket types, priorities, or boards to limit which tickets trigger this notification.
In the Smart Actions section:
1. Select the **Build Message** action
2. Set the note type to **Customer Facing**
3. Add instructions for the message format
Example of instructions:
```
Compose a professional message to the customer that:
- Confirms we received their request and ticket details
- Introduces the assigned technician by name
- Maintains a friendly, reassuring tone
```
In the Notify Users section:
1. Select **Notify Contact** as the action
2. Set the notification mode to **Time Entry**
Avoid creating notification loops by ensuring that the option "Run workflow only once per ticket" is enabled in case the ticket is assigned to a different technician.
Filter to only target tickets that have been assigned to a technician:
Use the filter: **Owner.Name is not null**
This ensures the workflow only runs when a ticket has an assigned owner.
Use the filter: **assignedResourceId is not null**
This ensures the workflow only runs when a ticket has an assigned resource.
You may also want to add filters for specific ticket types, priorities, or boards to limit which tickets trigger this notification.
In the Smart Actions section:
1. Select the **Build Message** action
2. Set the note type to **Customer Facing**
3. Add instructions for the message format
Example of instructions:
```
Compose a professional message to the customer that:
- Confirms we received their request and ticket details
- Introduces the assigned technician by name
- Maintains a friendly, reassuring tone
```
In the Notify Users section:
1. Select **Notify Contact** as the action
2. Set the notification mode to **Time Entry**
Avoid creating notification loops by ensuring that the option "Run workflow only once per ticket" is enabled in case the ticket is assigned to a different technician.