> ## Documentation Index
> Fetch the complete documentation index at: https://docs.neoagent.io/llms.txt
> Use this file to discover all available pages before exploring further.
# Connecting to Neo Agent
> Configure the connection between your ConnectWise ScreenConnect instance and Neo Agent
Once you've [created an API secret](/integrations/rmm/screenconnect/creating-the-secret) in ScreenConnect, connect it to Neo Agent through the integrations dashboard.
You'll need your instance URL and the RESTful API Manager authentication secret to complete this setup.
## Required Information
Your ScreenConnect instance URL, e.g. `https://yourcompany.screenconnect.com`. Enter just the host — the API path is appended automatically.
The **RESTful Authentication Secret** from the RESTful API Manager extension.
ScreenConnect authenticates with a single secret — there is no separate client ID, so the Neo form only asks for the URL and the Client Secret.
## Configuring the Integration
Navigate to the [Neo Agent Dashboard](https://dashboard.neoagent.io/integrations) and log in.
From the dashboard:
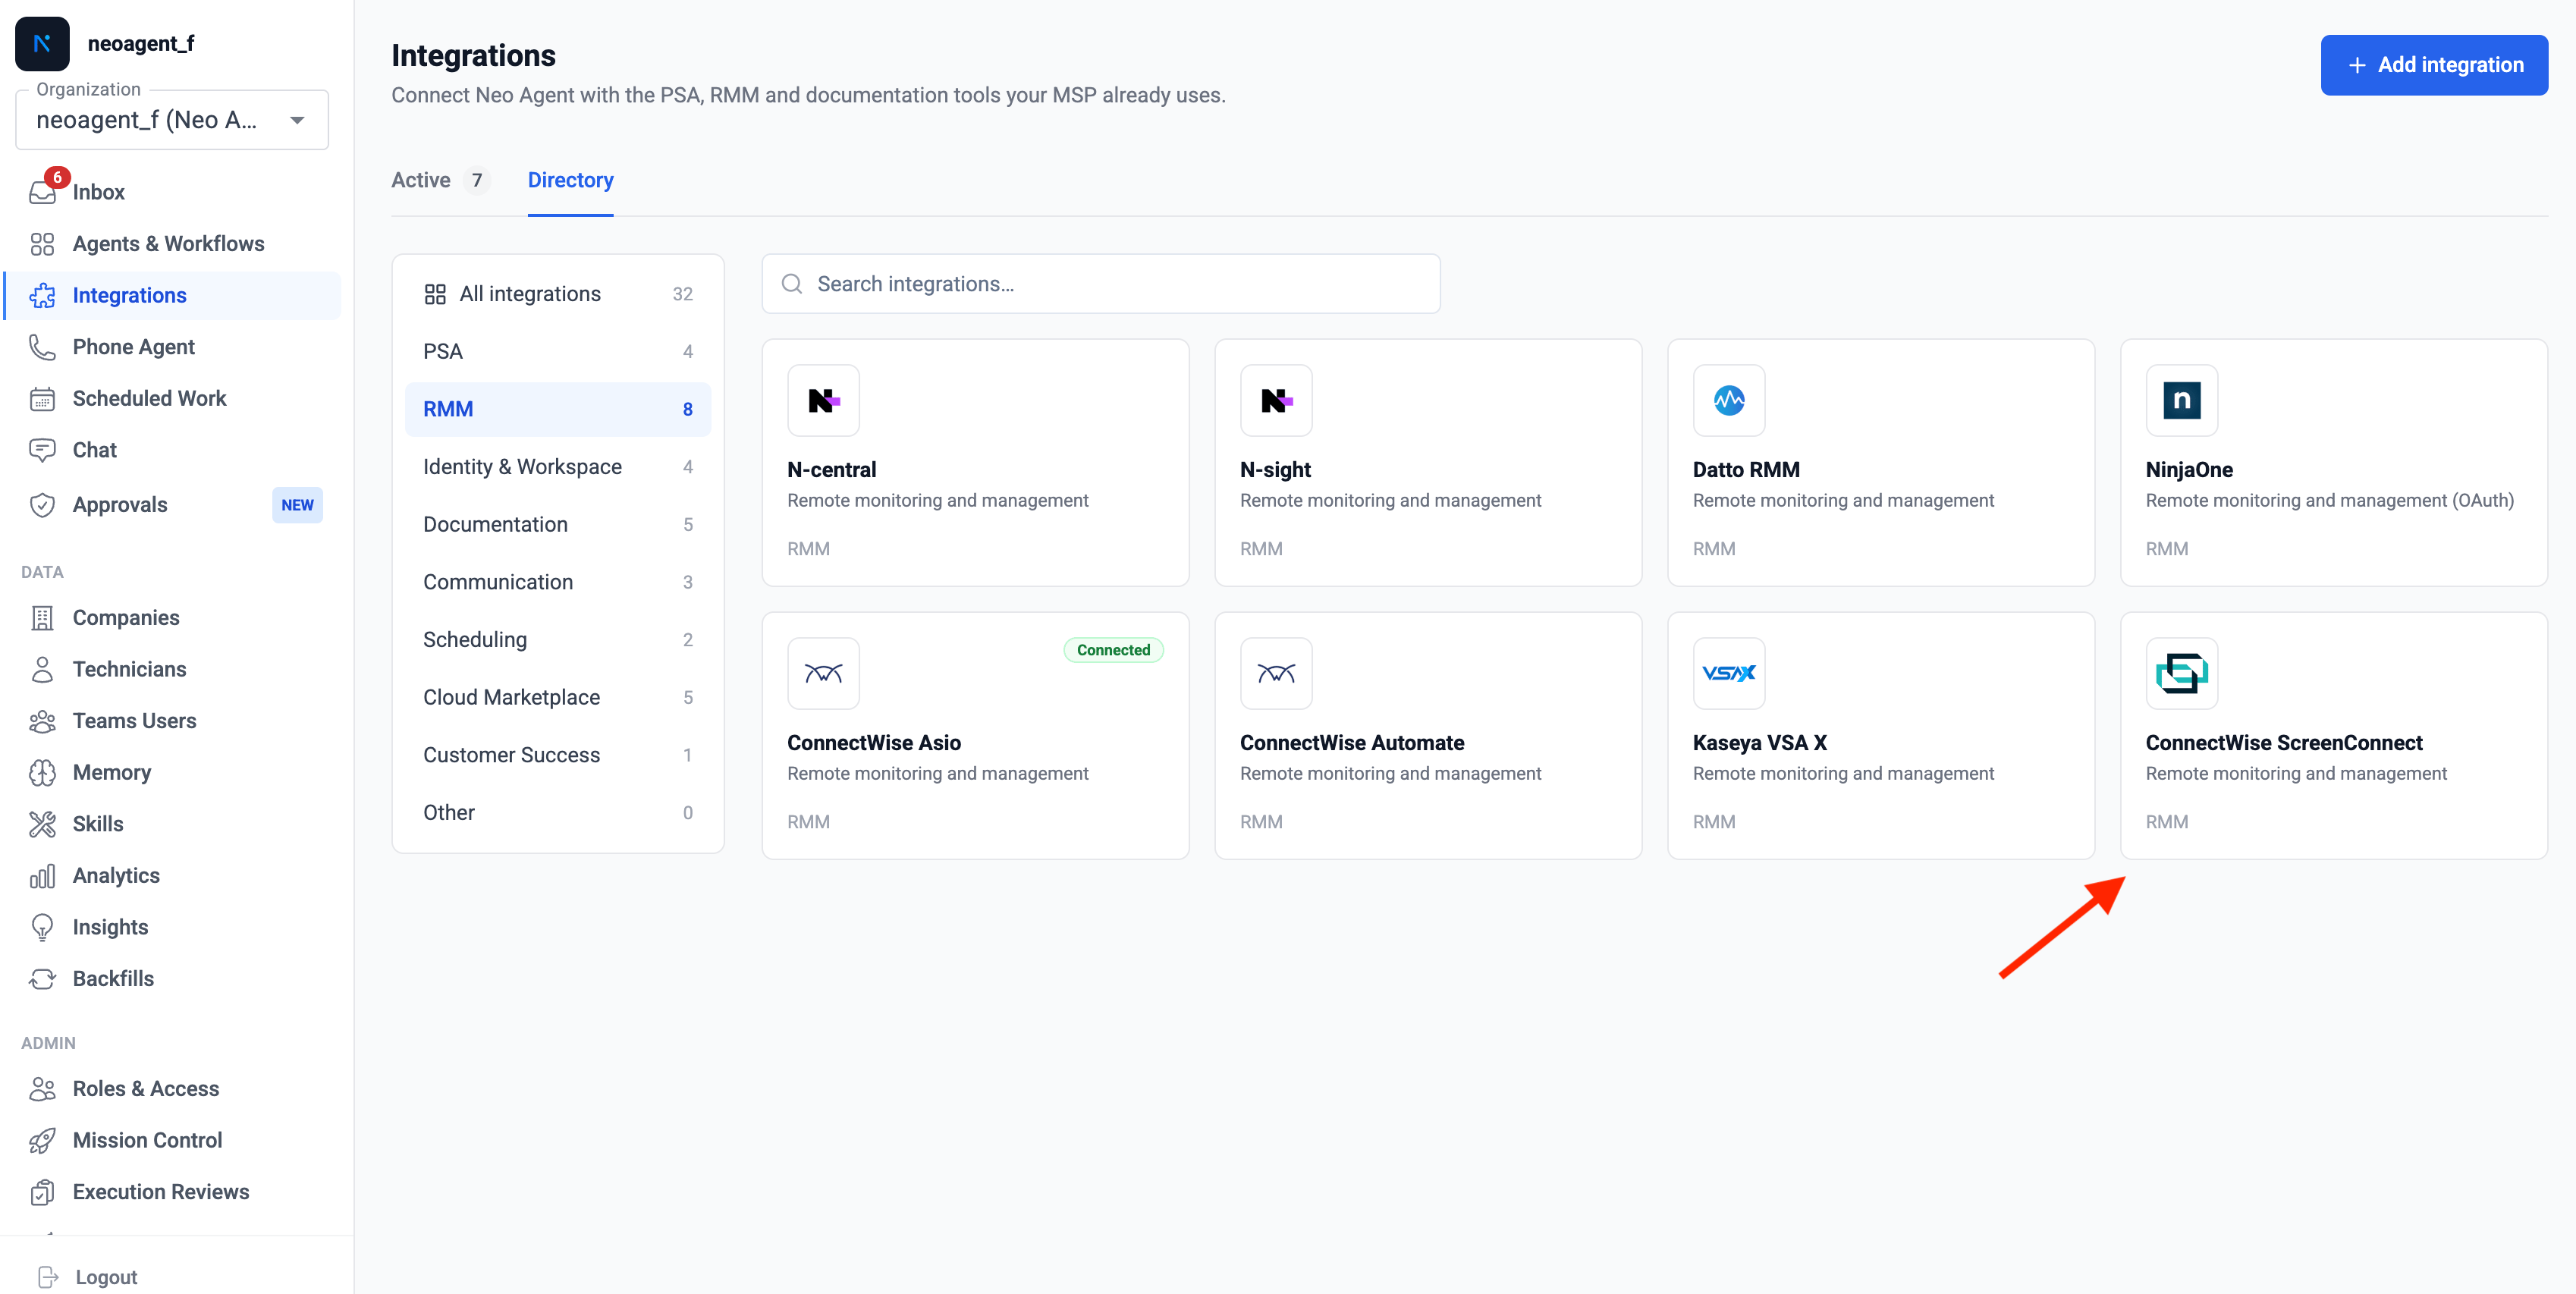
1. Click **Integrations** in the left sidebar
2. Select the **RMM** category
3. Find and select **ConnectWise ScreenConnect** from the list of available RMM integrations
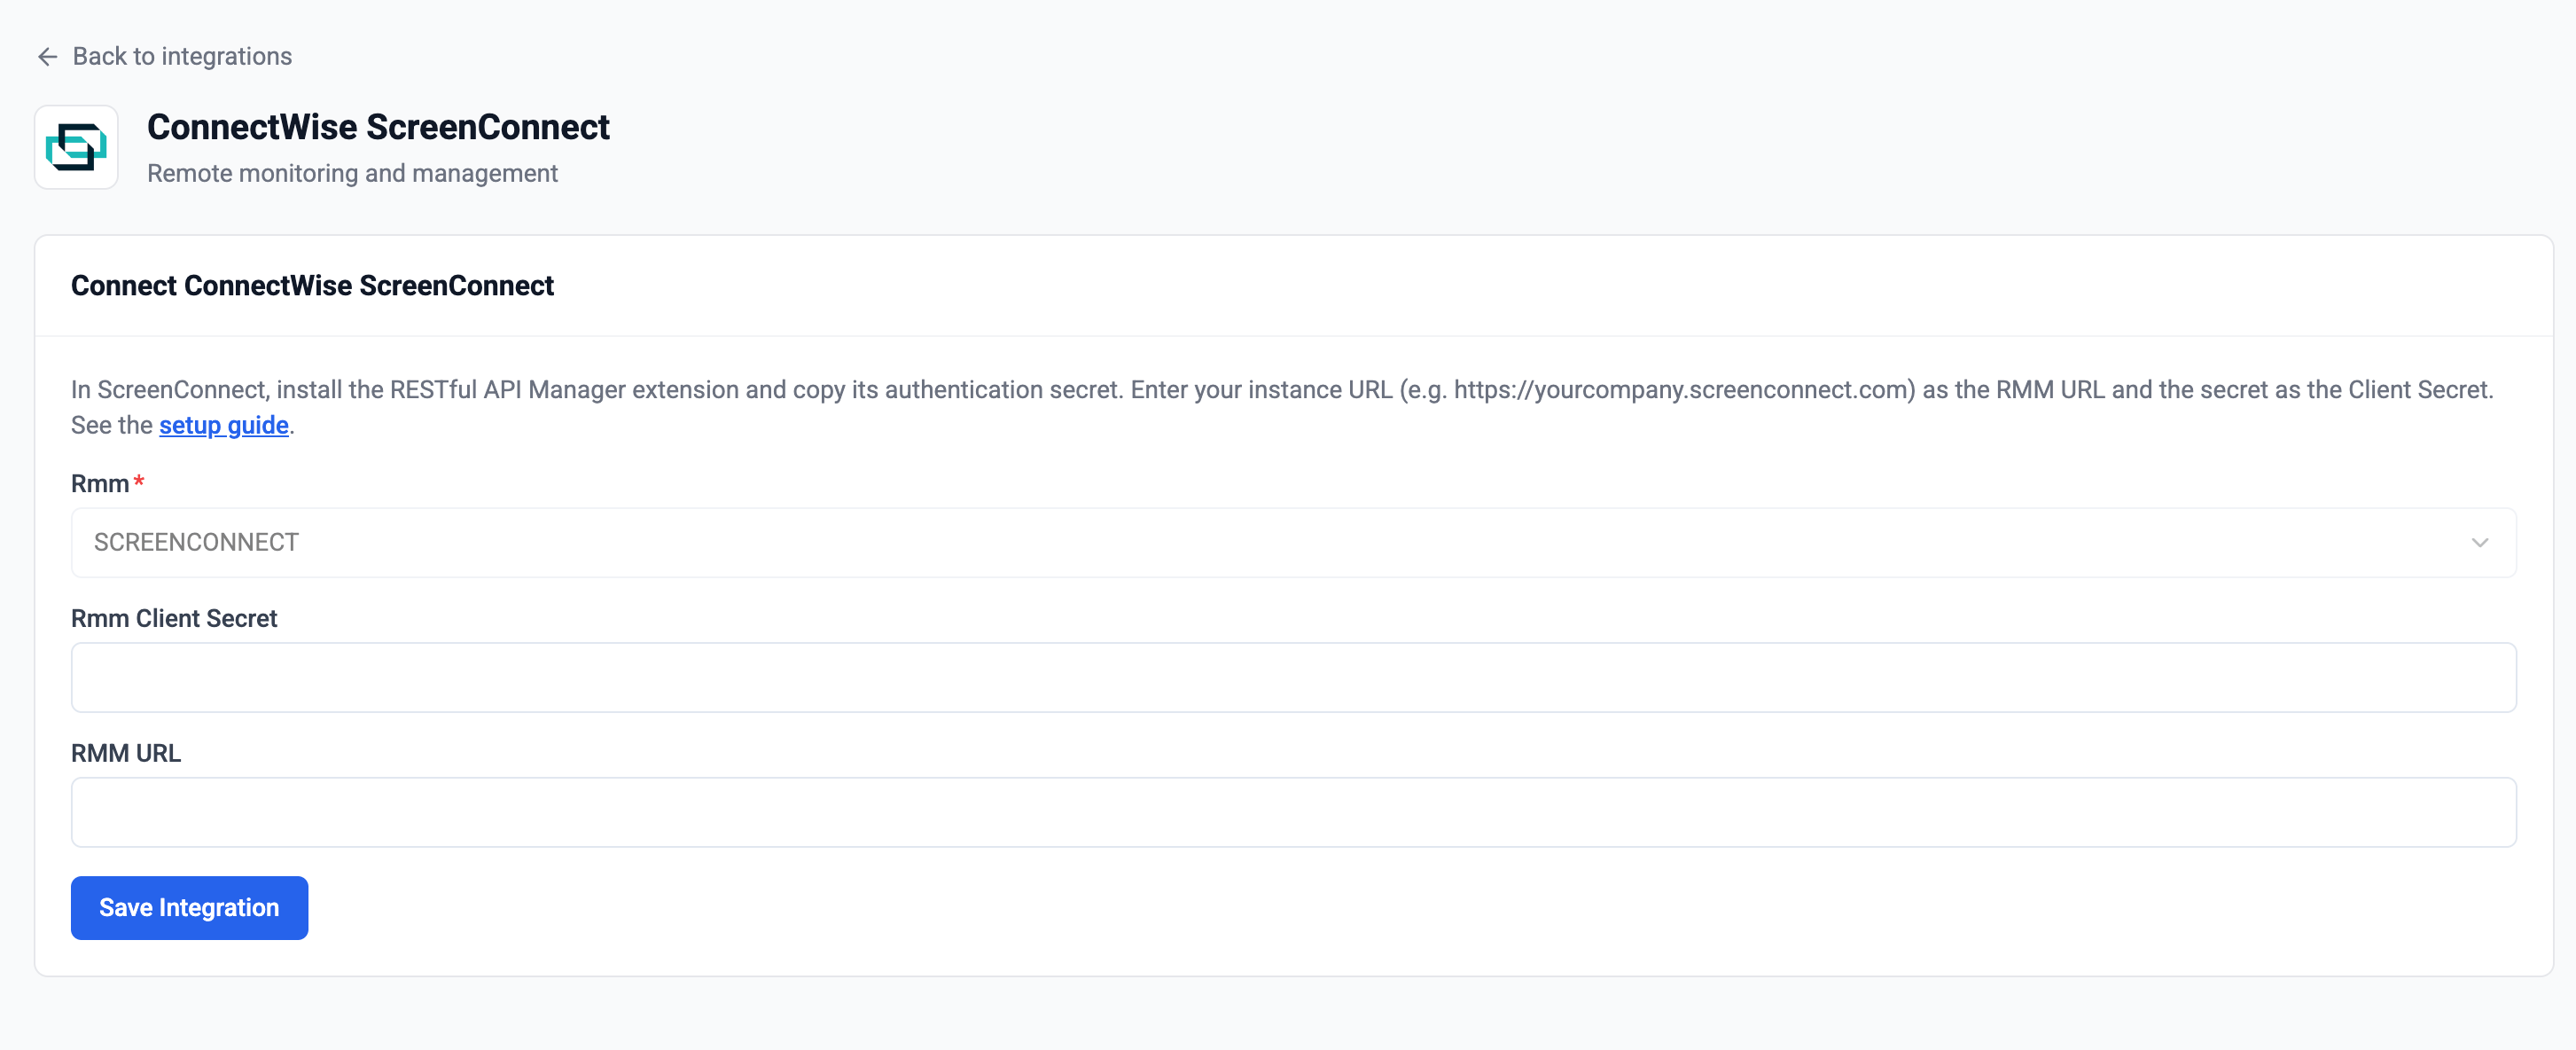
 Complete the ConnectWise ScreenConnect integration setup form:
1. **RMM URL**: Enter your instance URL (e.g. `https://yourcompany.screenconnect.com`)
2. **RMM Client Secret**: Enter your RESTful Authentication Secret
Complete the ConnectWise ScreenConnect integration setup form:
1. **RMM URL**: Enter your instance URL (e.g. `https://yourcompany.screenconnect.com`)
2. **RMM Client Secret**: Enter your RESTful Authentication Secret
 Double-check both values for accuracy. An incorrect URL or secret will prevent Neo Agent from connecting to your ScreenConnect instance.
Click **Submit**. Neo Agent validates the secret against your instance and establishes the connection.
A successful connection confirms Neo Agent can reach your ScreenConnect instance with the provided secret.
## Troubleshooting Connection Issues
* Verify the authentication secret is correct and copied without extra spaces
* Confirm the RESTful API Manager extension is installed and enabled
* Check that the secret hasn't been rotated in the extension settings since you copied it
* Confirm the instance URL is correct (just the host, e.g. `https://yourcompany.screenconnect.com`)
* Wait a few minutes for the initial sync to complete after connecting
* Confirm the instance has installed (access) agents — Neo reads ScreenConnect **Access** sessions as devices
## Configuring Permission Groups
Once connected, open **Agent Settings → Permission Groups** to choose what the agent may do in ScreenConnect. Each group can be **Disabled**, **Read-only**, or **Read & Write**:
| Group | Read | Write |
| ----------------------- | ------------------------------------------------------------------------------------------- | ------------------------------------------------------------------ |
| **Sessions** | Find sessions, read session detail (OS, last-contact, custom properties) and command output | Create sessions, rename, update custom properties, add notes |
| **Commands** | — | Send a shell/PowerShell command and read the output |
| **Toolbox & Messaging** | — | Run a pre-staged Toolbox item, send a chat message to the end user |
ScreenConnect commands run as **SYSTEM** (Windows) or **root** (macOS/Linux). Enable **Require approval** on the Commands group to gate every command behind a technician before it runs.
## What's Next?
With ScreenConnect connected, Neo can:
* **Device lookup** — pull session status, OS, and last-contact time while triaging tickets
* **Company mapping** — associate sessions with the right PSA company by name
* **Remote action** — run a command or Toolbox item and message the end user, where you've granted write access
Double-check both values for accuracy. An incorrect URL or secret will prevent Neo Agent from connecting to your ScreenConnect instance.
Click **Submit**. Neo Agent validates the secret against your instance and establishes the connection.
A successful connection confirms Neo Agent can reach your ScreenConnect instance with the provided secret.
## Troubleshooting Connection Issues
* Verify the authentication secret is correct and copied without extra spaces
* Confirm the RESTful API Manager extension is installed and enabled
* Check that the secret hasn't been rotated in the extension settings since you copied it
* Confirm the instance URL is correct (just the host, e.g. `https://yourcompany.screenconnect.com`)
* Wait a few minutes for the initial sync to complete after connecting
* Confirm the instance has installed (access) agents — Neo reads ScreenConnect **Access** sessions as devices
## Configuring Permission Groups
Once connected, open **Agent Settings → Permission Groups** to choose what the agent may do in ScreenConnect. Each group can be **Disabled**, **Read-only**, or **Read & Write**:
| Group | Read | Write |
| ----------------------- | ------------------------------------------------------------------------------------------- | ------------------------------------------------------------------ |
| **Sessions** | Find sessions, read session detail (OS, last-contact, custom properties) and command output | Create sessions, rename, update custom properties, add notes |
| **Commands** | — | Send a shell/PowerShell command and read the output |
| **Toolbox & Messaging** | — | Run a pre-staged Toolbox item, send a chat message to the end user |
ScreenConnect commands run as **SYSTEM** (Windows) or **root** (macOS/Linux). Enable **Require approval** on the Commands group to gate every command behind a technician before it runs.
## What's Next?
With ScreenConnect connected, Neo can:
* **Device lookup** — pull session status, OS, and last-contact time while triaging tickets
* **Company mapping** — associate sessions with the right PSA company by name
* **Remote action** — run a command or Toolbox item and message the end user, where you've granted write access