> ## Documentation Index
> Fetch the complete documentation index at: https://docs.neoagent.io/llms.txt
> Use this file to discover all available pages before exploring further.
# Connecting to Neo Agent
> Enter your Syncro URL and API token in the Neo Agent dashboard
Before starting, create your API token — see [Creating an API Token](/integrations/psa/syncro/creating-api-token).
## Step 1 — Open Integrations
In the Neo dashboard, go to **Integrations** and click **Add integration**.
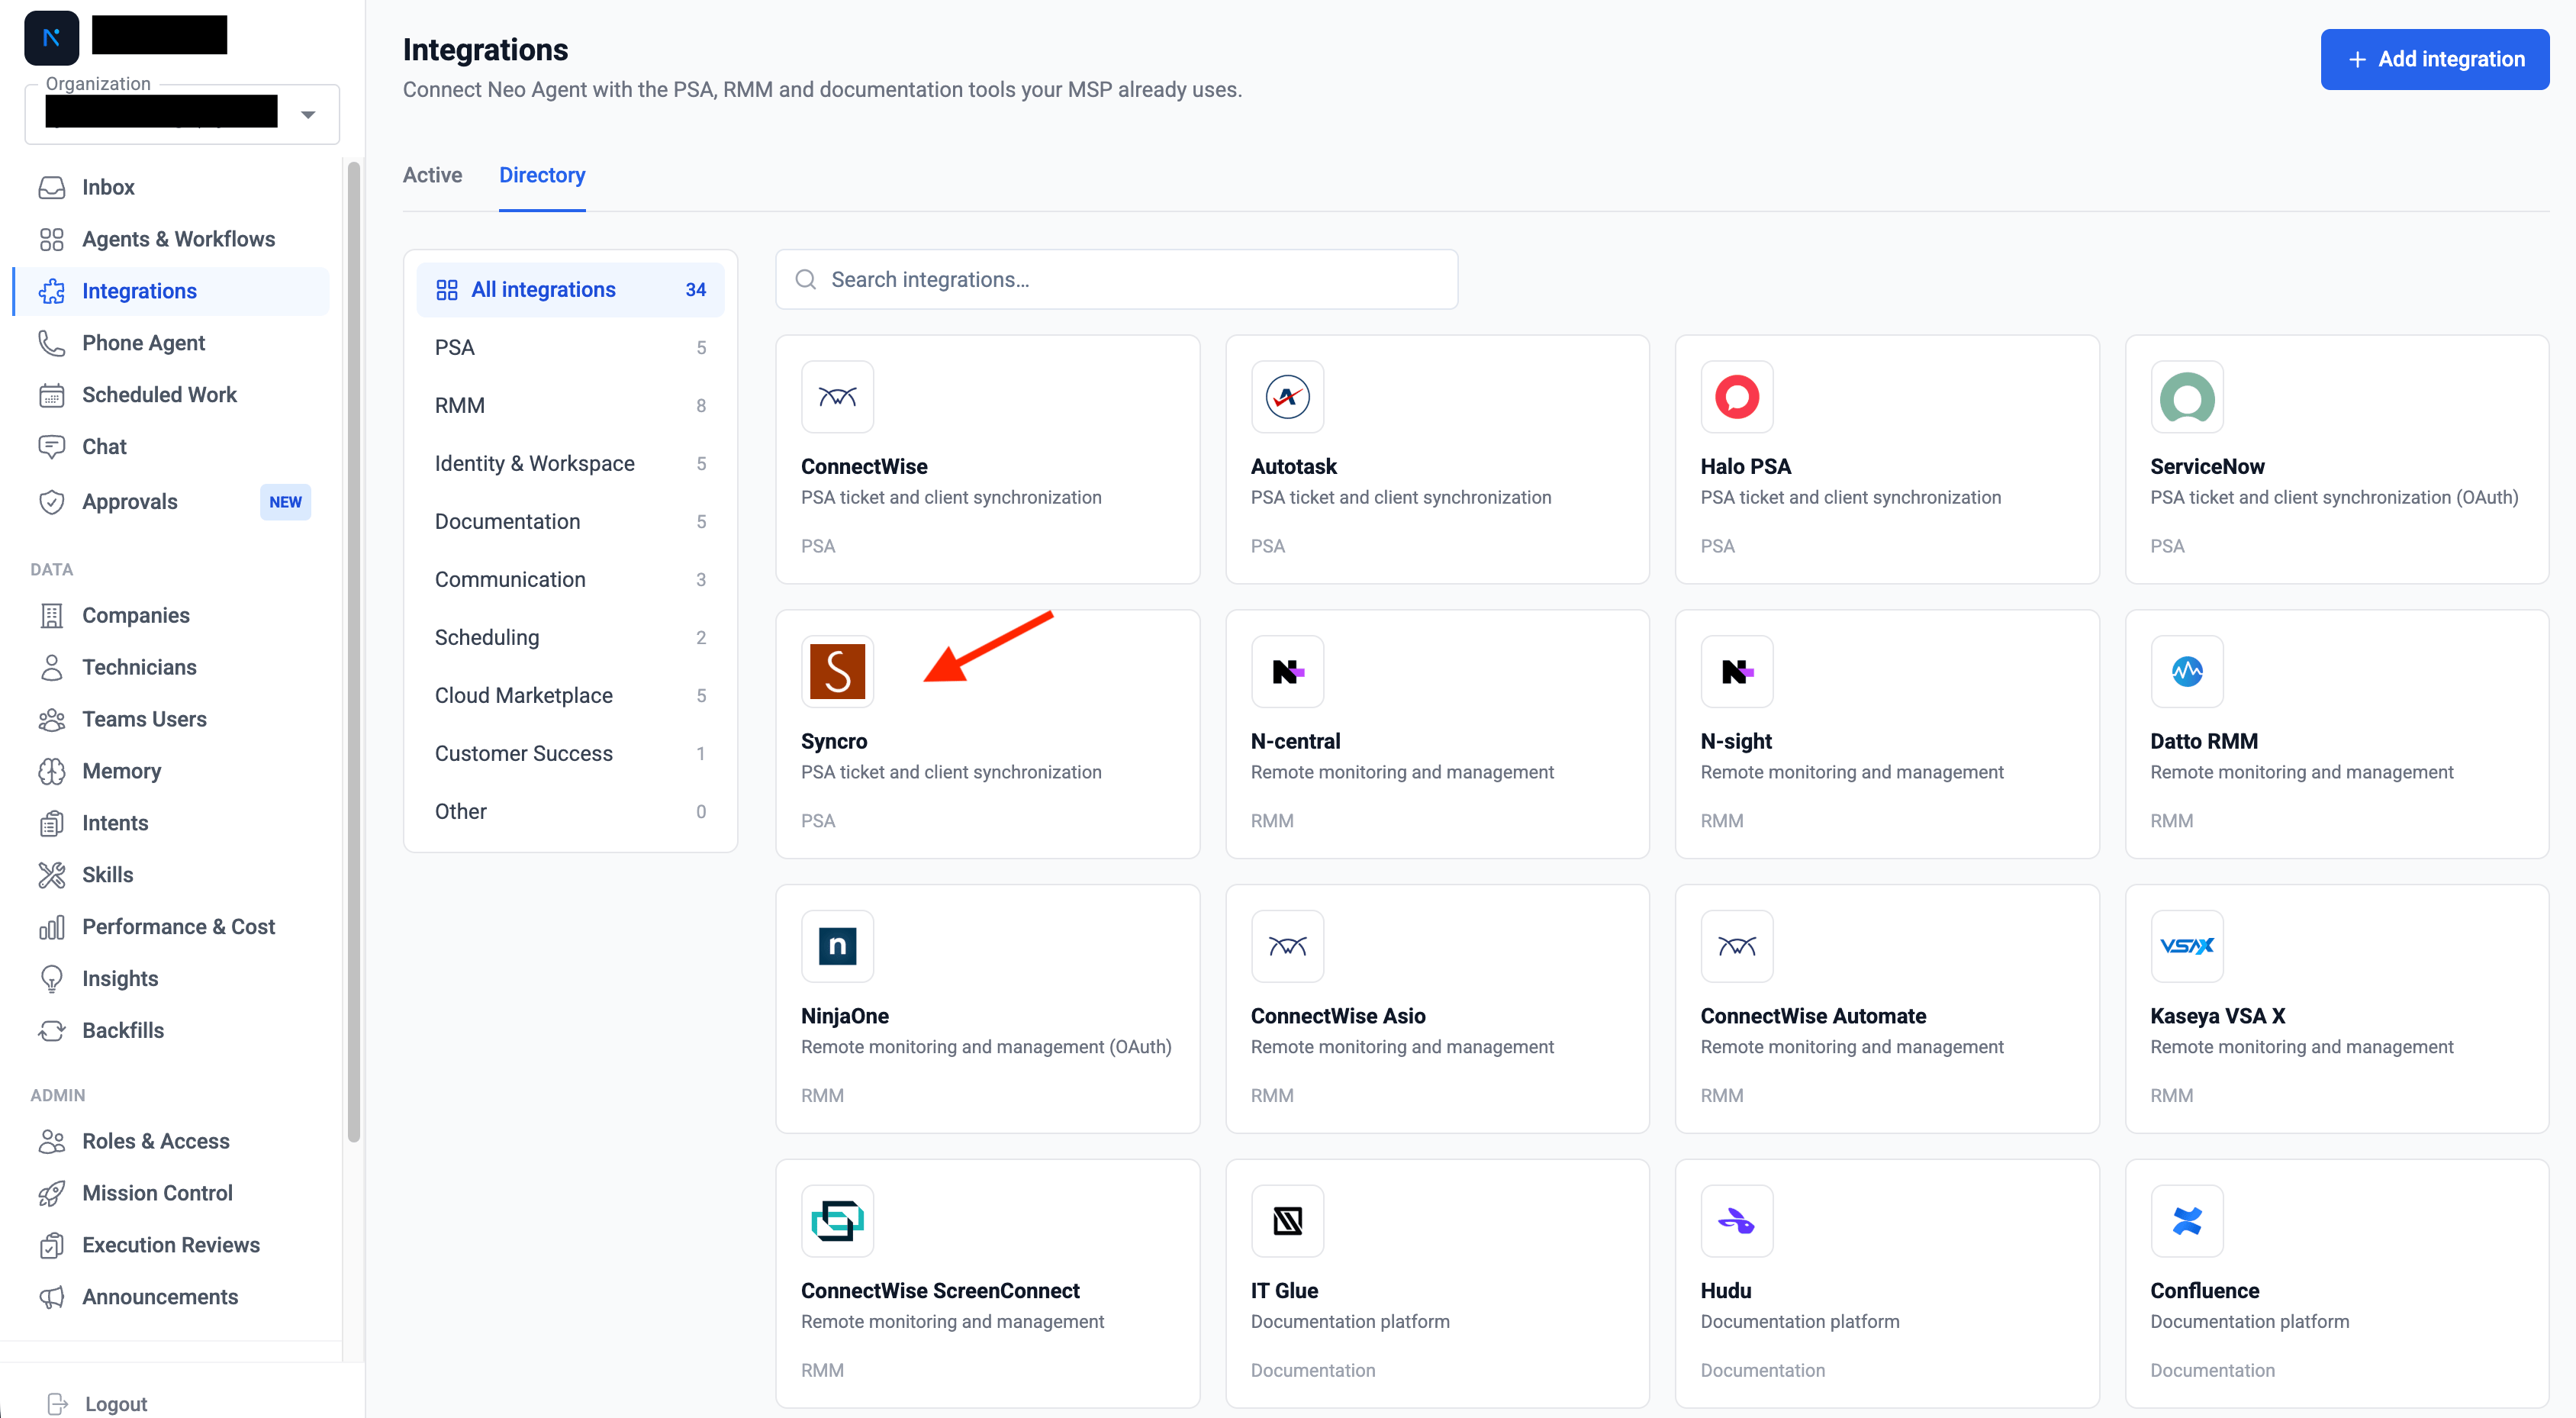
 ## Step 2 — Choose Syncro
Find **Syncro** under PSA and open it.
## Step 2 — Choose Syncro
Find **Syncro** under PSA and open it.
 ## Step 3 — Enter your credentials
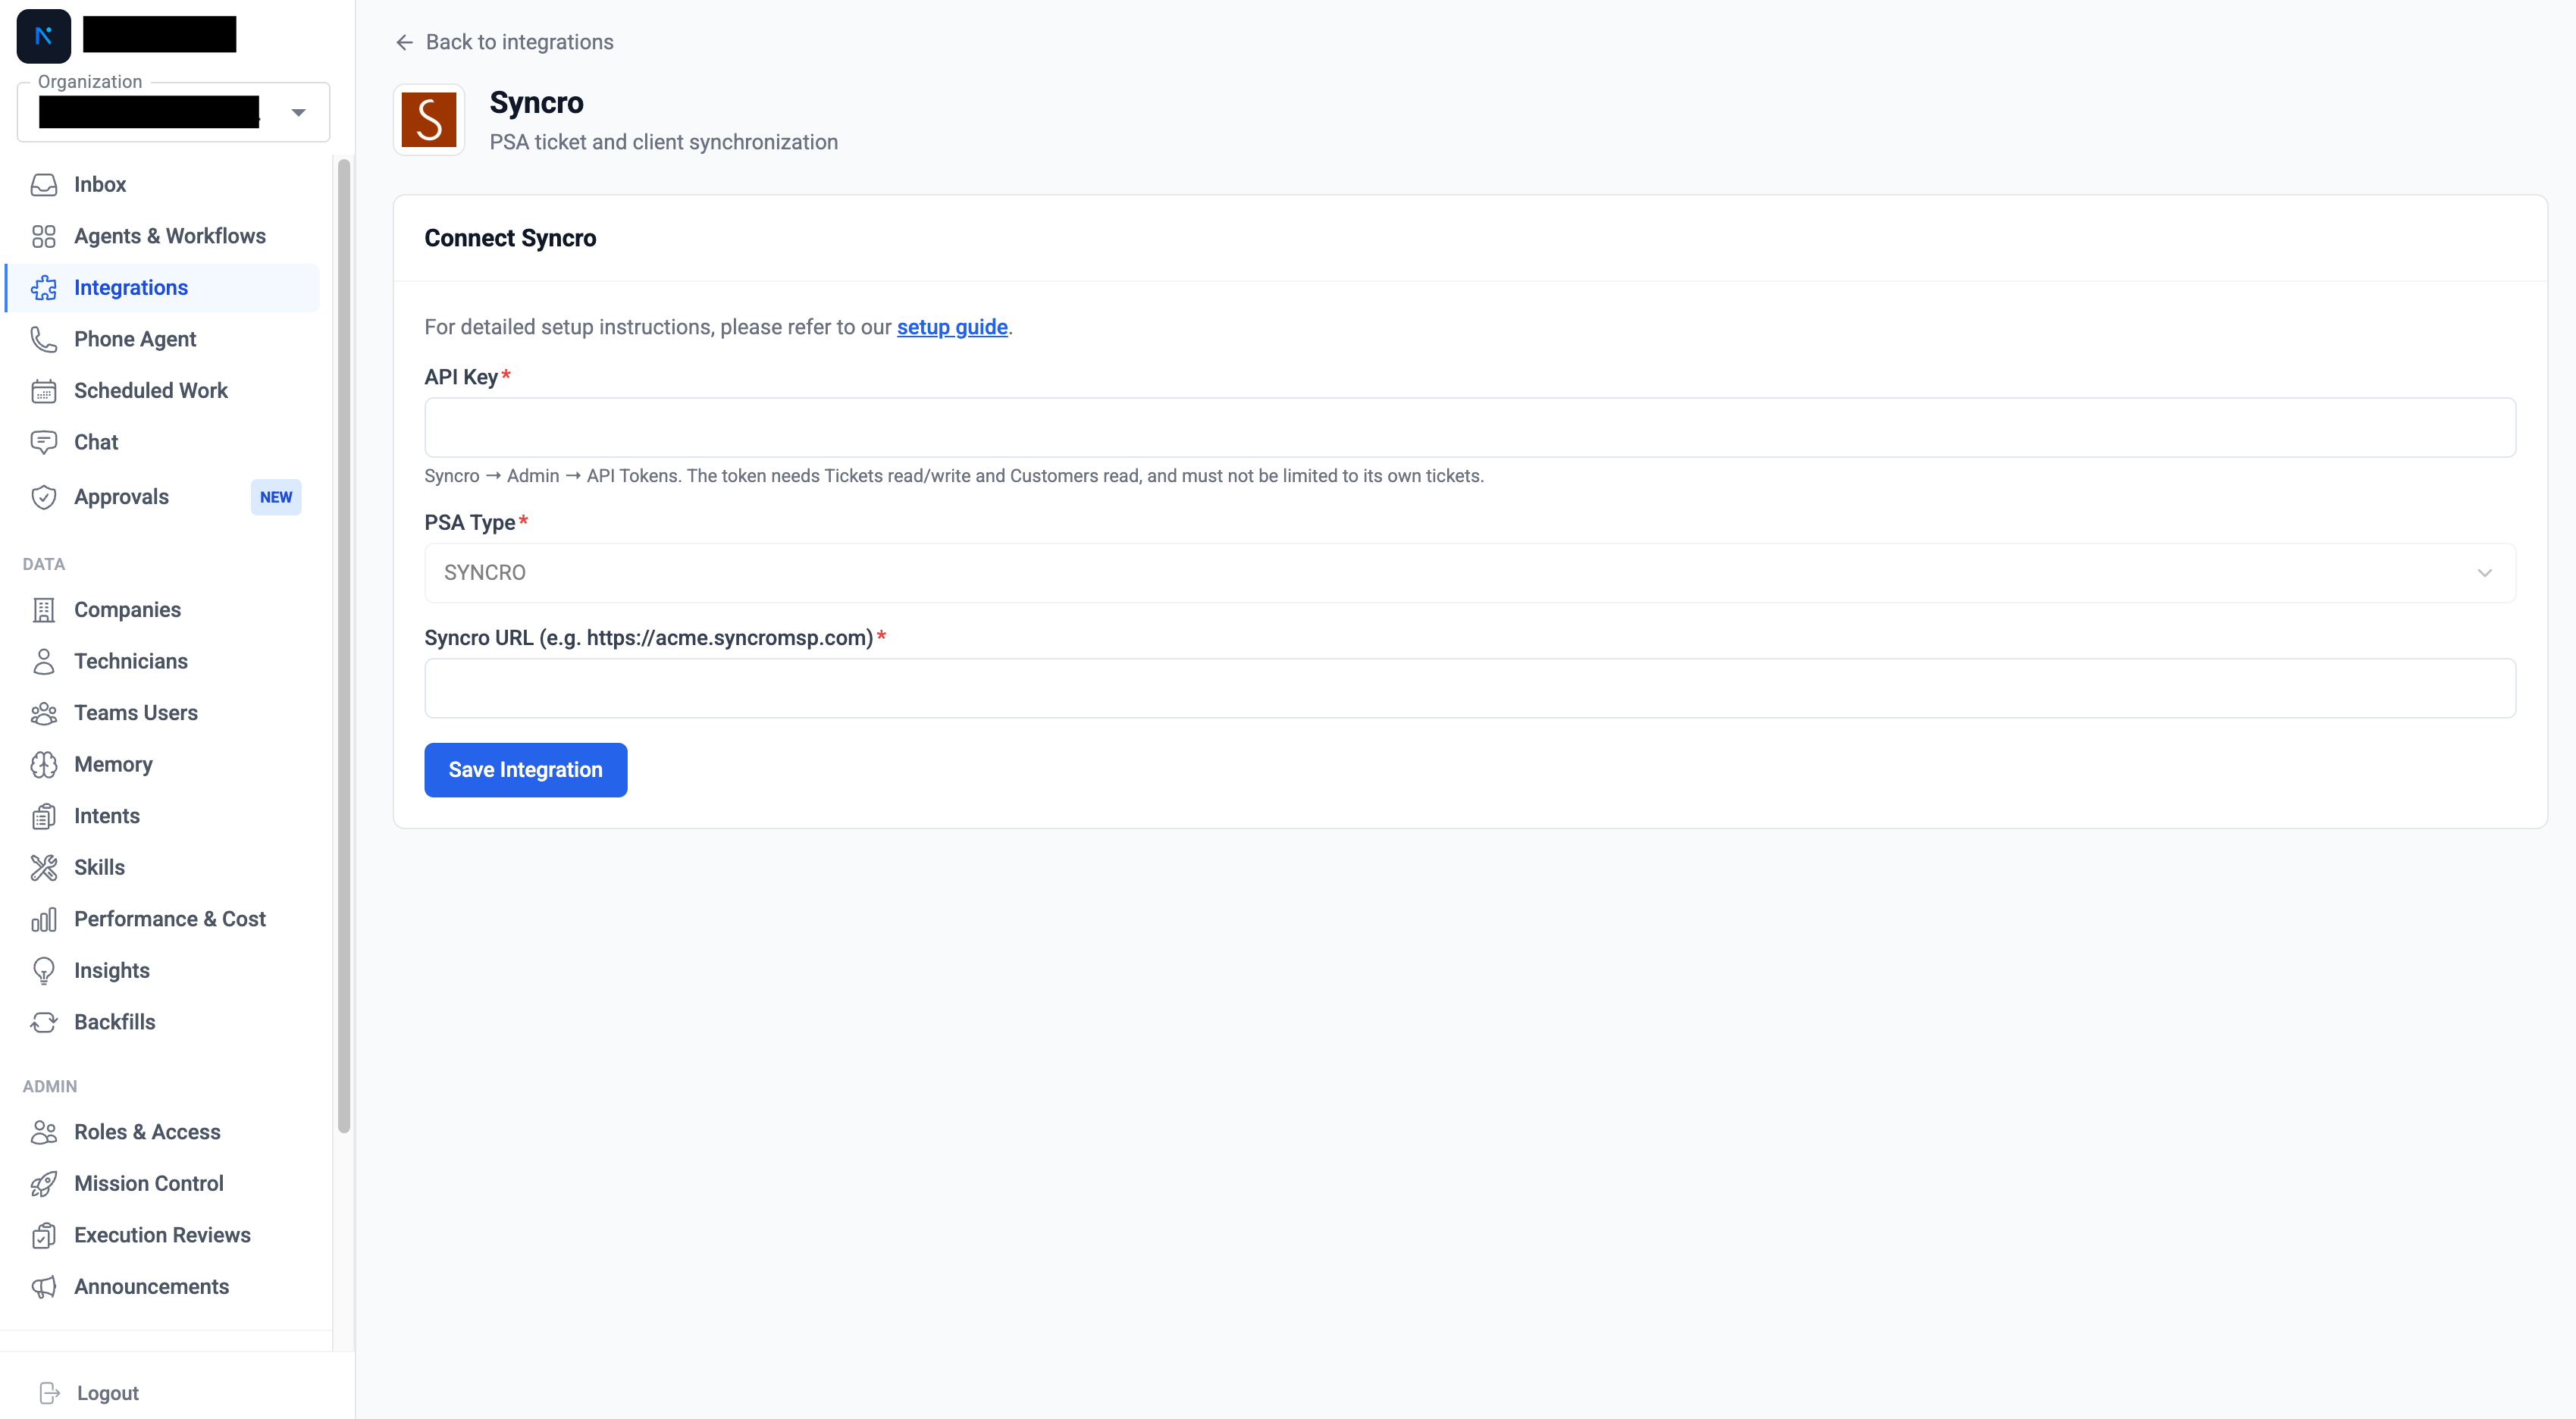 | Field | Value |
| -------------- | -------------------------------------- |
| **API Key** | The Custom token you created in Syncro |
| **Syncro URL** | `https://.syncromsp.com` |
Click **Save Integration**. Neo verifies the token against Syncro and saves it only if it works — if something is wrong, the error names what to fix in Syncro.
There is no username field. Syncro tokens identify their own user, so Neo reads that from Syncro and shows it as the connected account.
## Step 4 — Confirm the first sync
Saving the integration starts the first sync. On the Syncro integration page you can see the sync status and trigger a sync manually with **Trigger sync**.
The first sync pulls in your tickets, customers, contacts, ticket statuses and ticket types. Once it completes, your Syncro companies appear under **Companies** and your Syncro users under **Technicians**.
## Troubleshooting
| Symptom | Cause |
| ---------------------------------------------------------------------------- | ------------------------------------------------------------------------------------------------------------------------------- |
| "Could not authenticate against Syncro" | Wrong subdomain, or the token is inactive or expired. Check **Admin → API → API Tokens** in Syncro. |
| "This Syncro API token is limited to its own tickets" | The token's user has the "mine only" ticket restriction. Clear it, or use a token from a user without it. |
| "This Syncro API token is missing permissions" | Grant the named permissions on the token. Note that Syncro only lets you tick permissions the token's own user holds. |
| "This API token belongs to the Syncro tenant *x*, but the URL points at *y*" | The token and URL are from different Syncro accounts. |
| Sync succeeds but covers fewer tickets than expected | Usually the "mine only" restriction, or company filters excluding customers. Check **Company filters** on the integration page. |
## Changing the token later
Open the Syncro integration and click **Edit**. The API key is masked — leave it as-is to keep the stored token, or paste a new one to replace it. Do this before the token's expiry date if you set one.
| Field | Value |
| -------------- | -------------------------------------- |
| **API Key** | The Custom token you created in Syncro |
| **Syncro URL** | `https://.syncromsp.com` |
Click **Save Integration**. Neo verifies the token against Syncro and saves it only if it works — if something is wrong, the error names what to fix in Syncro.
There is no username field. Syncro tokens identify their own user, so Neo reads that from Syncro and shows it as the connected account.
## Step 4 — Confirm the first sync
Saving the integration starts the first sync. On the Syncro integration page you can see the sync status and trigger a sync manually with **Trigger sync**.
The first sync pulls in your tickets, customers, contacts, ticket statuses and ticket types. Once it completes, your Syncro companies appear under **Companies** and your Syncro users under **Technicians**.
## Troubleshooting
| Symptom | Cause |
| ---------------------------------------------------------------------------- | ------------------------------------------------------------------------------------------------------------------------------- |
| "Could not authenticate against Syncro" | Wrong subdomain, or the token is inactive or expired. Check **Admin → API → API Tokens** in Syncro. |
| "This Syncro API token is limited to its own tickets" | The token's user has the "mine only" ticket restriction. Clear it, or use a token from a user without it. |
| "This Syncro API token is missing permissions" | Grant the named permissions on the token. Note that Syncro only lets you tick permissions the token's own user holds. |
| "This API token belongs to the Syncro tenant *x*, but the URL points at *y*" | The token and URL are from different Syncro accounts. |
| Sync succeeds but covers fewer tickets than expected | Usually the "mine only" restriction, or company filters excluding customers. Check **Company filters** on the integration page. |
## Changing the token later
Open the Syncro integration and click **Edit**. The API key is masked — leave it as-is to keep the stored token, or paste a new one to replace it. Do this before the token's expiry date if you set one.