> ## Documentation Index
> Fetch the complete documentation index at: https://docs.neoagent.io/llms.txt
> Use this file to discover all available pages before exploring further.
# Creating the API User
> Set up dedicated API and regular user accounts with proper impersonation settings for Neo Agent
After creating the Neo API User security level, you need to create the actual API member account and optionally a regular user account for specific operations that require non-API user attribution.
This process involves creating an API-only member for programmatic access and optionally a regular user for operations like ticket assignments and time entries that require a standard user account.
## Creating the API Member
Go to **Admin → Organization Settings & Users → Resources/Users (HR)** to begin creating a new API member.
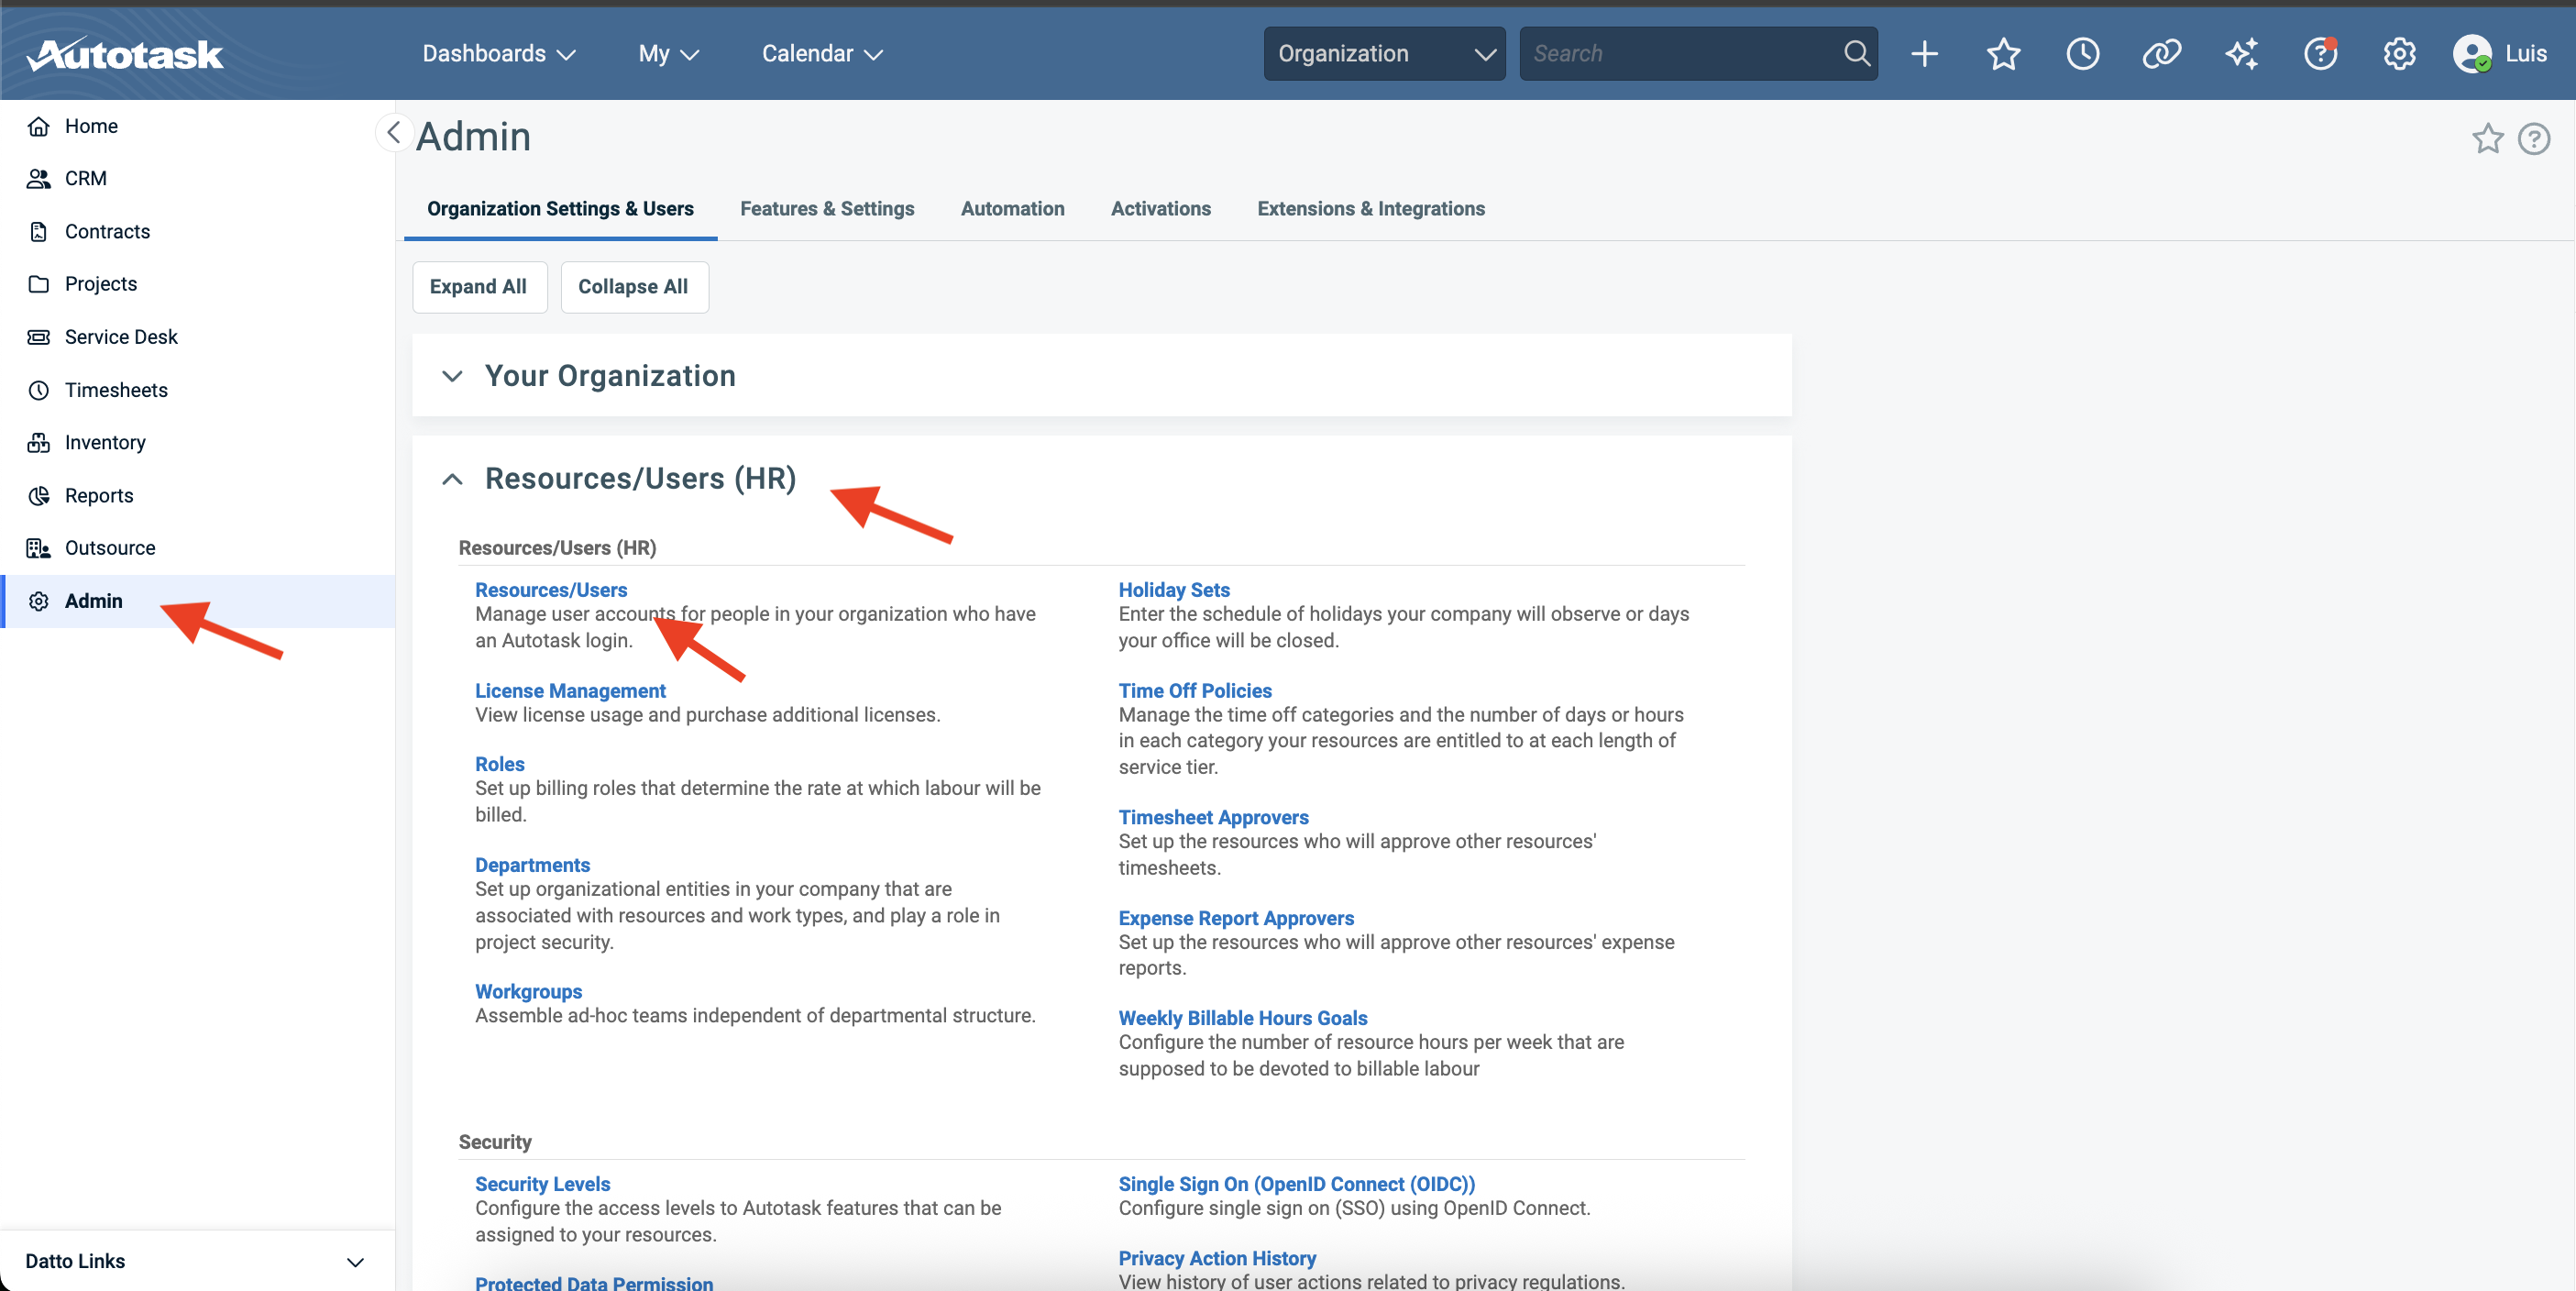 Click to add a new resource and select the option to create an API-only member (not a regular user).
 API members are specifically designed for programmatic access and have different capabilities than regular user accounts.
Fill in the required information for the API member and assign the **Neo API User** security level you created in the previous step.
API members are specifically designed for programmatic access and have different capabilities than regular user accounts.
Fill in the required information for the API member and assign the **Neo API User** security level you created in the previous step.
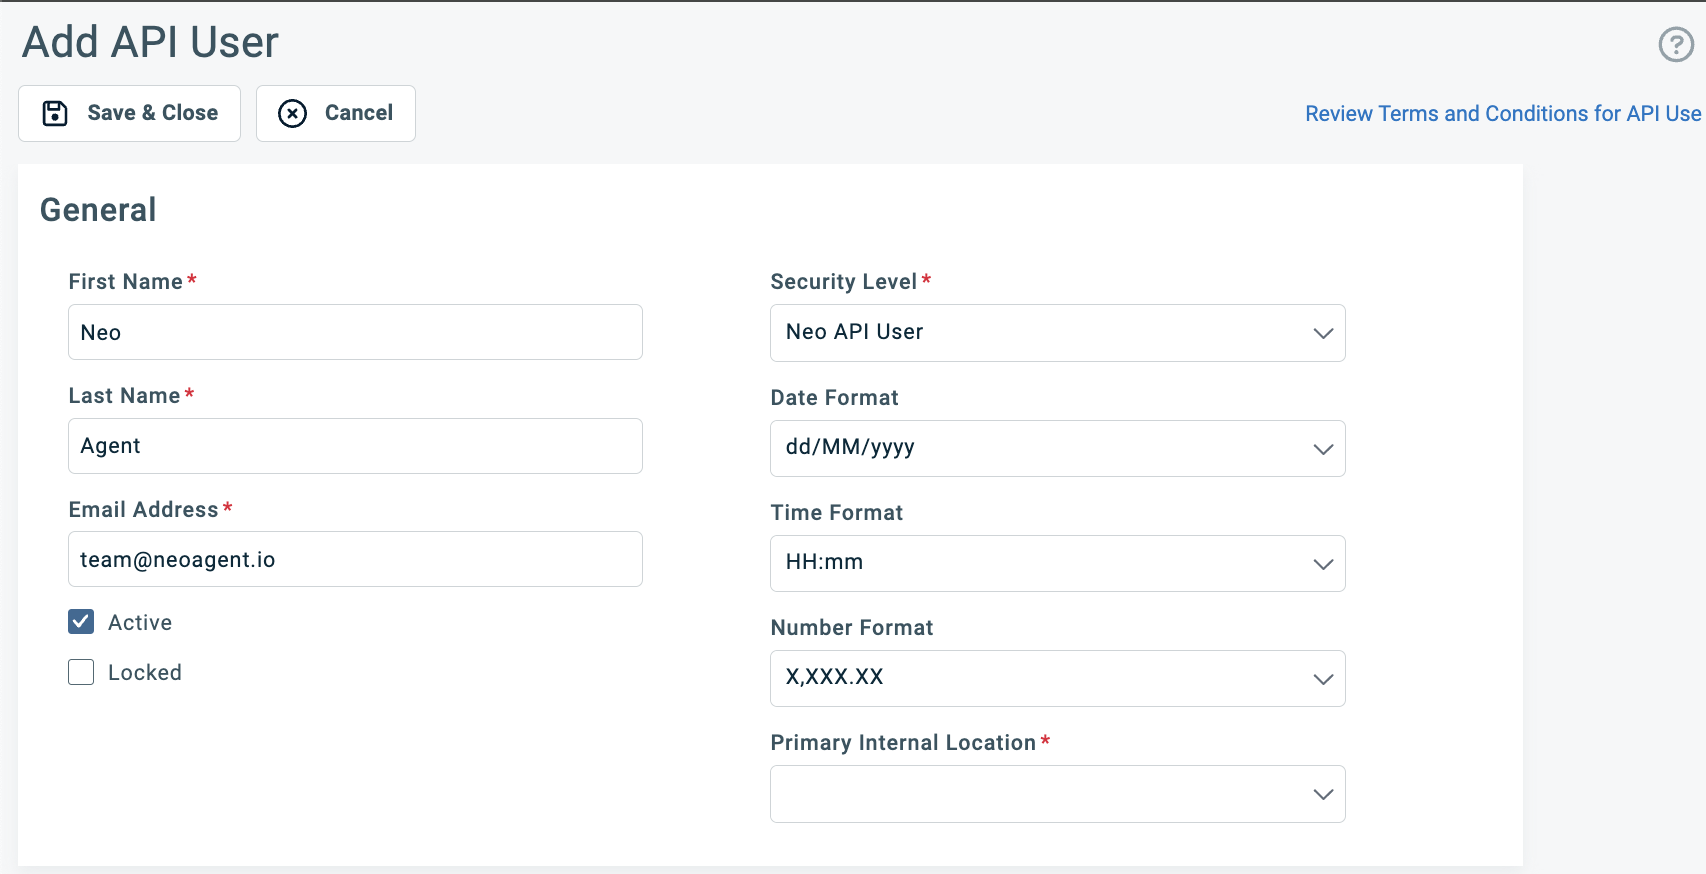 **Required Information:**
* **First Name**: Neo
* **Last Name**: API
* **Email**: Use a dedicated email address for this API account
* **Security Level**: Select the **Neo API User** security level you created earlier
* **Status**: Active
Make note of the API member's numeric ID displayed after creation (e.g., `342`) as you'll need this when configuring the connection to Neo Agent.
Set up the API Integration Code (tracking identifier) for your API member to identify requests from Neo Agent.
**Required Information:**
* **First Name**: Neo
* **Last Name**: API
* **Email**: Use a dedicated email address for this API account
* **Security Level**: Select the **Neo API User** security level you created earlier
* **Status**: Active
Make note of the API member's numeric ID displayed after creation (e.g., `342`) as you'll need this when configuring the connection to Neo Agent.
Set up the API Integration Code (tracking identifier) for your API member to identify requests from Neo Agent.
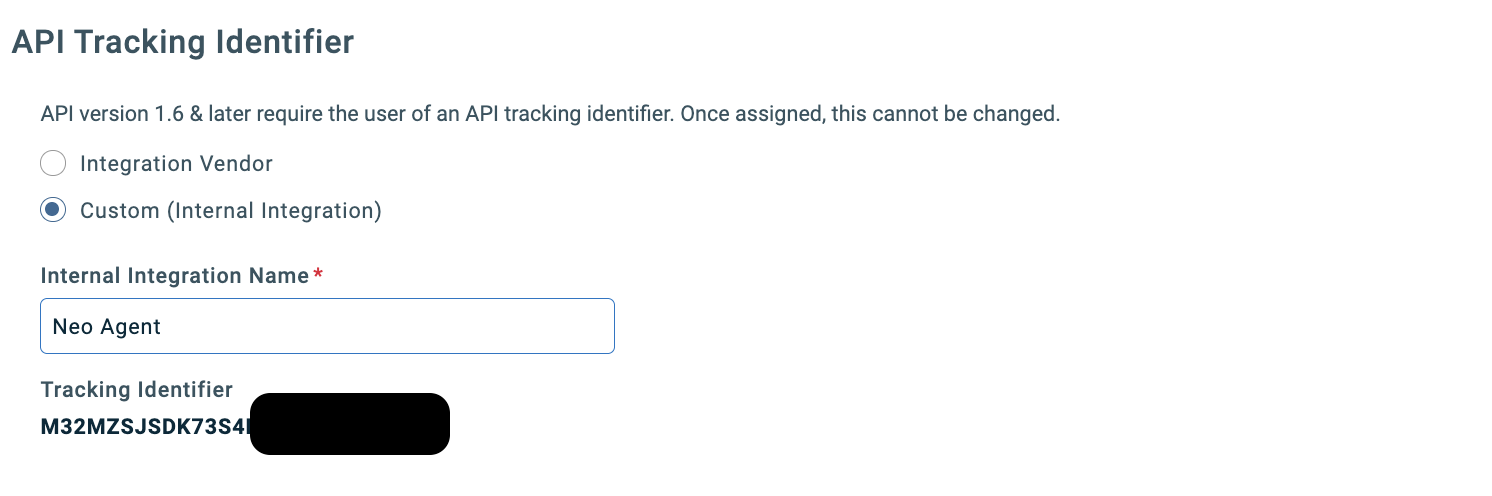 **API Integration Code:**
* This tracking code identifies API requests in Autotask logs
* Use a descriptive name like "NeoAgent" or "Neo Agent Integration"
* This helps with auditing and monitoring API usage
The tracking code appears in Autotask's API usage reports, making it easier to monitor Neo Agent's activity and troubleshoot any issues.
After saving the API member, generate the API credentials (username and secret) that Neo Agent will use to authenticate.
**API Integration Code:**
* This tracking code identifies API requests in Autotask logs
* Use a descriptive name like "NeoAgent" or "Neo Agent Integration"
* This helps with auditing and monitoring API usage
The tracking code appears in Autotask's API usage reports, making it easier to monitor Neo Agent's activity and troubleshoot any issues.
After saving the API member, generate the API credentials (username and secret) that Neo Agent will use to authenticate.
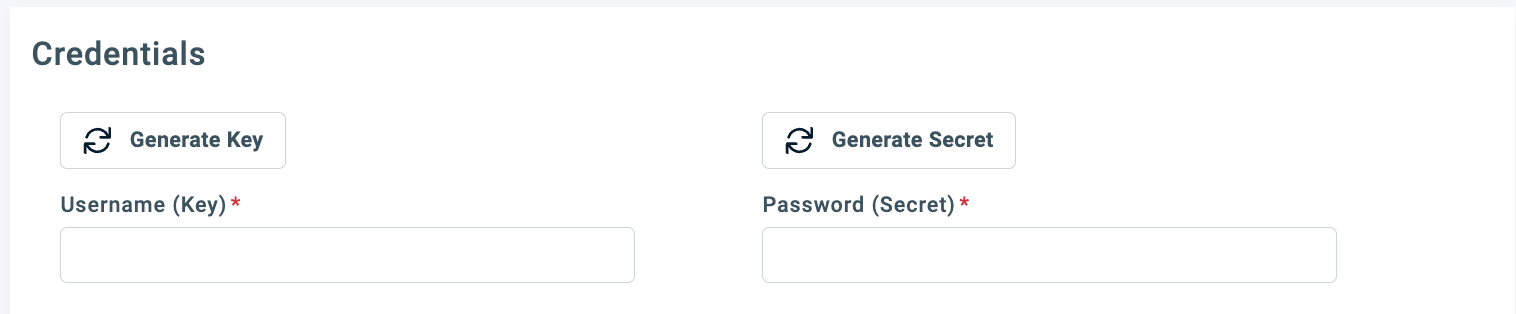 **Important Credentials:**
* **API Username**: Generated automatically by Autotask
* **API Secret**: One-time display secret key
* **Base URL**: Your Autotask API endpoint
Store these credentials securely. The API secret will only be displayed once and cannot be retrieved later. If you lose it, you'll need to regenerate new credentials.
## Creating a Regular User (Optional)
Autotask does not allow API-only users to be assigned to tickets or create time entries directly. If you need Neo Agent to perform these operations, create a regular (non-API) user account.
Create a new regular user (not an API member) with a dedicated name like "Neo Agent" or similar.
**Important Credentials:**
* **API Username**: Generated automatically by Autotask
* **API Secret**: One-time display secret key
* **Base URL**: Your Autotask API endpoint
Store these credentials securely. The API secret will only be displayed once and cannot be retrieved later. If you lose it, you'll need to regenerate new credentials.
## Creating a Regular User (Optional)
Autotask does not allow API-only users to be assigned to tickets or create time entries directly. If you need Neo Agent to perform these operations, create a regular (non-API) user account.
Create a new regular user (not an API member) with a dedicated name like "Neo Agent" or similar.
 **Use Cases for Regular User:**
* Being assigned to tickets (triggers email notifications to customers)
* Creating time entries
* Operations that require a standard user account in Autotask
Assign an appropriate security level to the regular user. This can be the same **Neo API User** security level or a different one based on your requirements.
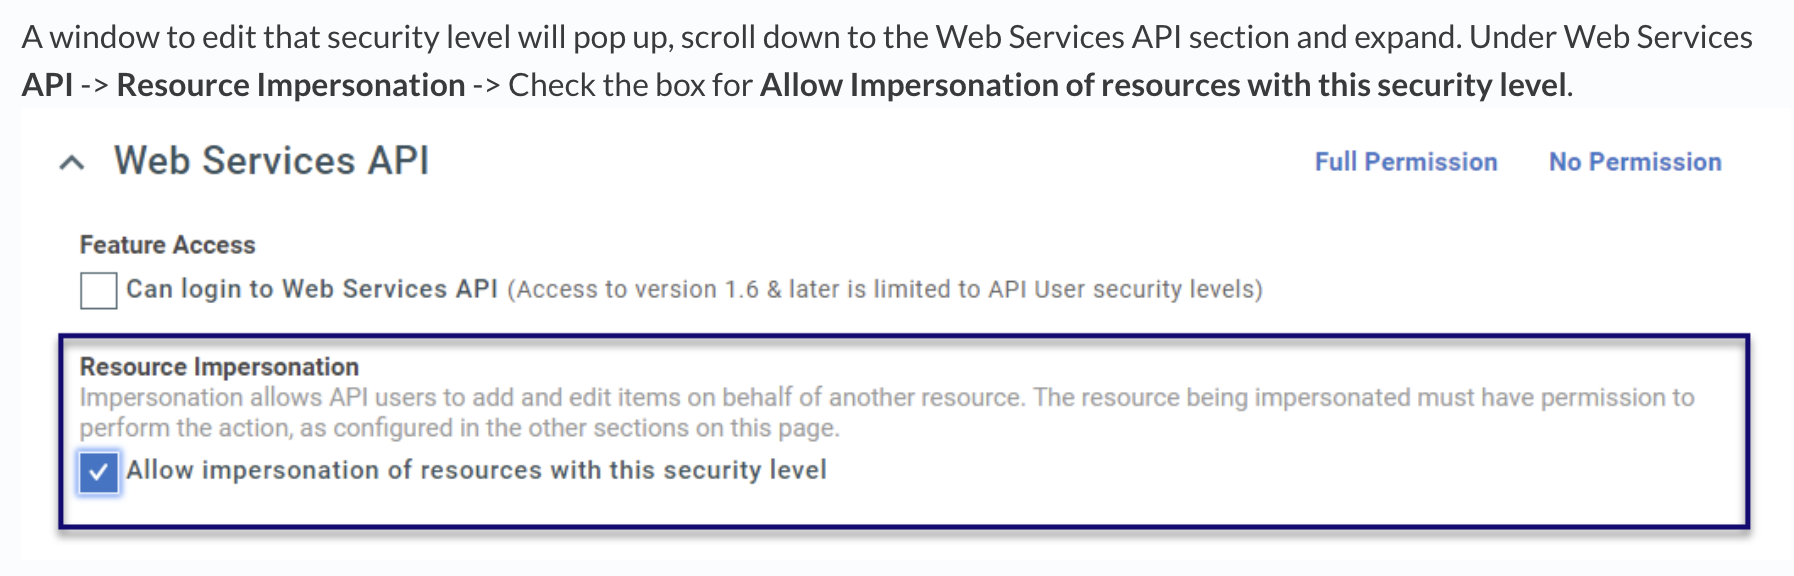
Navigate to the security level assigned to the regular user and enable impersonation:
1. Go to **Web Services API → Resource Impersonation**
2. Enable **Allow impersonation of resources with this security level**
This allows the API member to impersonate this regular user when performing operations that require a non-API user context.
Enabling impersonation allows Neo Agent to perform actions as the regular user while maintaining proper audit trails showing which operations were automated.
## Configuring Contact Notifications
To ensure proper communication with end users, configure how contacts are notified when tickets are updated.
Navigate to contact notification configuration settings.
**Use Cases for Regular User:**
* Being assigned to tickets (triggers email notifications to customers)
* Creating time entries
* Operations that require a standard user account in Autotask
Assign an appropriate security level to the regular user. This can be the same **Neo API User** security level or a different one based on your requirements.
Navigate to the security level assigned to the regular user and enable impersonation:
1. Go to **Web Services API → Resource Impersonation**
2. Enable **Allow impersonation of resources with this security level**
This allows the API member to impersonate this regular user when performing operations that require a non-API user context.
Enabling impersonation allows Neo Agent to perform actions as the regular user while maintaining proper audit trails showing which operations were automated.
## Configuring Contact Notifications
To ensure proper communication with end users, configure how contacts are notified when tickets are updated.
Navigate to contact notification configuration settings.
 Set up notification rules for different ticket events and actions.
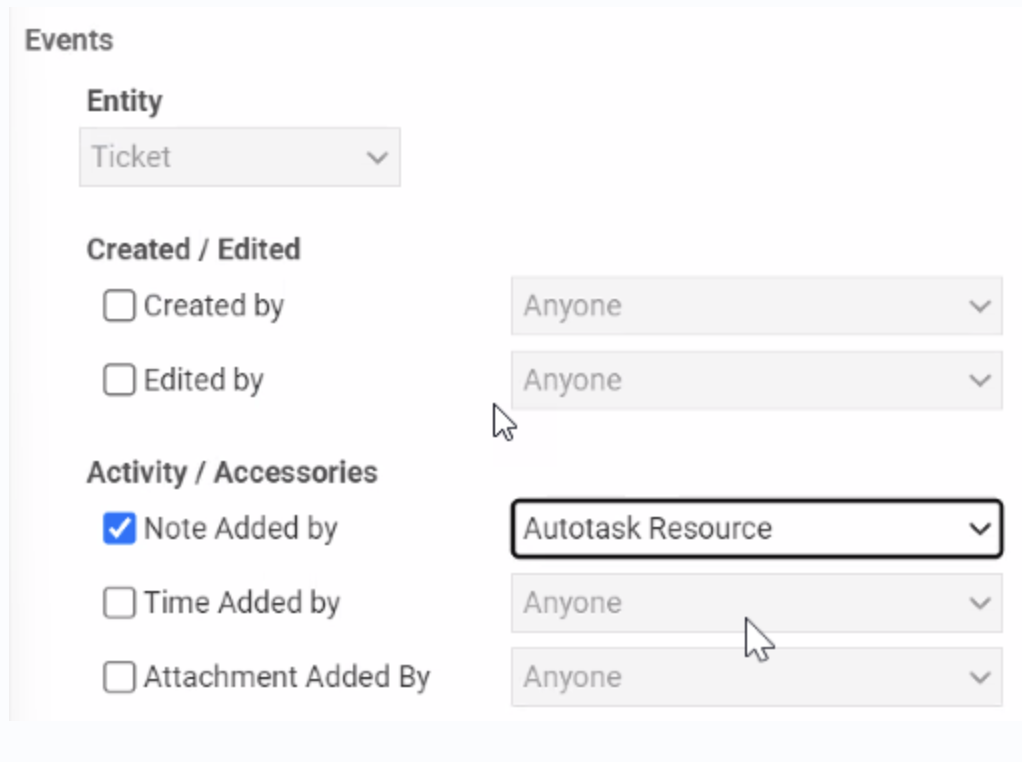 Configure which email templates are used for different notification types.
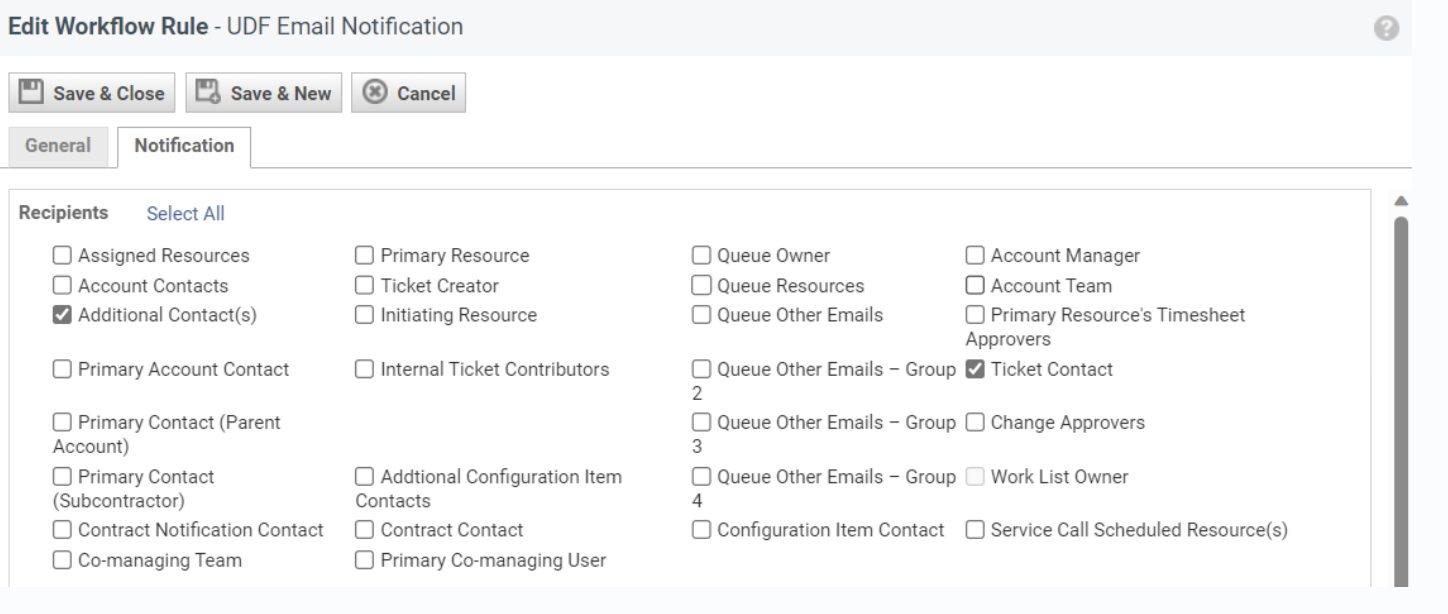 Specify which actions and changes should trigger notifications to contacts.
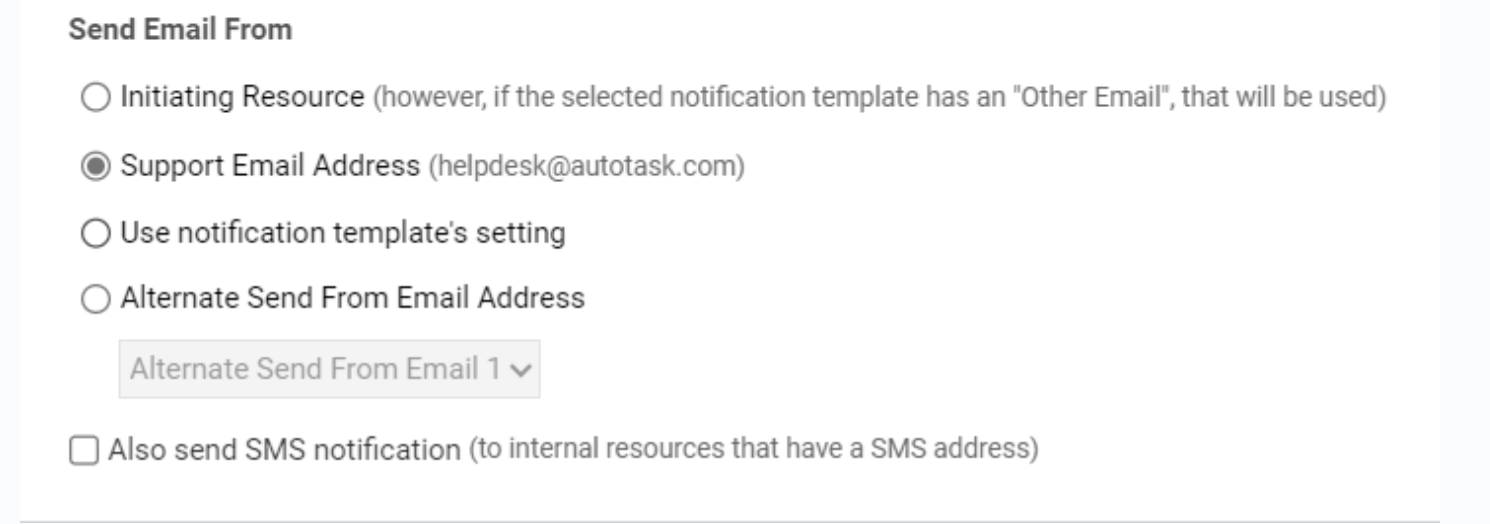 Review all notification settings and save your configuration.
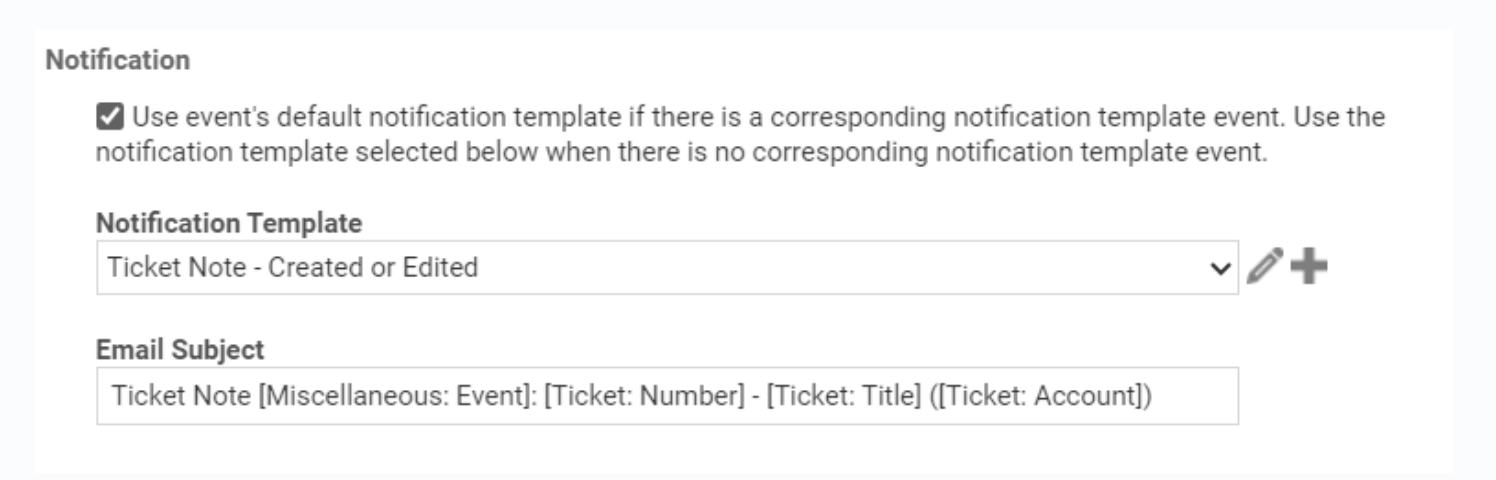 Contact notifications are now configured to ensure end users receive appropriate updates when Neo Agent performs actions on their tickets.
## What You've Configured
At this point, you have:
* Created an API member with the Neo API User security level
* Generated API credentials for programmatic access
* (Optional) Created a regular user account for ticket assignments and time entries
* Configured impersonation settings to allow the API member to act as the regular user
* Set up contact notification preferences
## What's Next?
With your API member and optional regular user created, you're ready to [connect them to Neo Agent](/integrations/psa/autotask/connecting-to-neo) using the credentials and configuration details.
Before proceeding, ensure you have:
* The numeric API member ID
* The API username and secret
* Your Autotask base URL
* Your API Integration Code (tracking code)
* (Optional) The numeric ID of the regular user for impersonation
Contact notifications are now configured to ensure end users receive appropriate updates when Neo Agent performs actions on their tickets.
## What You've Configured
At this point, you have:
* Created an API member with the Neo API User security level
* Generated API credentials for programmatic access
* (Optional) Created a regular user account for ticket assignments and time entries
* Configured impersonation settings to allow the API member to act as the regular user
* Set up contact notification preferences
## What's Next?
With your API member and optional regular user created, you're ready to [connect them to Neo Agent](/integrations/psa/autotask/connecting-to-neo) using the credentials and configuration details.
Before proceeding, ensure you have:
* The numeric API member ID
* The API username and secret
* Your Autotask base URL
* Your API Integration Code (tracking code)
* (Optional) The numeric ID of the regular user for impersonation